• About / Contact
  • Work With Me
  • Food & Drink
    • asian —>
      • chinese
      • indian
      • japanese
      • korean
      • malaysian
      • taiwanese
      • thai
      • vietnamese
    • brunch
    • coffee and tea
    • dessert
    • fusion
    • happy hour
    • italian
    • greek
    • mexican
    • pub
    • seafood
    • steakhouse
    • vegetarian/vegan
    • western
  • Travel
    • Canada ->
      • Kelowna
      • Sunshine Coast
      • Victoria
    • Japan ->
      • Himeji
      • Kamakura
      • Kobe
      • Kyoto
      • Osaka
      • Tokyo
    • Mexico ->
      • Cancun
      • Isla Mujeres
      • Playa Del Carmen
    • USA ->
      • Las Vegas
      • Los Angeles
      • New York City
      • Seattle
    • Europe ->
      • London
  • Beauty
    • beauty events
    • body
    • eyes
    • face
    • costumes
    • hair
    • lips
    • nails
    • skincare

Curiously Carmen

The Incredibles DIY Costume – Cheap, Easy, No sewing needed

October 27, 2018

Woohoo! It’s that time of the year again – Halloween! I actually almost forgot to write a DIY post on my costume this year, but I still have a few days before Halloween to get this in!

This year, we decided on doing….. The Incredibles! In particular, Mr and Mrs Incredible because we don’t have kids.  Incredibles 2 just came out this summer, so I thought it would be quite fitting. As well, this costume was easy peasy! My soap costume last year took a long time so I’m glad this one was finished in less than a hour total.

As usual, no sewing is needed! I’m no sewing expert, so I want to show that you don’t necessarily need sewing experience to make a cheap and easy costume.
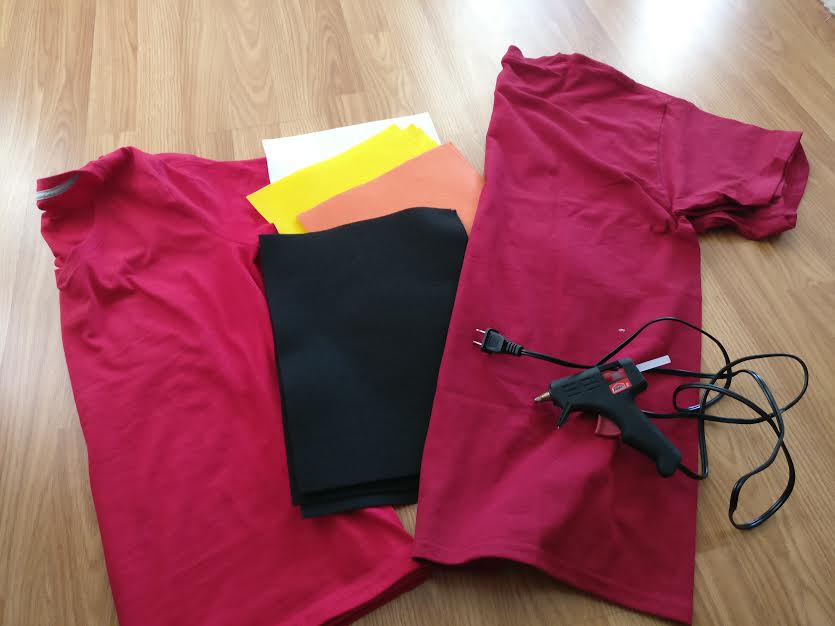
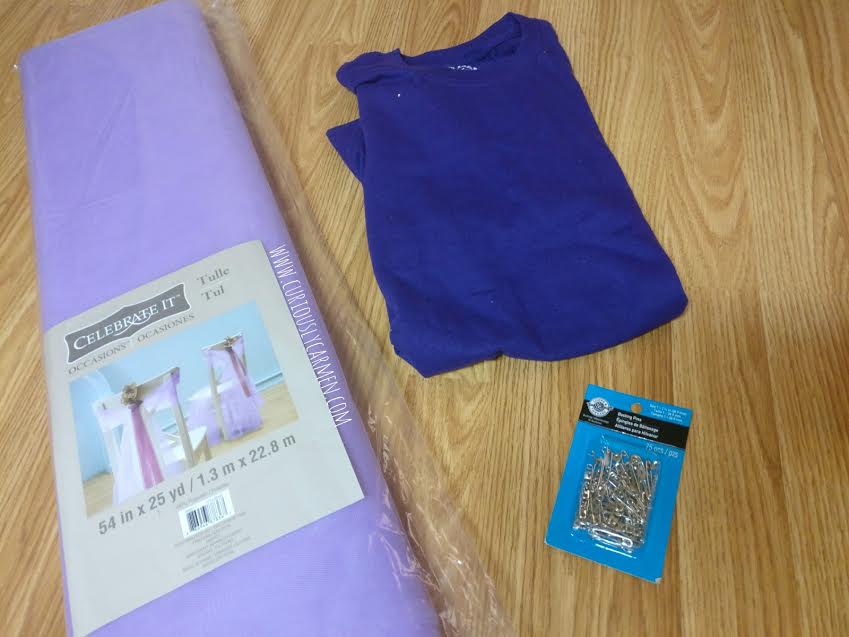
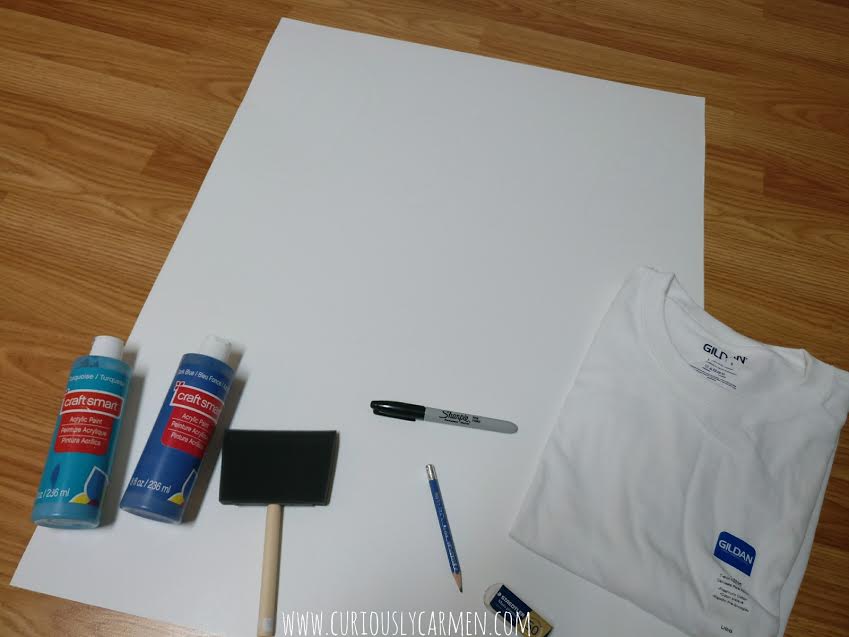
Materials:

-Orange, black, yellow, white felt (multiple of each incase of cutting malfunction)
-Red shirt X2
-Hot glue gun
-Scissors
-Black gloves X2
-Elastic fabric (or a headband that you cut into one strip)
-Black pants

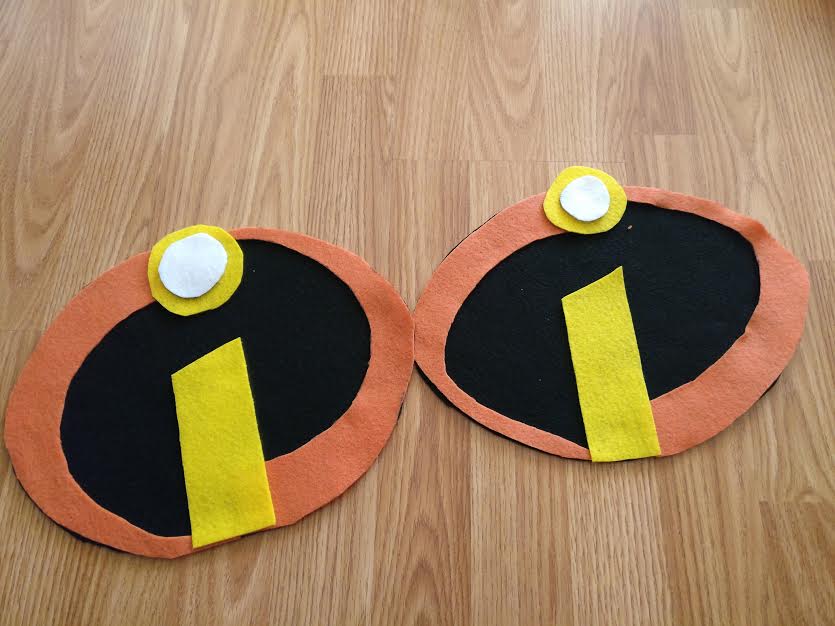
Instructions (for t-shirt):

1- Cut the coloured felt into The Incredibles logo.
2- Use hot glue gun to put the pieces of felt together.
3- Glue it onto the red t-shirt.

Instructions (for eye mask):

1- Cut the black felt into the eye mask shape.
2- Cut two holes for your eyes.
3- Glue the elastic headband.

Sooooo easy right! And cheap! Each piece of felt was around 60 cents at my local Michaels. Each shirt was around $7 maybe?

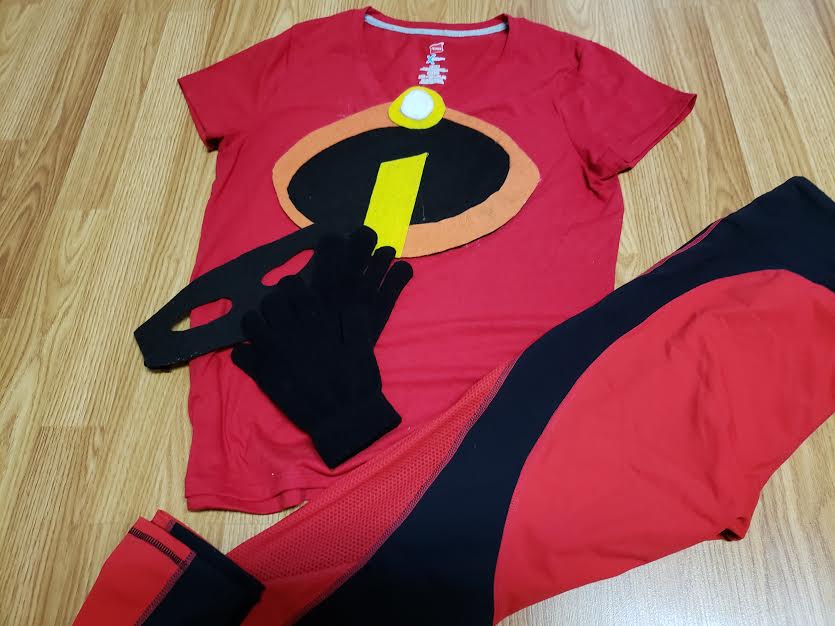
I also found the perfect leggings for Elastigirl on Amazon. I would recommend ordering these because they look cooler than just black pants! They were $21.00 CAD which isn’t that expensive and came quickly with Amazon prime.

Here is a photo of all the cheap, easy, no sewing DIY costumes over the years (minus the firefighter one because we did a group Pokemon costume that year which I wrote on instead)! Boyfriend is blurred out for privacy 🙂

Mickey and Minnie DIY
Pikachu DIY costume
Monsters Inc Sully and Mike DIY
Sushi costume DIY
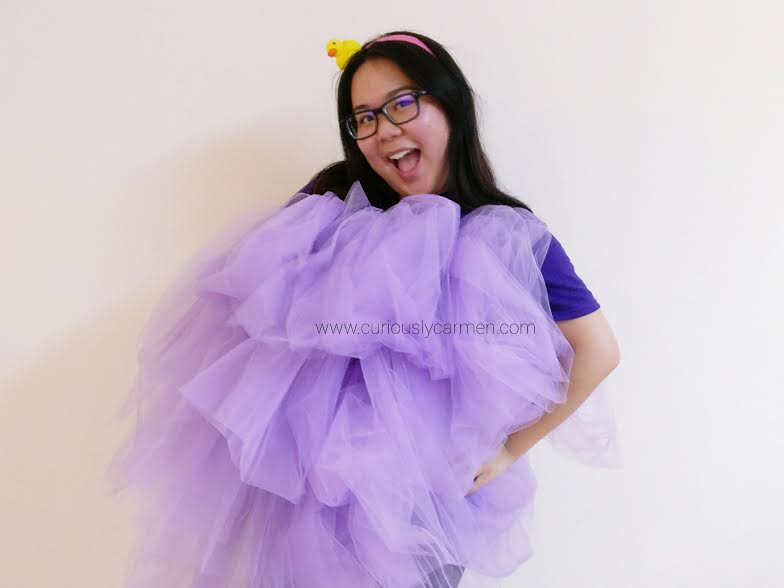
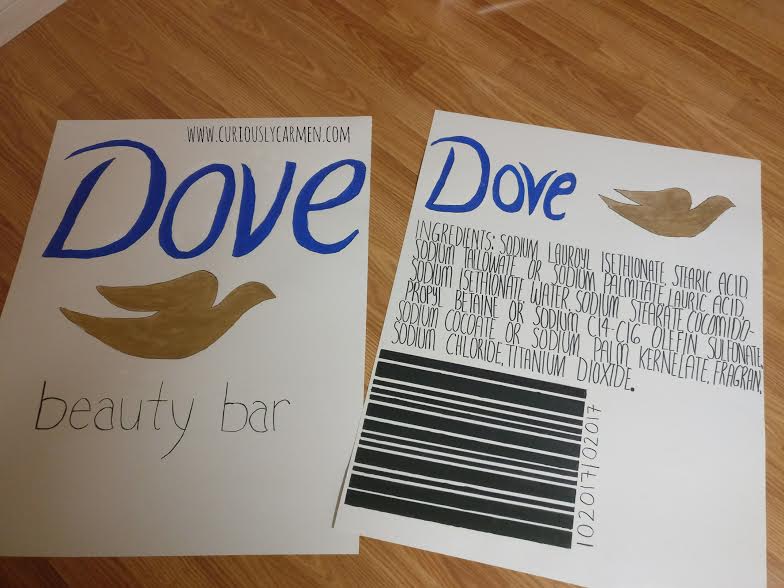
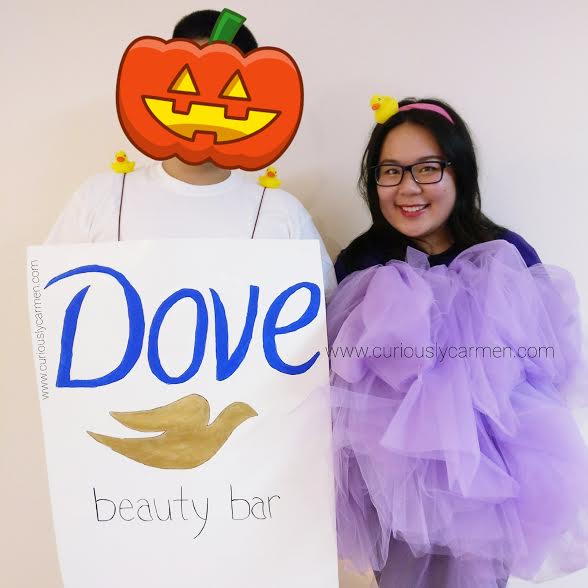
Soap & loofah costume DIY

Happy Halloween and happy costuming!

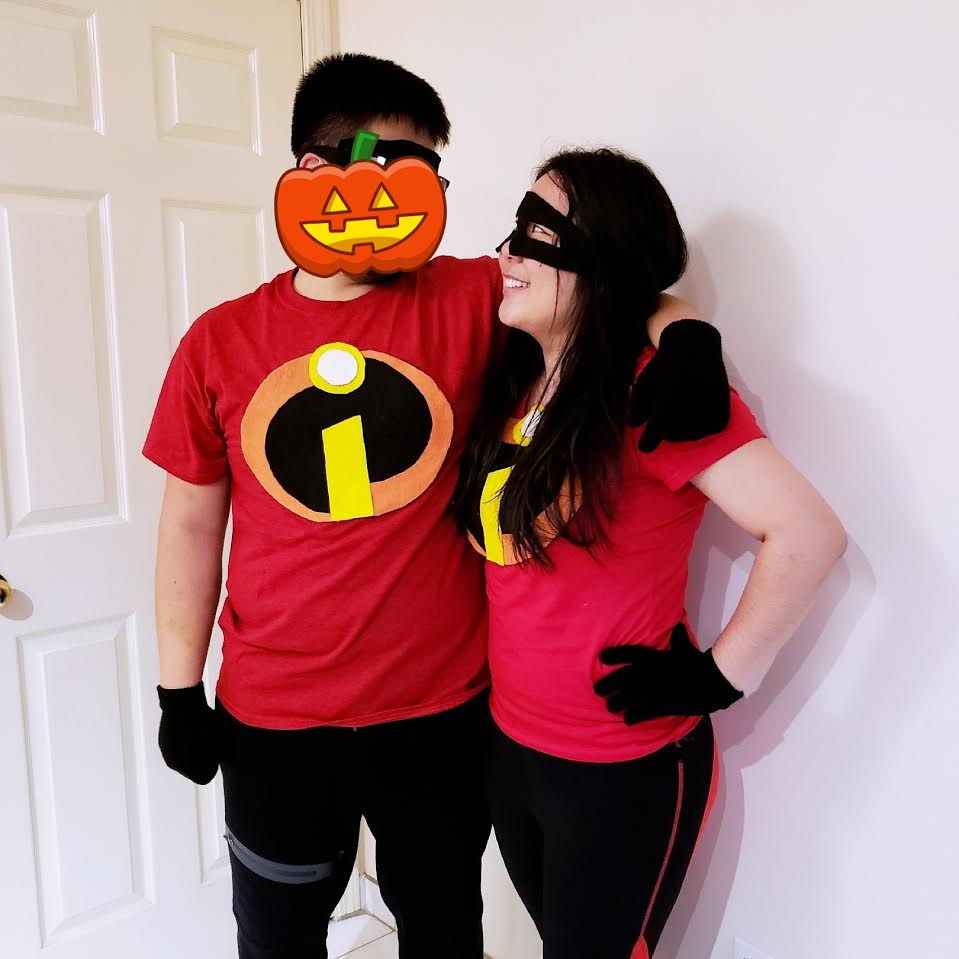
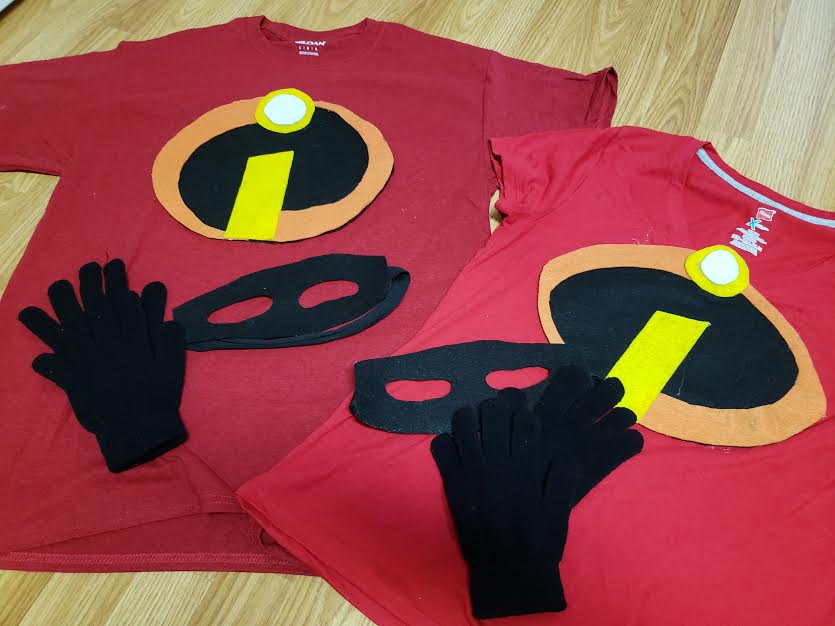
Edit: Here is a photo of our finished outfit!


Filed Under: costumes, misc

Loofah & Soap DIY Halloween Costume

October 27, 2017

Woohoo! It’s costume season again, one of my favourite times of the year. If it were up to me, I would love to dress up in silly costumes more than once a year.

This year for Halloween, I will be going as a loofah and the boyfriend will be going as a bar of soap!

Out of all the DIY costumes we have made over the years, the loofah was certainly the most challenging. I used a combination of videos/posts, and it was a lot of trial and error.

Although I love DIY costumes, I am absolutely abysmal at making them and can’t sew. Which is why I like to share these on my blog – if I can make these, anyone can. Trust me. Let’s get started!

LOOFAH COSTUME MATERIALS/INSTRUCTIONS:

  • 25 yards/74 feet of tulle fabric (You can easily purchase this at Michael’s or at a fabric store)
  • Twelve safety pins
  • Scissors
  • String
  • Shirt (preferably same colour as the tulle)
  • Measuring tape
Step #1
  1. Cut out 12 even strips of tulle using a measuring tape for accuracy, approximately 6 feet each. This part was frustrating for me because one layer of lavender tulle is practically clear, so I couldn’t really see where I was cutting… multiply this by 12 and you can understand why I was getting frustrated!
  2. With each strip, fold it in half length-wise
  3. Then, fold it in half width-wise again (should be approximately 3 feet by this step)
  4.  In the middle, wrap a piece of string tightly
  5. Repeat #2-#4 for the other strips

    Step #4
  6. Take a safety pin and hook it in the middle of the strip, where the string is.
  7. Pin the first piece of tulle by your collar bone

    Step #8
  8. Repeat #6-7 for the other strips until they are evenly pinned on the shirt. I have attached a photo of where I pinned each tulle section on the tshirt. Repeat for the back as well. It may seem a bit high but once you fluff it out, you can’t tell!
  9. Now comes to fun part – fluffing it out! Go crazy and (gently) pull the tulle out to give it the desired puffy effect
  10. Repeat #10 until you are satisfied with the level of puff!

BAR OF SOAP MATERIALS/INSTRUCTIONS:

For this costume, we were originally planning on just painting a cardboard box. However, we didn’t find one large enough and also, my friend brought up a good point where the boyfriend wouldn’t be able to sit down LOL. So, I did some brainstorming and came up with this super cheap and easy alternative!

  • Two sheets of white poster board
  • Blue, gold, black acrylic paint (other colours are okay but we decided to go with the Dove bars haha)
  • Paint brush
  • Sharpie
  • Pencil
  • String
  • Tape
  1. Using a pencil, outline the design you’d like. We looked up an image of Dove’s bar soaps and replicated that, but you can do whichever brand you’d wish, or simply just write “SOAP”.
  2. Outline what you are planning on painting with a sharpie
  3. Write down the ingredients, or any other text you’d like included to make it look more realistic
  4. Paint!
  5. Cut two pieces of string and use tape to connect the two poster boards


I will be updating this post after Halloween with our final costume result! Just wanted to get this post up before Halloween to give you some ideas.

As a bonus, get some rubber duckies at the dollar store (I found this pack for $1.25) and hot glue gun it onto a headband! 🙂 You could also blow up some white balloons to act as bubbles, heh.

Happy costuming!


Filed Under: Beauty, costumes

Estee Lauder Advanced Night Repair Intensive Recovery Ampoules

June 15, 2017

What a mouthful to say! The Estee Lauder Advanced Night Repair Intensive Recovery Ampoules. I heard of this product at the Estee Lauder preview which took place last autumn.

I thought it was a pretty cool product as I’ve never seen anything quite like it before, in that the products were contained in capsules or ampoules as they call it!

What it says (taken from Sephora):

A powerful oil concentrate to calm and repair the look of over-stressed skin, helping to strengthen resistance against future assaults. Revolutionize how you repair at night and help your skin recover the healthy, luminous look of youth. This active treatment oil includes ChronoluxAI technology to help reduce visible irritation and support skin’s natural synchronization. Ideal for brightening, soothing, and strengthening skin, skin will appear calmer, more radiant, and healthier-looking.

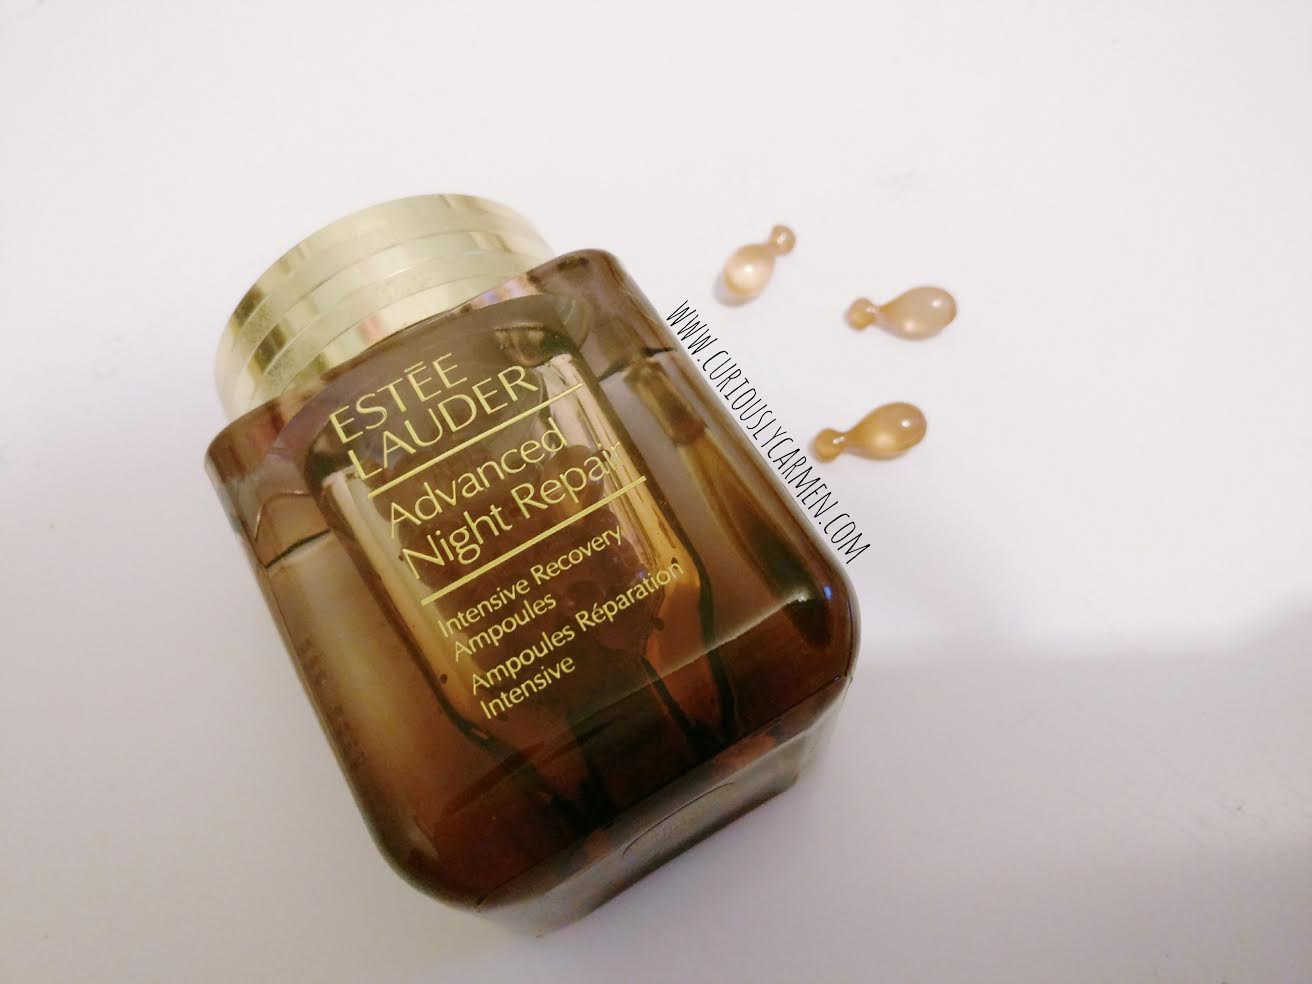
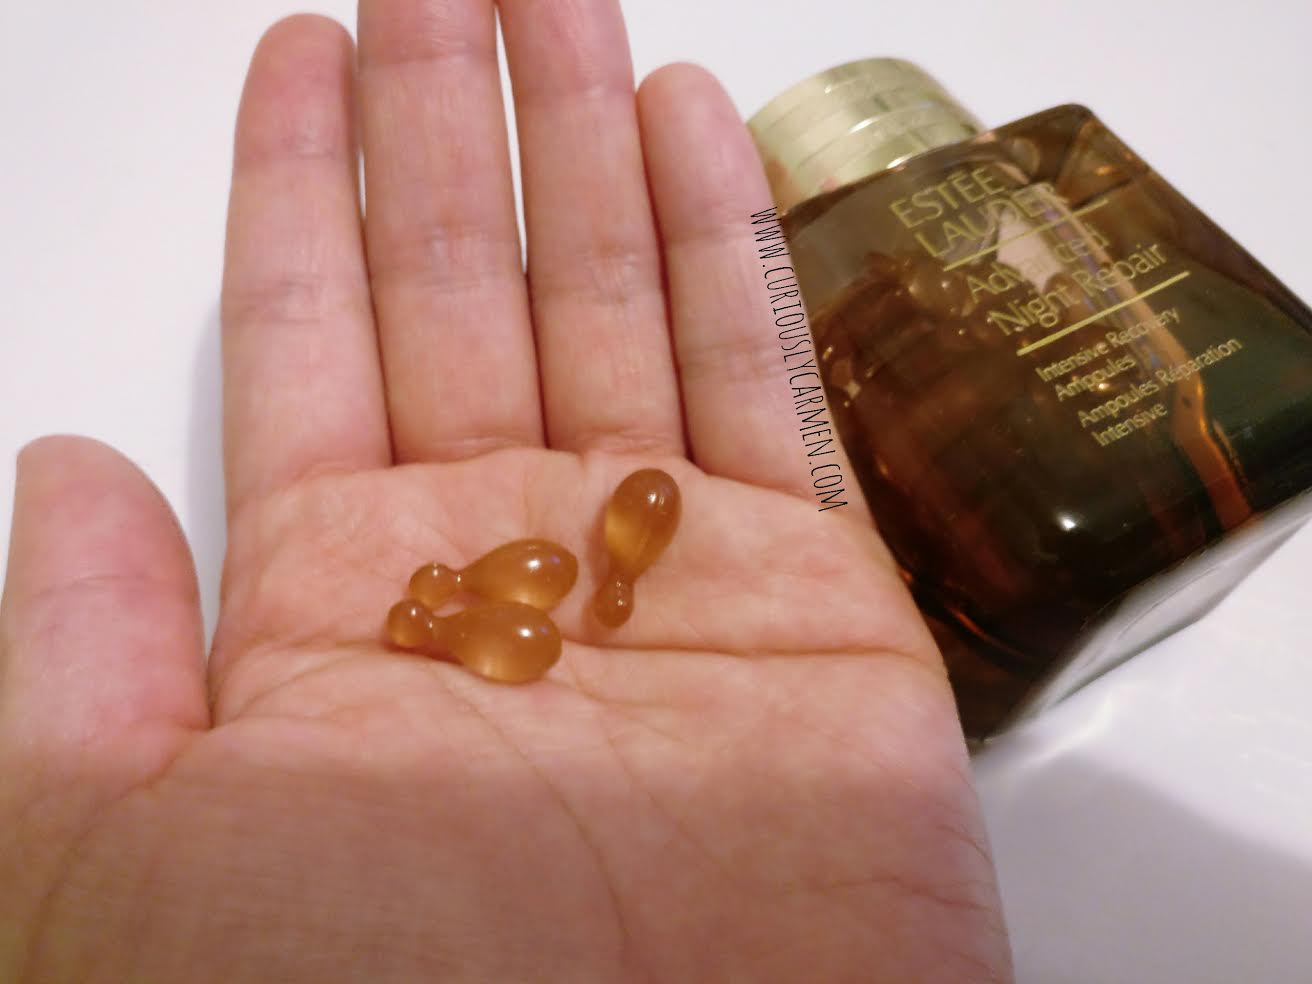
The ampoules are made out of a plastic material. I’ve put a few in my hand for scale, so you can get a better idea of the size of each. At $138.00 CAD, these little guys aren’t cheap! Luckily, one is more than enough for moisturizing my face.

Since it is $138, I use this very sparingly… I only use it when my skin is in dire need of some hydration. The Estee Lauder spokesperson who introduced us  to the product said that he only uses this when travelling to tropical destinations, as his skin dries out in the hot weather.
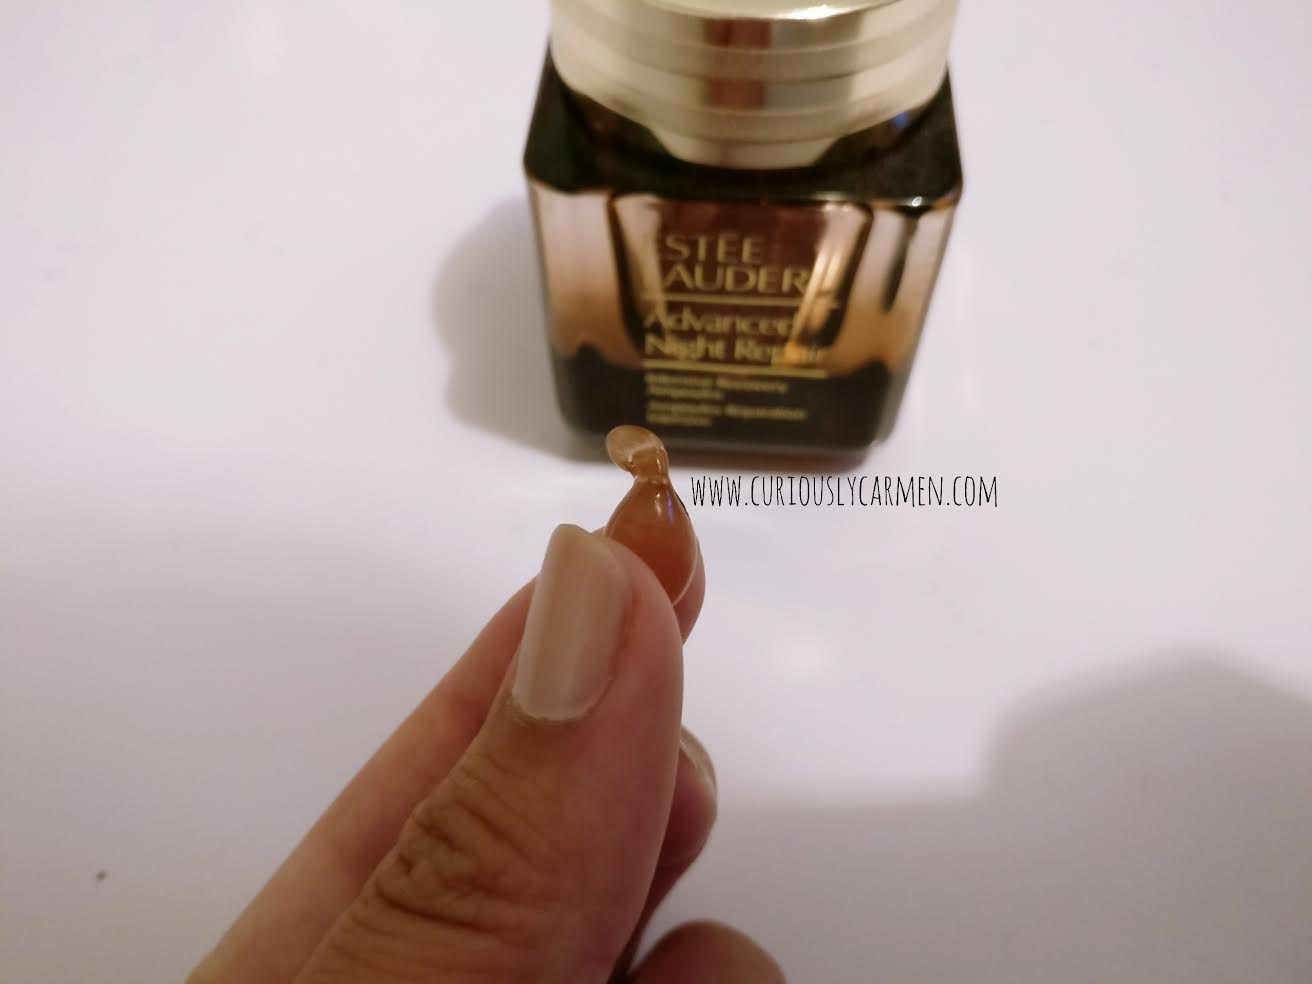
Using it can be a bit messy, so you have to be gentle. Gently twist the smaller circle to open the capsule, and then the product will come out right away. I can’t find a way to gracefully apply this product without it getting all over my hands, and frantically trying to put it on quick enough before it all spills out.

It has a very thin, almost liquid like consistency but with a hint of oil. It also has a bit of herbal smell to it, which I find neither pleasant or unpleasant. I really like the smell of their Nutritious Vitality8 Overnight Cream though.

Anyways, the most important part… is it effective?! Without a doubt, yes. At $138, you pay what you get and the quality is definitely there. When I wake up, my face is nice and moisturized but oily, because my skin didn’t absorb all of the product yet. I always feel like I’m wasting it when I wash off my face and I feel the product coming off!

  • Easy to carry around. If on-the-go, you could put some ampoules in a zip loc bag for a quick but intensive moisturizing session!
  • Deeply hydrates skin
  • Suitable for many skin types: normal, oily, sensitive, dry
  • Lasts a long time

  • Slightly messy application process
  • Price is not affordable for everyone, definitely considered a luxury skincare item (although there are luxury products out there which cost $250+)

Yay!


Filed Under: Beauty, costumes

SmartBuyGlasses.ca Review

May 31, 2017

SmartBuyGlasses is an online glasses retailer with over 30,000 styles of sunglasses and glasses to pick from. I was recently contacted by the SBG team for a feature. Here is what I thought!

A bit of background – SmartBuyGlasses was founded in 2006, launching first in Australia. Currently, they are based in Hong Kong, which is where their products ship out from.

After browsing on their website, I placed an order for the Ray-Ban RB3429M 9000Z2. I’ve always thought that Ray-Bans were super stylish and they are a staple name in the sunglasses industry, so you can’t really go wrong with them. I liked these ones because they had a vintage look to it, and I love gold & pink (like every other girl probably hahaha!). I also thought they would go well with my face shape.

The website had very clear, high quality picture of the sunglasses, description, and reviews as well. Some of the styles have a virtual try-on feature which is very helpful, but the style that I chose didn’t have that option. For an added price, you can have prescription on the sunglasses as well.

Anyways, after placing my order, the processing was 5 days. Then, it shipped out from Hong Kong on May 17 at 2am, and arrived at my doorstep in Canada the next day, May 18th at 11:30am – super super fast!  It came bubble wrapped and in a Ray-Ban box. The cardboard box was slightly dented, but the Ray Bans came in a pouch and were in perfect condition.

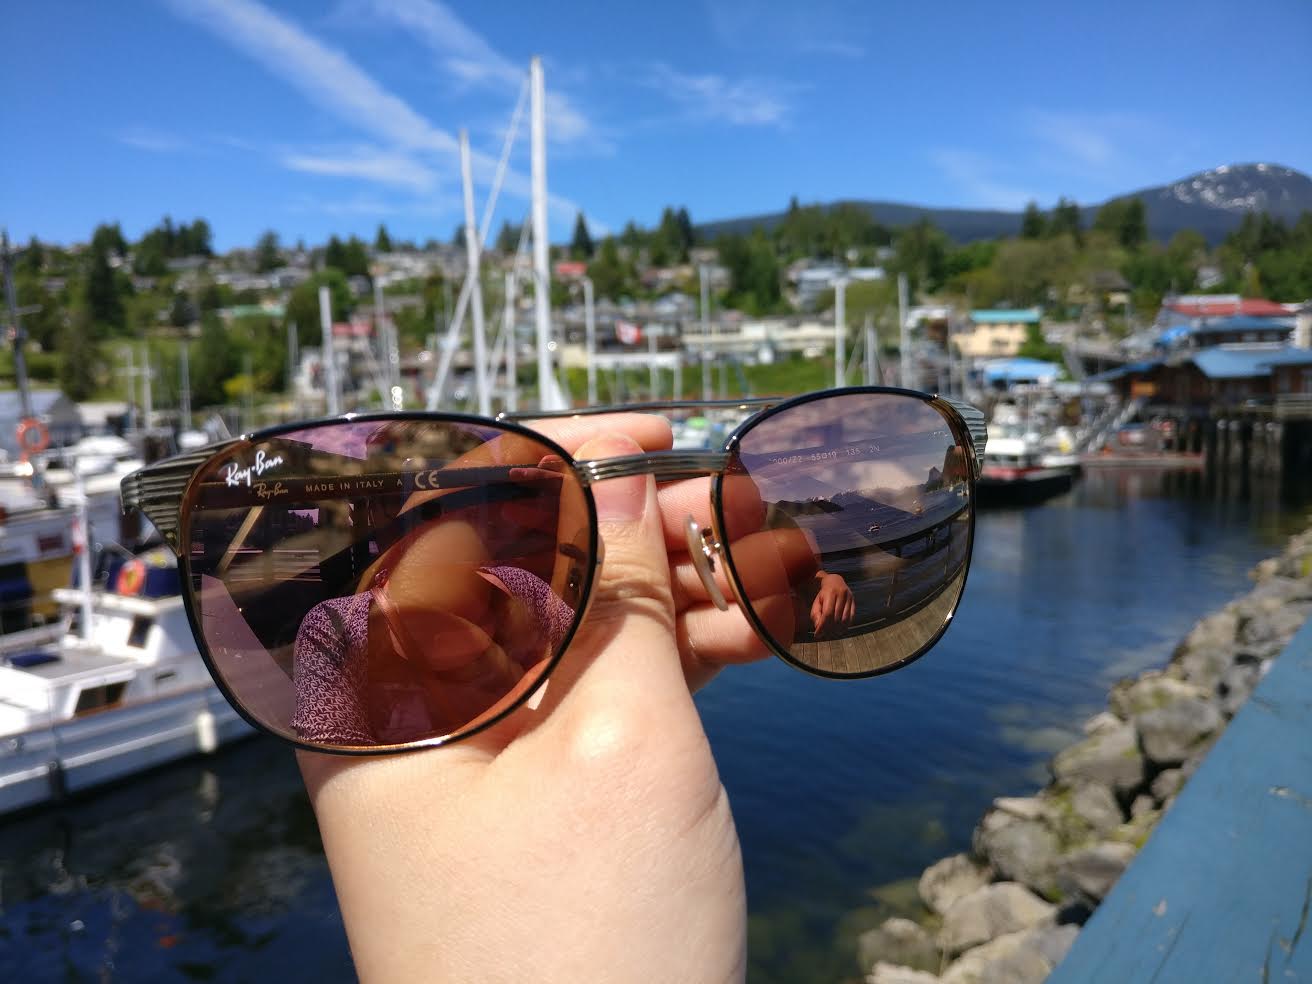
The timing was perfect- I brought them out to my little weekend getaway to the Sunshine Coast! The Ray-Bans had some fun in the sun and shielded my eyes from the rays… glad I wore them out that weekend because it is currently pouring rain again in Raincouver – oops I meant Vancouver.

Overall, I am very satisfied with SmartBuyGlasses. They have a great selection of sunglasses and I received great service from their customer service team! If you are skeptical of their authenticity – don’t worry! It is a completely reasonable concern before shelling out money for an expensive pair of designer glasses. But, SmartBuyGlasses has an authenticity guarantee, backed up with a 24 month warranty.

Check out the other styles they have here!

Product provided for review. This review is not sponsored (ie. paid) by SmartBuyGlasses. All opinions are my own. 


Filed Under: costumes

Sushi Costume w/ Wasabi Headband DIY (No sewing needed)

October 19, 2016

Yay! Halloween is just around the corner again! I am a bit crazy over costumes because I like to think about them months in advance. In fact, I might actually already think what I’ll be the NEXT year on November 1st!

Although I love costumes and themed events, I am also terrible at DIY, drawing, arts/crafts, and can barely thread a needle. I’ve been wanting to brush up on my sewing skills and maybe take a beginners course somewhere, but haven’t had the time to yet.

Anyway, for Halloween this year, the boyfriend and I have decided to be… SUSHI!!! We seriously LOVE sushi and it is one of foods I can still eat without having a bad reaction.

diy-sushi-costume
Everything prepped and made at home from the boyfriend! <3

Well, I’m going to be a salmon nigiri, but the boyfriend will be a sushi chef. He actually worked as a sushi chef last year in between school (long story). From that job, he’s become really good at making rolls and very knowledgeable in sashimi prep and taste.
salmon-sashimi-sushi-costume-wasabi-headband-diy
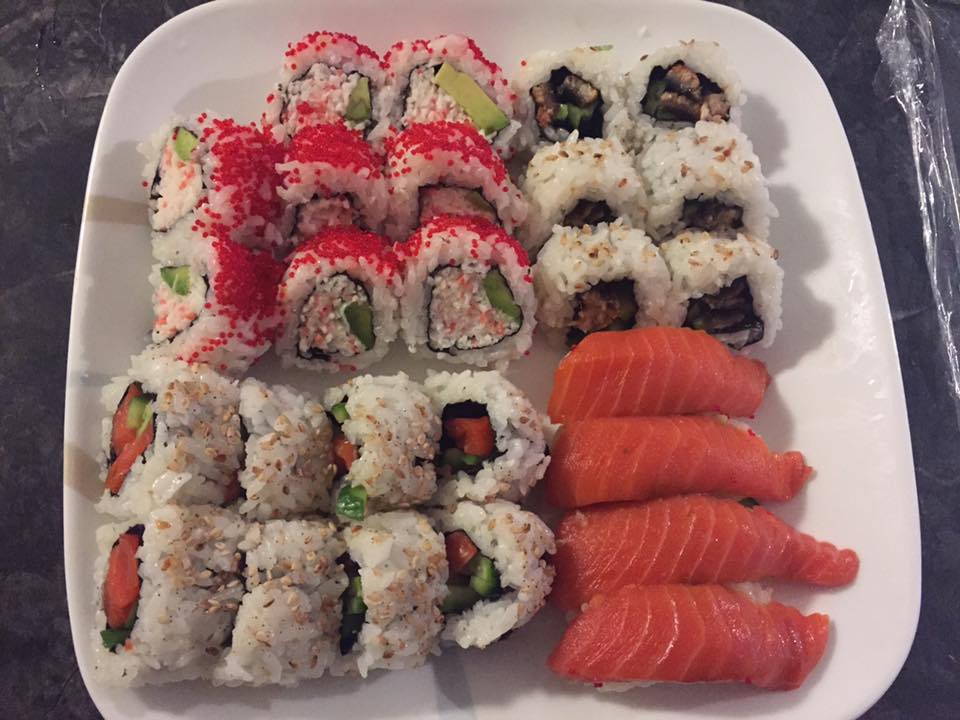
I will first start off with the salmon sashimi costume!

MATERIALS NEEDED FOR SUSHI (Wasabi headband part after):

  • Hot glue gun
  • Fluffy pillow
  • Orange pillowcase OR orange fabric to make the pillowcase – approx 1 square meter
  • White felt
  • Safety pins – approx 10 (optional if you are planning on sewing your pillow case)
  • White shirt
  • A long strip of black fabric approx. 5 inches/12 cm height. Width is depending on your hip size, but it will have to wrap around your body 1.5 times.

salmon-sashimi-sushi-costume-wasabi-headband-diy-5
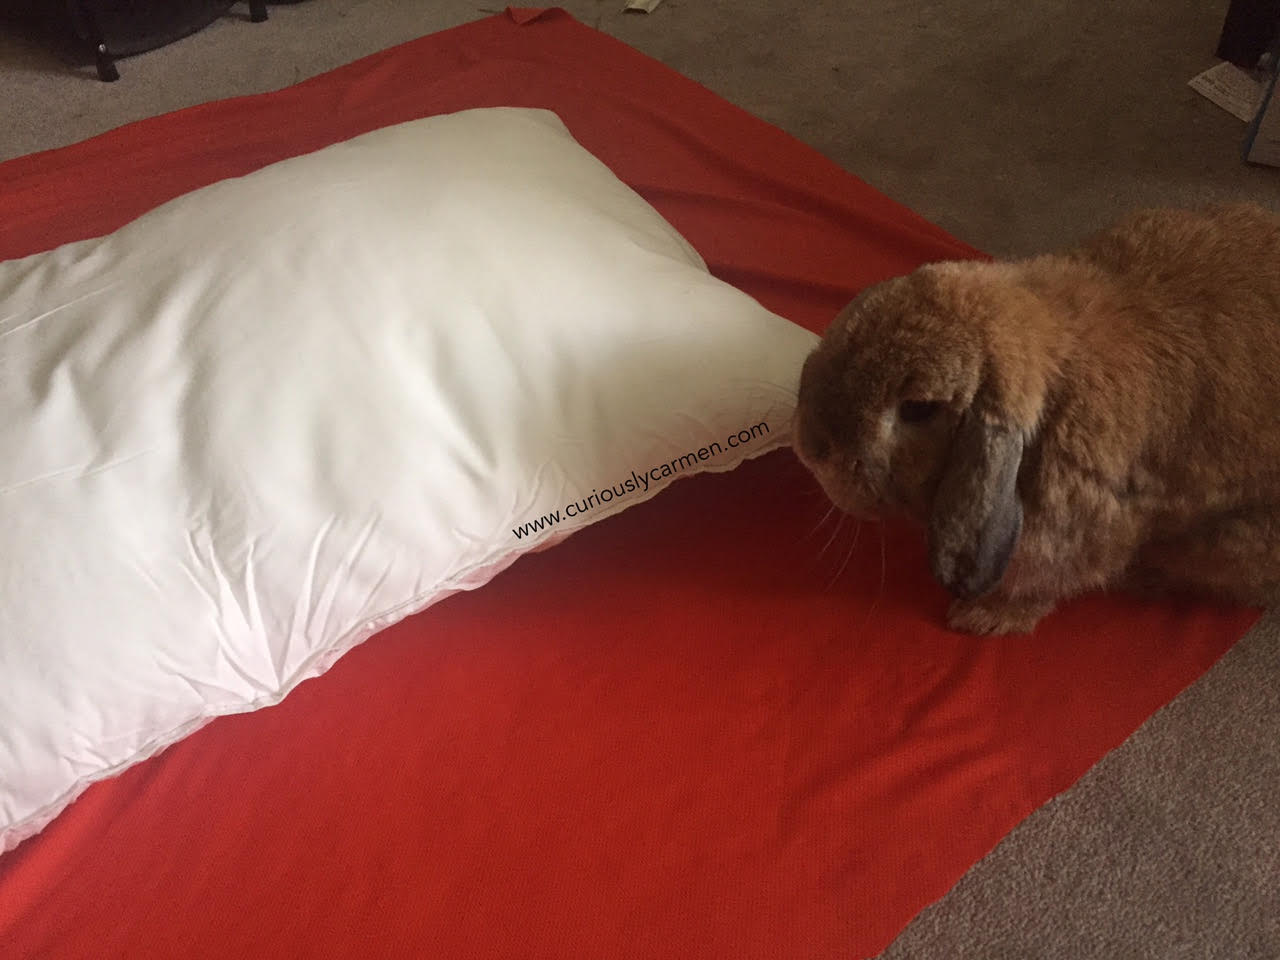
1) Put orange fabric around pillow. (Skip if you already have a pillowcase) Unfortunately, I couldn’t find any orange pillowcases so I bought a meter of a random orange fabric at the fabric store. Here is Benji being curious and wondering if there are pellets hidden.

Spread out the fabric and put the pillow in the center. Test out how you’d like to wrap the pillow. I treated mine as if it was a present I needed to wrap.
salmon-sashimi-sushi-costume-wasabi-headband-diy-4
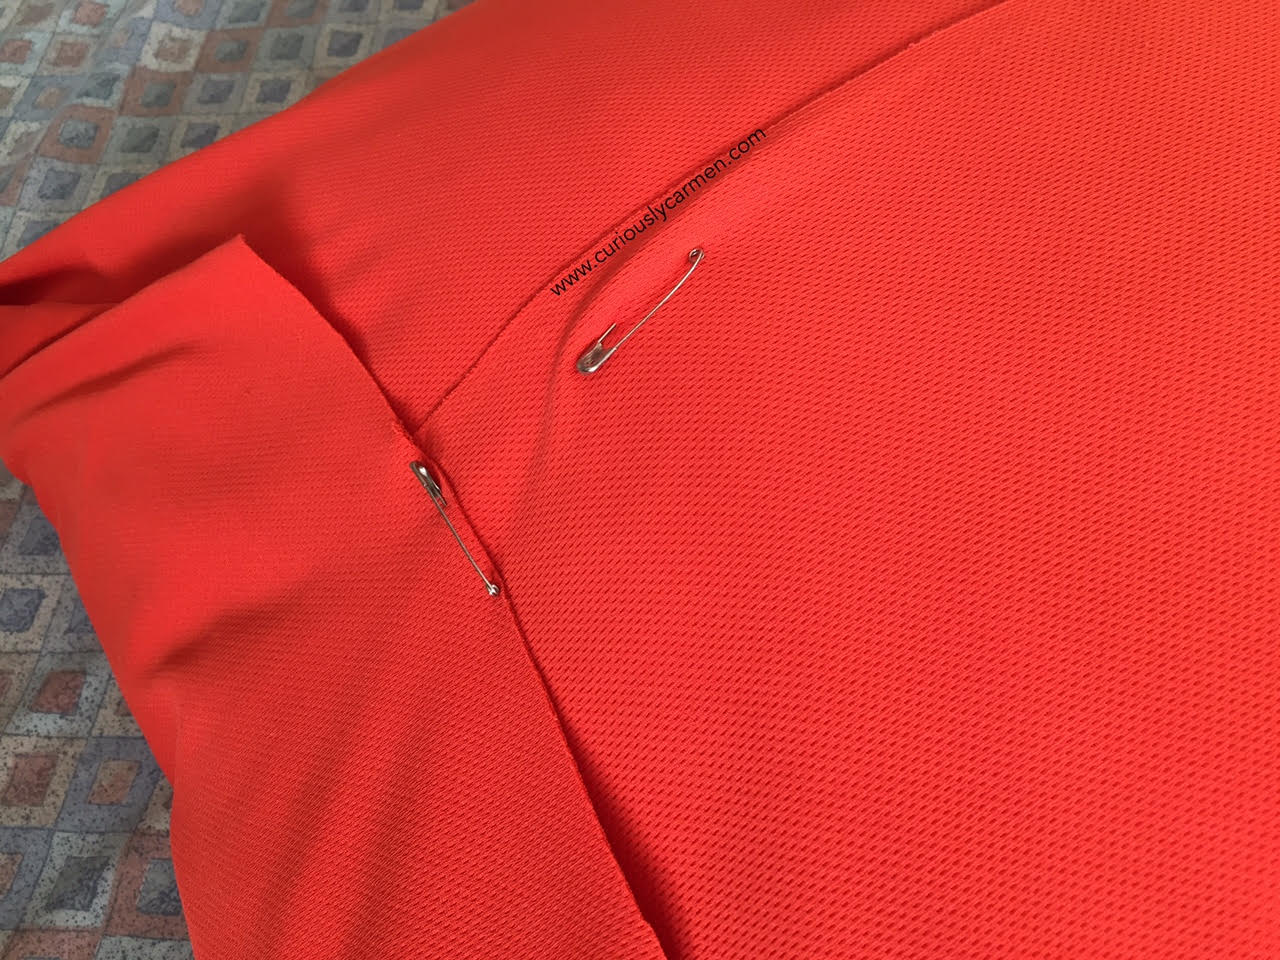
2) Pin together the fabric. If you have a pillow case, simply pin together the opening. You can also use a hot glue gun for this.

Or, if you know how to sew, just sew it together (Keep in mind this tutorial is for those who can’t sew, so be nice!)
salmon-sashimi-sushi-costume-wasabi-headband-diy-2
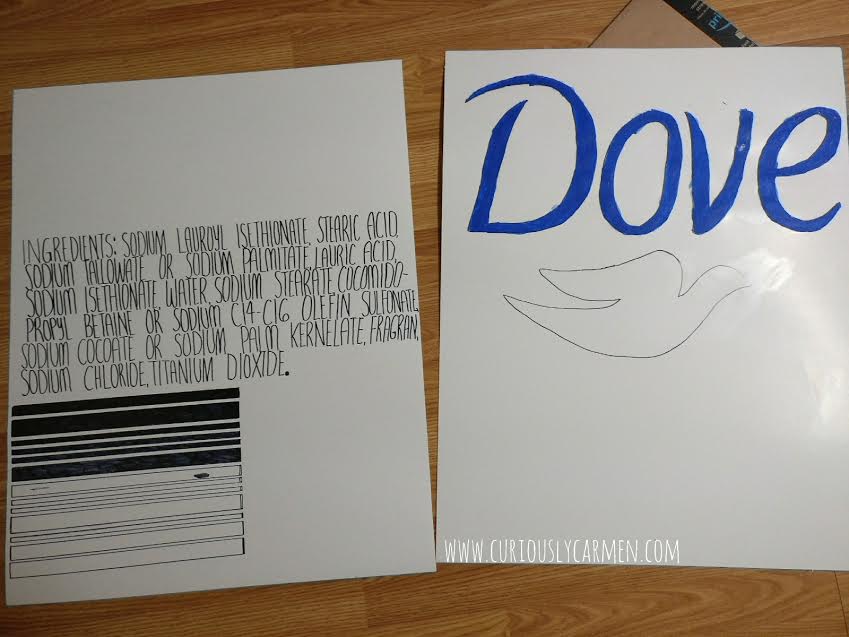
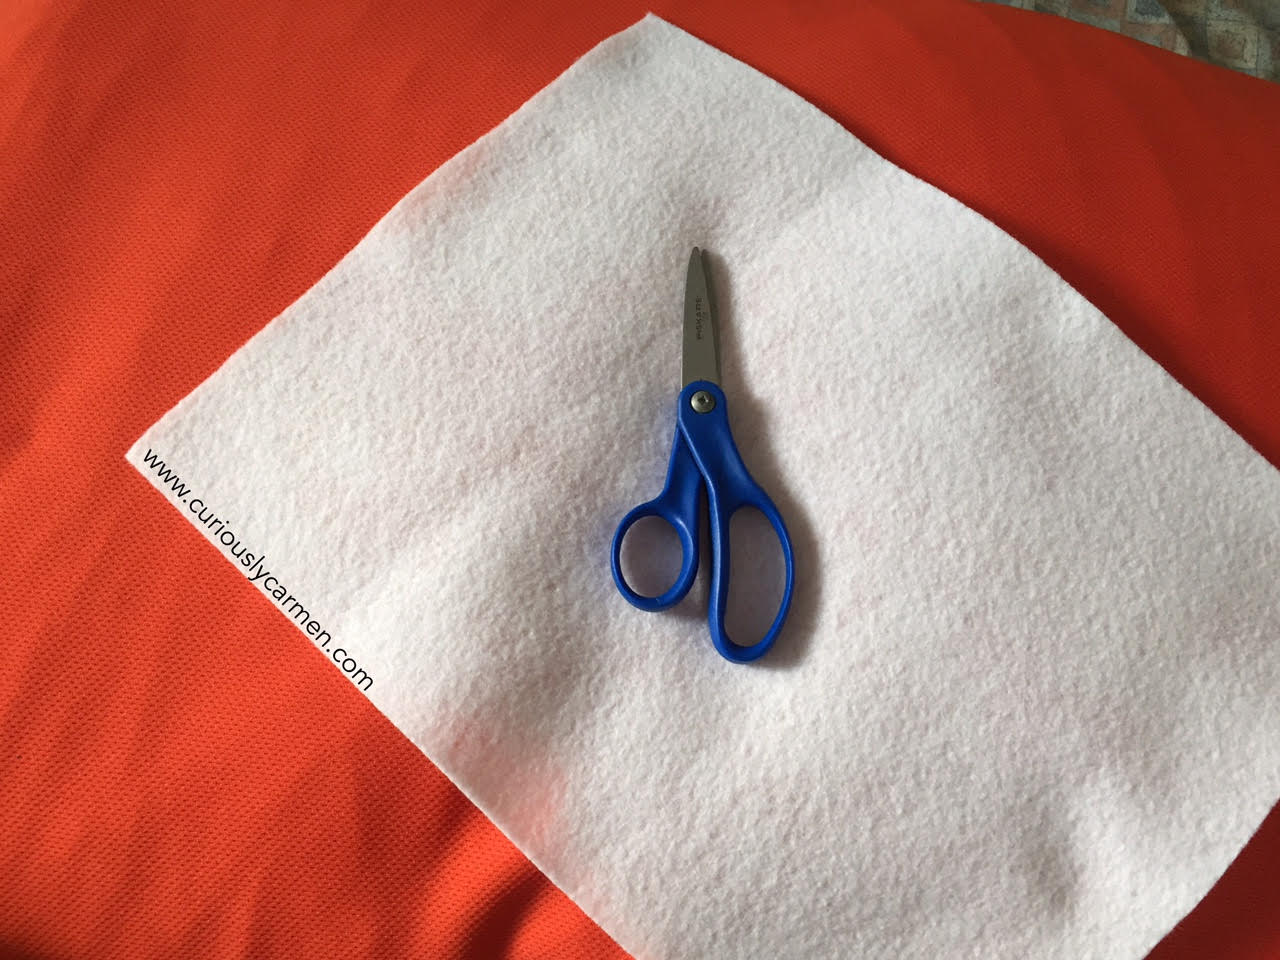
3) Get your white felt and using a ruler, draw equal lines to make the strip. Having lines will make it easier for you to cut the felt evenly.
salmon-sashimi-sushi-costume-wasabi-headband-diy-3
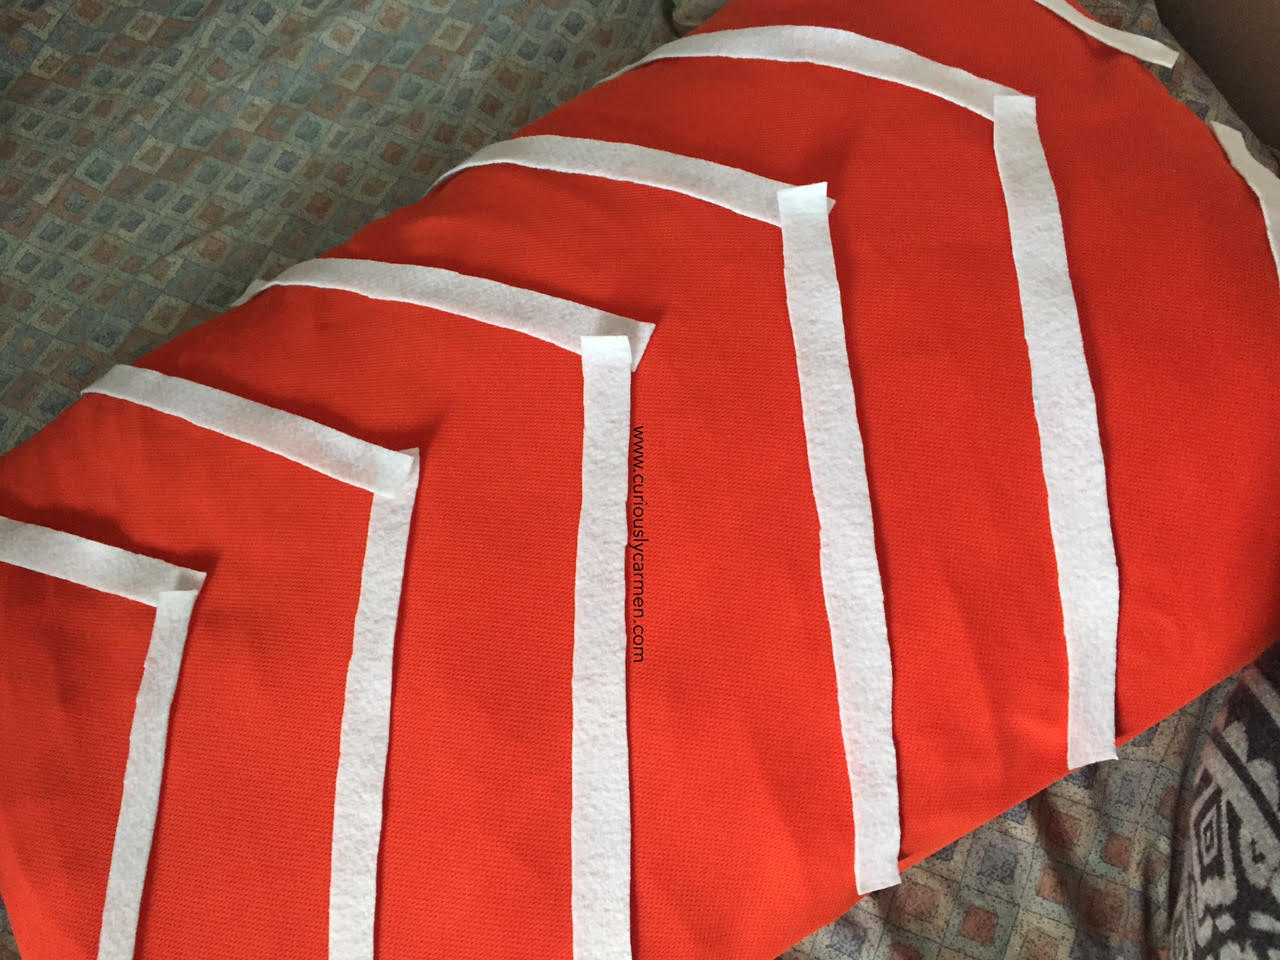
4) Use the hot glue gun to glue the white strips! You may choose to position them in a V shape like me, or just diagonally.

5) Wear a white shirt. You will be the nigiri rice!

6) Use the black fabric or black belt to wrap the pillow on your back. You may also choose to safety the top part of the pillow to the tshirt for more reinforcement.

7) Done!
salmon-sashimi-sushi-costume-wasabi-headband-diy-6
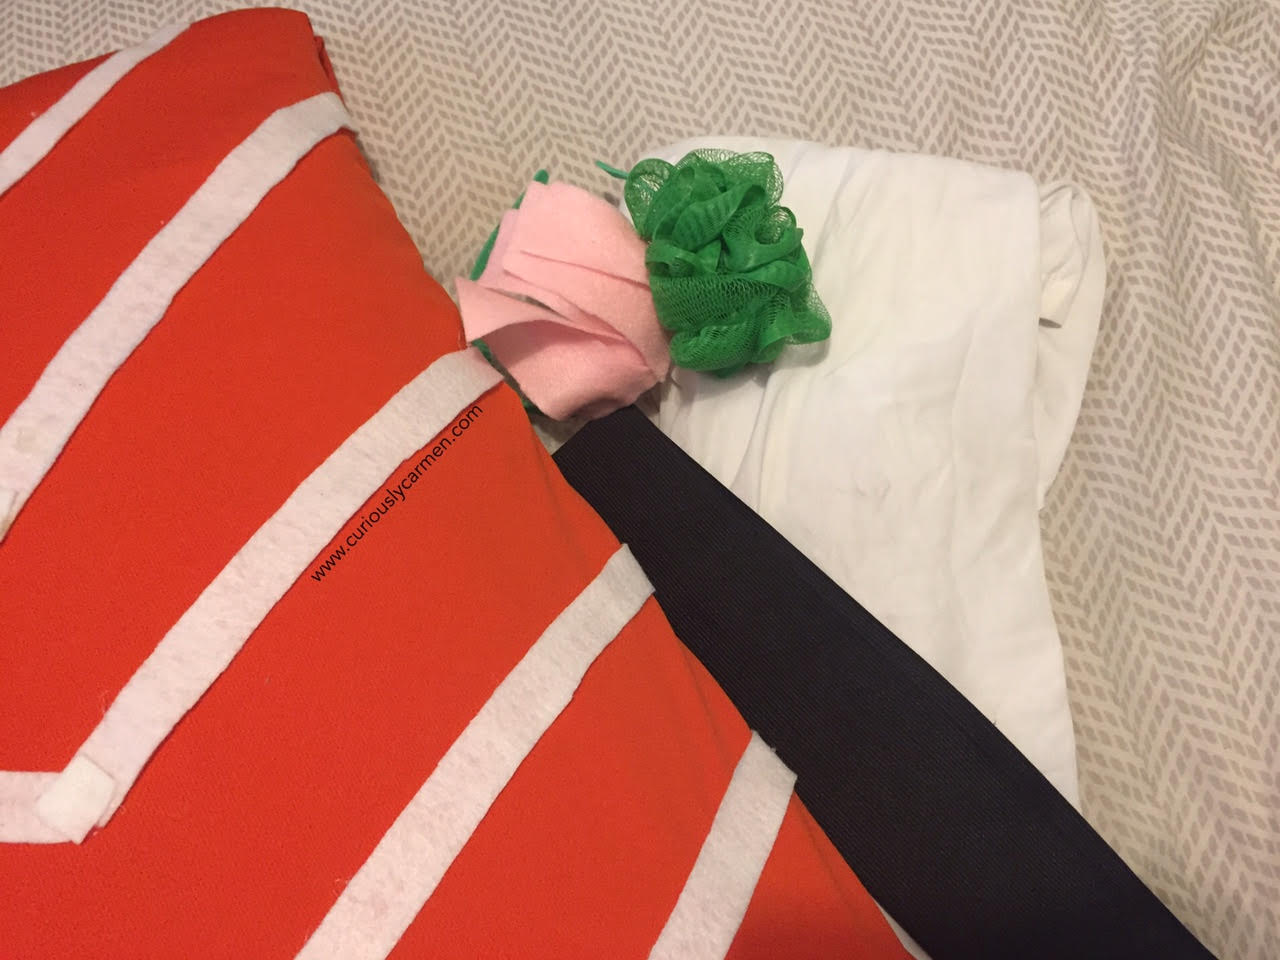
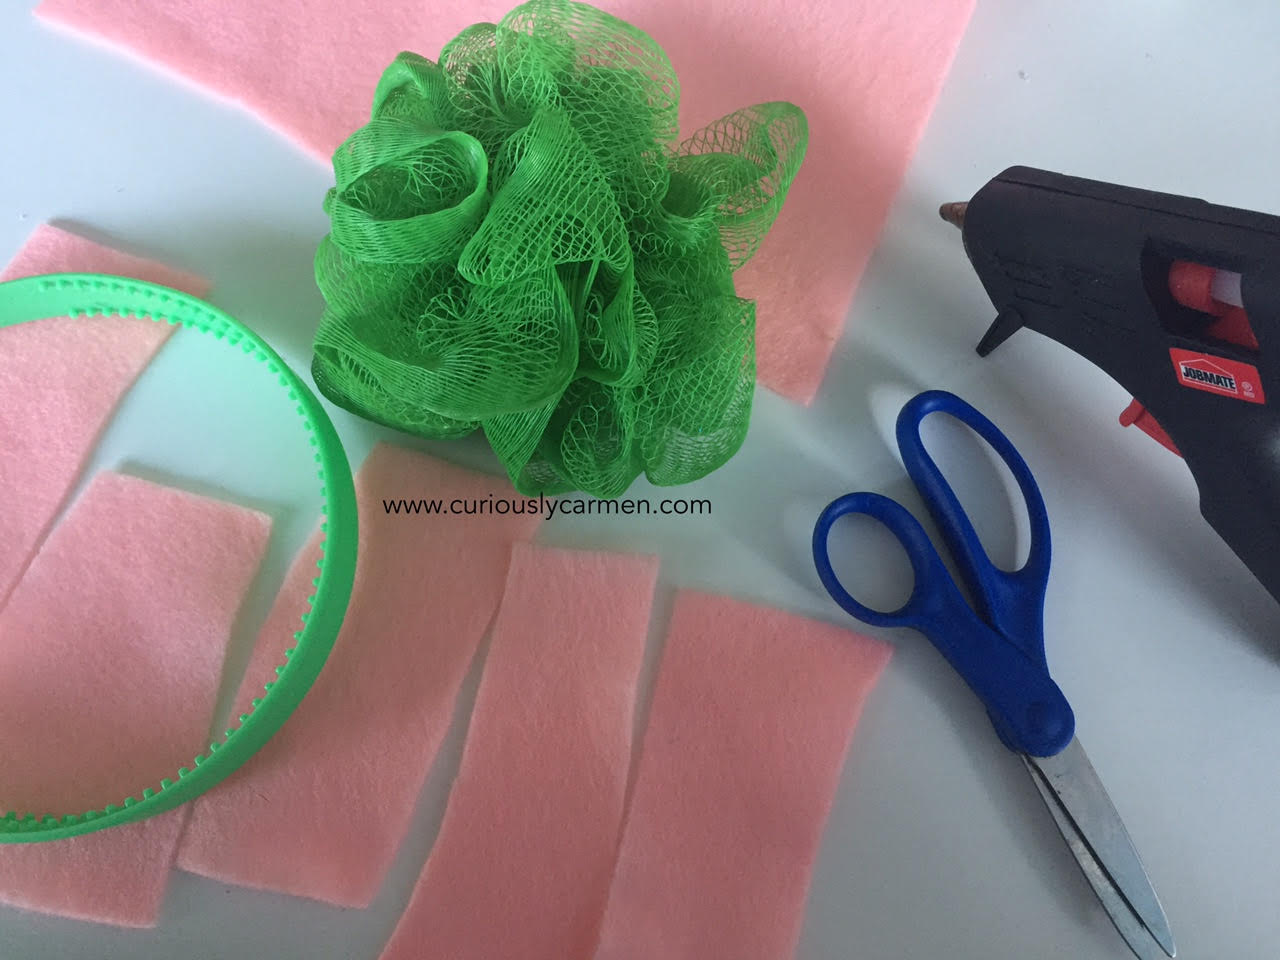
MATERIALS NEEDED FOR WASABI & GINGER HEADBAND:

  • Green loofah
  • Pink fabric
  • Scissors
  • Hot glue gun
  • Headband (one that matches your hair colour or green, pink)

1) Cut up the pink fabric to 5×1 inch rectangles. It is up to you how many, I chose to do 5 slices of ginger.

2) Glue one end of the strip to the headband w/ hot glue gun, starting from either the left or right.

3) Continue gluing the strips, with each one half overlapping the other. The idea is to glue halfway of the headband. You don’t want it all across or that looks kinda weird and not cute.

4) Glue the green loofah towards the side, on top of the pink fabric.

AND DONEEEE! Unfortunately, I don’t have any pictures wearing it as Halloween is still almost about 2 weeks away. I still need to find a white shirt to wear, hoping to find a 3/4 sleeve one so I won’t be that cold. As well, I need to safety pin the pillow to said shirt for more reinforcement.

But I will DEFINITELY update this post with a picture once I find that! I just wanted to post this before Halloween incase you’re looking for ideas and instructions.
salmon-sashimi-sushi-costume-wasabi-headband-diy-8
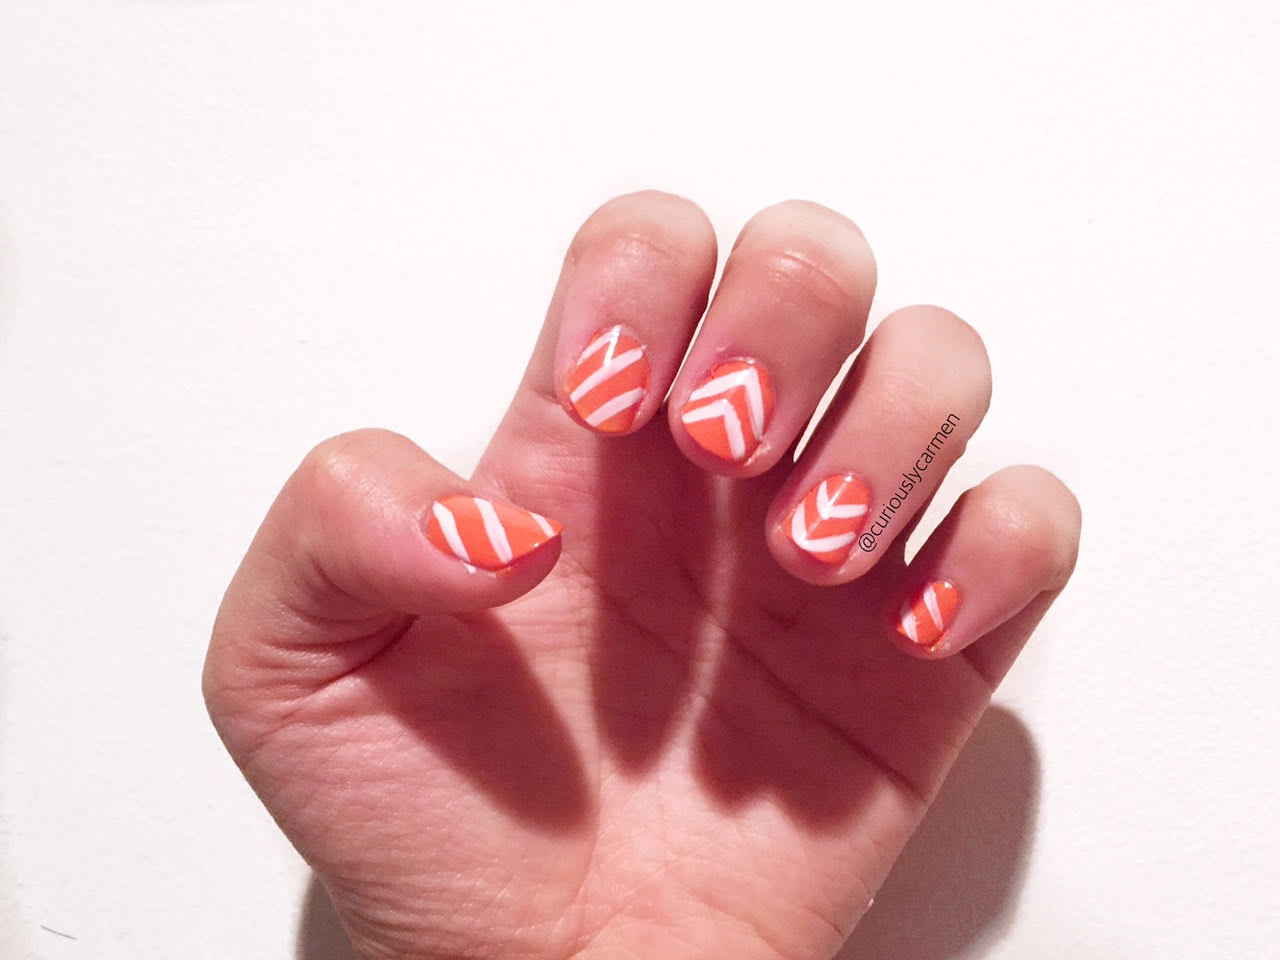
As a bonus, you could paint your nails as salmon nigiri too! I used a mix of triangle and diagonally striped sashimi here!

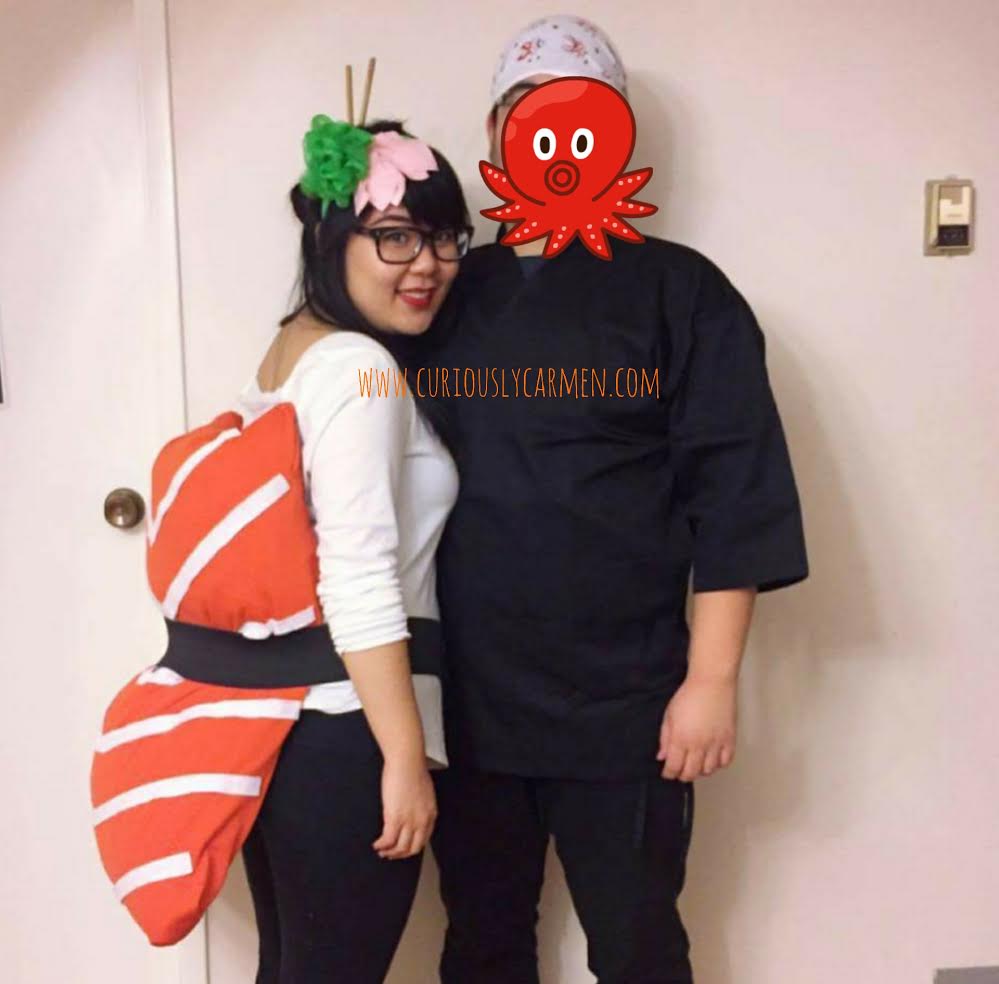
Edit: Us on Halloween with the costume! The boyfriend bought a sushi chef apron off Amazon, and we went to Daiso for the sushi chef hat. It’s actually a decorative towel but it worked as a headband too!

Happy costuming!!!


Filed Under: costumes, japanese

  • 1
  • 2
  • 3
  • Next Page »

Hello!

Hi and welcome to Curiously Carmen! I am Carmen, the girl behind the blog. You can read more about me here!

Recent Posts

  • H&P Noodle House Burnaby
  • Travel: Harry Potter Studio Tour (Watford, UK)
  • Travel: The Resident Soho Hotel, London UK
  • North Noodle House
  • Grand Crystal Seafood Restaurant

Subscribe to Blog via Email

Enter your email address to subscribe to this blog and receive notifications of new posts by email.

Partnerships

View my food journey on Zomato!

Archives

Theme Design By Studio Mommy · Copyright © 2025

Copyright © 2025 · Young Blush Theme on Genesis Framework · WordPress · Log in