• About / Contact
  • Work With Me
  • Food & Drink
    • asian —>
      • chinese
      • indian
      • japanese
      • korean
      • malaysian
      • taiwanese
      • thai
      • vietnamese
    • brunch
    • coffee and tea
    • dessert
    • fusion
    • happy hour
    • italian
    • greek
    • mexican
    • pub
    • seafood
    • steakhouse
    • vegetarian/vegan
    • western
  • Travel
    • Canada ->
      • Kelowna
      • Sunshine Coast
      • Victoria
    • Japan ->
      • Himeji
      • Kamakura
      • Kobe
      • Kyoto
      • Osaka
      • Tokyo
    • Mexico ->
      • Cancun
      • Isla Mujeres
      • Playa Del Carmen
    • USA ->
      • Las Vegas
      • Los Angeles
      • New York City
      • Seattle
    • Europe ->
      • London
  • Beauty
    • beauty events
    • body
    • eyes
    • face
    • costumes
    • hair
    • lips
    • nails
    • skincare

Curiously Carmen

DIY Easy Pikachu Ears/Headband (No sewing necessary)

October 25, 2014

Pikachu is one of the most lovable and adorable characters from the Japanese based show/media franchise, Pokemon!

Pikachu ears done

For an extreme rookie like me, making these ears were relatively easy. I’m pretty sure a young child is capable of making these ears too hahhaha….. that’s how easy it is 🙂

Pikachu earsMaterials:

  • Yellow and black felt (I used foam because I had some left over from my Minnie costume last year)
  • Hot glue gun, scissors, pencil
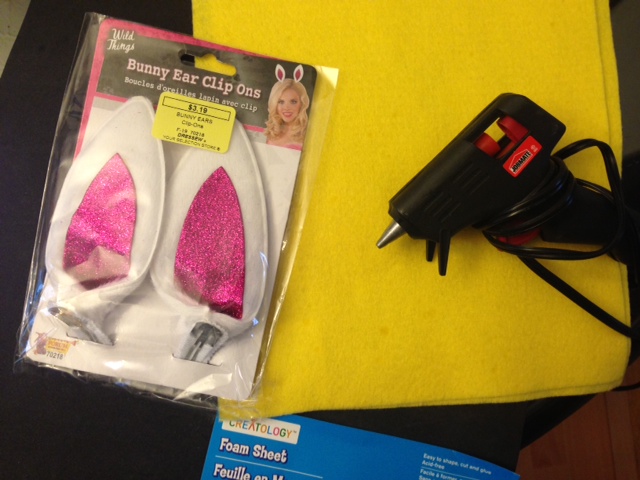
  • Random ear clip ons

Pikachu ears bunny

1) Find a random animal ear headband or clip on. The most important part is that it is sturdy, it doesn’t matter what type of animal it is. We will be gluing it over.

I found some bunny ear clip ons for mine!

Pikachu frontThe idea is to basically wrap the original animal ears with yellow felt. It took me three tries to finally get an ear shape that I liked.

Pikachu cut outs

2) After finding a shape that you like, continue to trace and cut four ears out.
Pikachu glue gun

3) Now comes the fun part- gluing! I would recommend gluing the front part of your bunny ears first, or else you risk gluing higher than you actually meant to in the back (which means a lot of the white bunny ear part would show in the front or you would have uneven ears).

Be careful to check where you are gluing before you actually do it, once you add in the hot glue gun, you won’t have much time for changes!

I also marked down which felt edge should match up with the other felt edge, to prevent myself from accidentally flipping one side and making it asymmetrical.
Pikachu ear tips4) The hardest part is now done! That wasn’t too bad right? 🙂 Next up is just the black tips on Pikachu’s ears. For this, I traced the finished yellow ears onto a piece of scrap paper and drafted up some designs on how I wanted the tips to look.

After I drew a black ear tip that I was happy with on the scrap paper, I cut it out and traced it onto the black foam and hot glue gunned them on.

You are also welcome to use black felt, construction paper, black tape, marker, etc etc. I felt that construction paper wouldn’t be as durable, and felt that marker may look a bit ugly or uneven with my art ability. Construction paper and marker tips might get damaged or smudge if it begins to rain and you’re outside…

Pikachu ears doneAnd there you have it! Super easy Pikachu ears for those who don’t want to sew.
pikachu diy ears costume

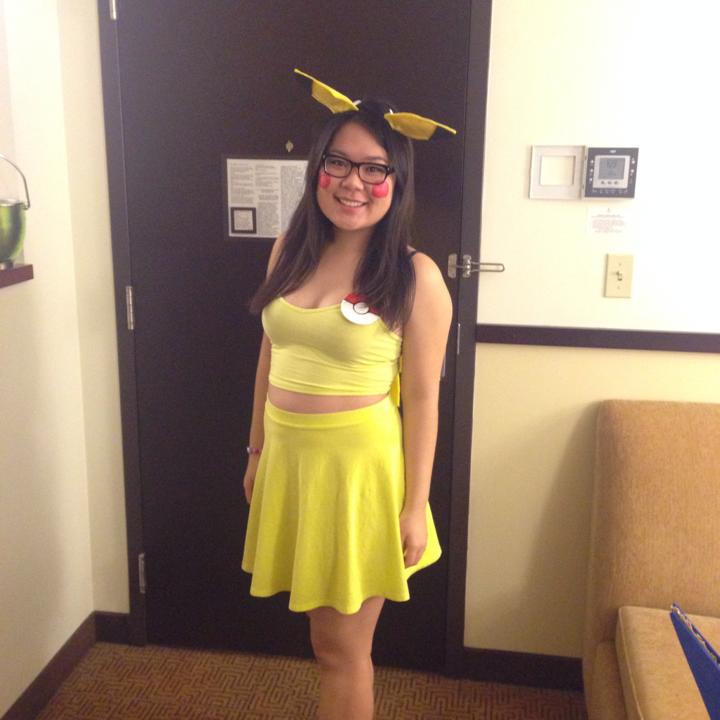
Happy early Halloween!

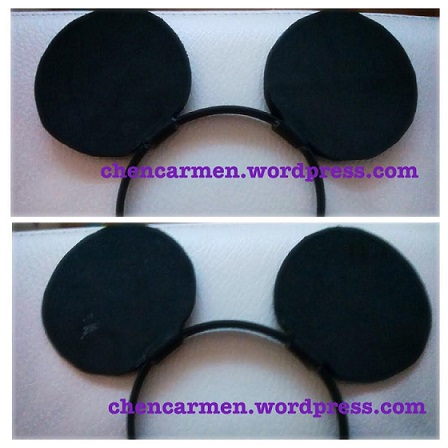
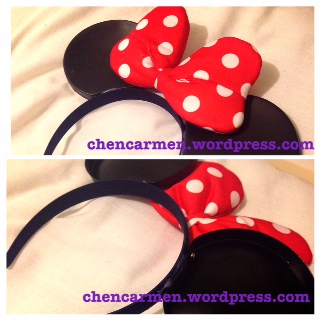
Minnie and Mickey Mouse DIY Costume from Halloween 2013!

-Carmen


Filed Under: costumes Tagged: arts and crafts, crafting, diy, diy ears, diy headband, easy diy, halloween, halloween costume diy, halloween costume ideas, no sewing, pikachu, pikachu costume, pikachu ears, pikachu headbands, pintrest, pokemon, pokemon costume, pokemon headband, sew free zone, yellow ears

Minnie and Mickey Mouse Costume DIY

October 21, 2014

Ha! This is probably the most ironic post I’ll ever write because I am probably the worst 20-something year old crafter, drawer, diy-er in the world. I seriously can’t be bothered by craft instructions, nor do I have the patience to sit for hours on end sewing or gluing piece by piece.

As for drawing? I have NO talent in that department whatsoever either. In Grade 9, our class was playing Pictionary and my poor classmate thought I drew a banana. Guess what it was? A SNOWMOBILE. So yes, I am extremely lacking in the arts and crafts department.
unnamed (34)

Which is WHY, as I was saying…that it is ironic that I’m writing this post. The boyfriend and I were Mickey and Minnie Mouse last year, and our costumes were made with things that you probably have lying at home.

I love dressing up for Halloween, but I’m a firm believer that your costume shouldn’t cost you a leg and arm (Halloween pun intended) and if you look around enough, you might just have parts of your costume collecting dust in your closet!

unnamed (33)

Also, please keep in mind that this is not going to be a step by step tutorial, but rather, just briefly showing you what we did, and hopefully inspire you if you’re planning on being Minnie or Mickey Mouse this Halloween. 

Materials used:

  • Foam board, dollar store
  • Cheap cotton gloves, dollar store
  • Old Minnie Mouse head piece, thrift shop
  • Scissors, home
  • Hot glue gun, general store
  • Headband, dollar store
  • Paper (for Mickey mouse only)

We didn’t have a hot glue gun so we had to purchase one (figured it was worth the investment in the future anyways), but that was where the bulk of the money went for this costume.

In total, both headbands and materials cost under $20, considering that one of these in the Disney store cost $20 minimum, not bad!

MickeyFor the Mickey Mouse ears (for the boyfriend), I found a template similar to this, which we then traced onto the black foam. The boyfriend then cut out the foam, positioned the cut outs where it looked appropriate (not too wide apart, but not too close either) and glued it together on the headband.

We got a bit of dried glue on the back of the ears, as you can see :(.  Just to warn you though, the quality up close in real life won’t look that good. But we figured that for the price we paid, it was worth the sacrifice. Plus, the pictures are going to last longer, and the ears turned out pretty decent in photos!

Minnie  I ended up finding an old children’s size Minnie Mouse set from the thrift store for $5. I simply snipped the ears and bows off, and glued it onto my headband. Perhaps you could find one lying around as well, or you can buy/make a red bow and then paint white dots!

Oh yeah, the headband set that we bought came in a set of dark blue and black, which is why mine is dark blue. But once I put it on, my dark hair blends in with it and you can’t tell that it’s blue.

For the gloves, we used the remaining pieces on the foam board and cut out the raindrop shapes and hot glue gunned it.

1403695_256304224516884_1632396849_oAs for the clothes, due to my love of polka dots, I had this dress from H&M lying around from the summer time. I also had a pair of yellow flats which worked perfectly for this costume!

I had to go out and buy a cardigan, but it’s very versatile and doubles up as office appropriate attire.

For the boyfriend, he bought a pair of cheap red pants from the men’s section at Forever 21. He ended up cutting oval pieces from paper, which he then taped onto the pants. I remember that this didn’t turn out so well. From the 5 minute car ride, the tape wasn’t holding out so we had to stop at Shoppers to buy better quality packaging tape.

It would have been better to hot glue gun or sew white fabric on.

unnamed (35)As for the makeup, I kept it relatively simple and placed a lot of emphasis on fake eyelashes and blush. Minnie has super long lashes, so I doubled up my falsies and placed them only on the outer corner of my eyes, to give it more of a cartoon effect.

I wanted to look extra girly and add more of a cartoon effect, so I put on a lot of blush. It’s hard to tell in those pictures though! Of course, I had to draw a button nose with eyeliner as the finishing touch.

1532013_281116645368975_820147862_nAs a bonus, I also got to wear my Halloween costume two months later to Disneyland!

I hope that this post was a bit helpful during the Halloween costume planning season! Half the fun is thinking of, and preparing the costume, am I right?

What are you going to dress up as for Halloween this year? Or, what have you dressed up as in the past?

Thanks for reading!

-Carmen


Filed Under: costumes, face, makeup, personal Tagged: arts and crafts, costume, costume making, costume planning, crafts, disney, Disneyland, diy, dress up, halloween, halloween 2014, halloween costume ideas, halloween diy, mickey mouse costume, mickey mouse diy, minnie mouse costume, minnie mouse diy

SpookyEyes.com Coloured Contacts Review

September 15, 2014

Disclaimer: These contacts are FDA and ISO approved, and sterile. FDA means that they are approved for use in the States, while ISO is the international health standard institution. The ISO was formed since countries have their different standards of “safe” for many products, so it’s a way to harmonize the requirements for safe contact lenses wear.

I definitely would not be reviewing this product if I did not think it was safe, if the site looked questionable, or had any further doubts about putting these into my eyes whatsoever. Rest assured, although these contacts were sent to me on behalf of the company, they are completely safe to wear compared to other contacts and I would never risk the health of my readers or misinform you guys. With that said, I do know that compared to regular contacts, coloured contacts have a higher chance of drying out your eyes. As with all products, be careful and read the ingredients properly,and use your judgement. 

——-

Helloooo everyone! Today, I will be reviewing a product that I never wear – coloured contacts! My relationship with contacts, both regular prescription and coloured have not been great, to say the least. That is because my eyes tend to dry out really fast, making wearing contacts uncomfortable if I wear them for long hours.

I have tried many different contact lenses, different contact solutions, etc, which have helped on some days, but for the most part, they are not comfortable for me. Fast forward to the present, I only wear the daily disposable contacts probably 3-4 times a month as I find those are the most moisturizing, comfortable, and convenient.

Anyways, I was contacted by UK based sister companies DreamEyes.com / SpookyEyes.com to do a review of their coloured contacts. For simplicity’s sake, I will be referring to them as Spooky Eyes. I haven’t worn coloured contacts for over two years, so I figured I could give them a chance again and if it does work out, I can order a pair of Halloween contacts soon! Here’s how it turned out.
photo 3 (2)I was told to select three coloured contacts that I would like, and one of them would be mailed to me. I was quite excited to see which colour I would end up with! My contacts came roughly three weeks later from the UK. I received the colour green sparkle. 

I was happy to learn that the contacts are manufactured in South Korea, where coloured contacts are extremely popular with the female population. That fact reassured me as I know from prior knowledge that South Korea makes great quality coloured lenses.
dreameyesHere is a screenshot from the website, and what I received. Compared to the picture online, I feel that the green shade in real life appears a bit softer and lighter, which I actually prefer.

There are many different shades of green, brown, blue, and purple on their website. I’ve always wanted to try green contacts with my Asian skin and brown eyes, and I felt that these weren’t too dramatic or harsh.
photo 1 (3)I did not have any trouble putting these inside my eyes, they were like my standard contact lenses. When I first put these on, I was shocked at how my eyes looked. Although these contacts did not specify that they will enlarge the appearance of your eyes, they definitely will!

I was not used to seeing myself with enlarged pupils, let alone green eyes. This picture was taken in natural sunlight. Luckily, the colour matched my skin and eyes pretty well. If it was the green shade as seen on their website, I don’t think it would have looked as soft. I also liked how there is a bit of sparkle to it as well in the sun. How do they look in your opinion?

Since these contacts are only for cosmetic purposes, I still had to wear my glasses. These two pictures were taken outside as well, I try to use natural sunlight when possible. With my glasses on, I don’t think the green is as noticeable at first glance, but if you look longer, you can definitely tell.
photo 1Oops, I forgot to take a picture of my eyes before the contacts so here is a picture from a previous post, taken in the same spot where I took the picture above. Since I have naturally dark eyes, coloured contacts may not always turn out the way it appears, or it may not show up at all!

I’m glad that I didn’t have this problem with these contacts. I ended up wearing these for a bit over five hours, and had no problem at all with them! I actually forgot that I was wearing them until I got in the shower, and my eyes started to sting a bit when water got in.

They were super comfortable to wear, and remind me of a smooth, gel-like material as opposed to thinner, plasticky feeling contacts.
Pros:

  • Very comfortable to wear, smooth gel-like contacts
  • This specific shade was not too harsh which I preferred
  • Colour will show up even on dark coloured eyes
  • Lasts one year and retails for $28 US
  • Made in S. Korea, a country known for great quality and comfortable coloured lenses
  • Great for cosplay or costumes but the softer looking coloured lenses are good for daily wear too
  • Free shipping! 

Cons:

  • Does not currently offer prescription lenses

In conclusion, I am really satisfied with these contacts, as they are really comfortable and I like the colour. They also have a vast assortment of coloured contacts, with all the possibilities imaginable. White out, UV, devil, cat eye, sparkle, anime… they have them all. Here are some I picked out on SpookyEyes:
contacts
Check them out at DreamEyes.com and SpookyEyes.com!

I’m curious, let me know what are your favourite contacts on their site and if you would you consider wearing coloured contacts for fun in the comments!

These contacts were sent to me free of charge from SpookyEyes, and I was not paid to write this post. Everything in this post is my personal opinion and was not altered by the request of the company. 

-Carmen


Filed Under: costumes, eyes, makeup Tagged: beauty blogger, beauty guru, beauty PR, coloured contacts, crazy contacts, dramatic eye, dream eyes, eye colour, eye makeup, halloween, halloween ideas, makeup blogger, makeup PR, spooky eyes, UK

Hello!

Hi and welcome to Curiously Carmen! I am Carmen, the girl behind the blog. You can read more about me here!

Recent Posts

  • H&P Noodle House Burnaby
  • Travel: Harry Potter Studio Tour (Watford, UK)
  • Travel: The Resident Soho Hotel, London UK
  • North Noodle House
  • Grand Crystal Seafood Restaurant

Subscribe to Blog via Email

Enter your email address to subscribe to this blog and receive notifications of new posts by email.

Partnerships

View my food journey on Zomato!

Archives

Theme Design By Studio Mommy · Copyright © 2025

Copyright © 2025 · Young Blush Theme on Genesis Framework · WordPress · Log in