• About / Contact
  • Work With Me
  • Food & Drink
    • asian —>
      • chinese
      • indian
      • japanese
      • korean
      • malaysian
      • taiwanese
      • thai
      • vietnamese
    • brunch
    • coffee and tea
    • dessert
    • fusion
    • happy hour
    • italian
    • greek
    • mexican
    • pub
    • seafood
    • steakhouse
    • vegetarian/vegan
    • western
  • Travel
    • Canada ->
      • Kelowna
      • Sunshine Coast
      • Victoria
    • Japan ->
      • Himeji
      • Kamakura
      • Kobe
      • Kyoto
      • Osaka
      • Tokyo
    • Mexico ->
      • Cancun
      • Isla Mujeres
      • Playa Del Carmen
    • USA ->
      • Las Vegas
      • Los Angeles
      • New York City
      • Seattle
    • Europe ->
      • London
  • Beauty
    • beauty events
    • body
    • eyes
    • face
    • costumes
    • hair
    • lips
    • nails
    • skincare

Curiously Carmen

Monsters Inc. Mike & Sully DIY Costume (No Sewing Necessary) 

October 7, 2016

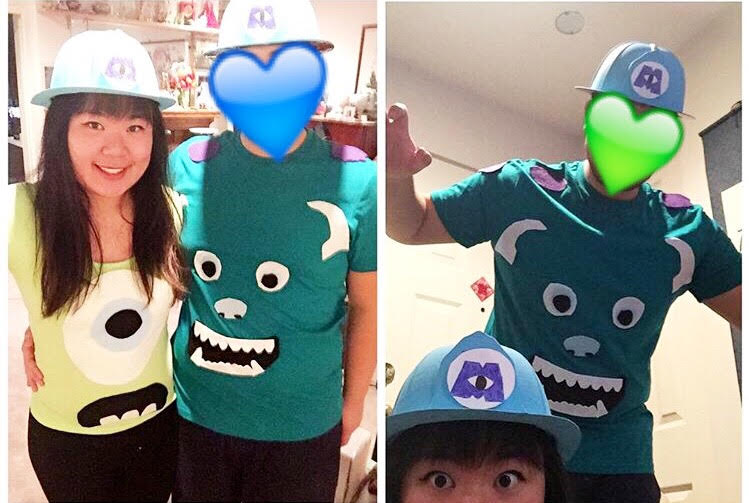
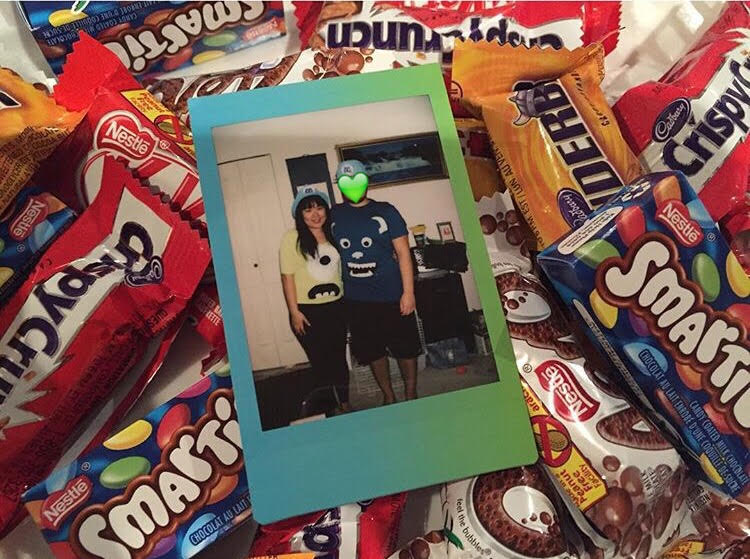
For Halloween 2015, the boyfriend and I decided to be Mike and Sully from Monsters Inc! We didn’t do anything big or special last year, just hung out at home, and gave out candy. We also decided to watch the movie while giving out candy!

sully mike diy costume monsters inc couplesAs with all my costumes, they are extremely simple to create. I can not sew, and am abysmal at arts/crafts but that doesn’t mean I can’t find ways to save money and come up with costume ideas!
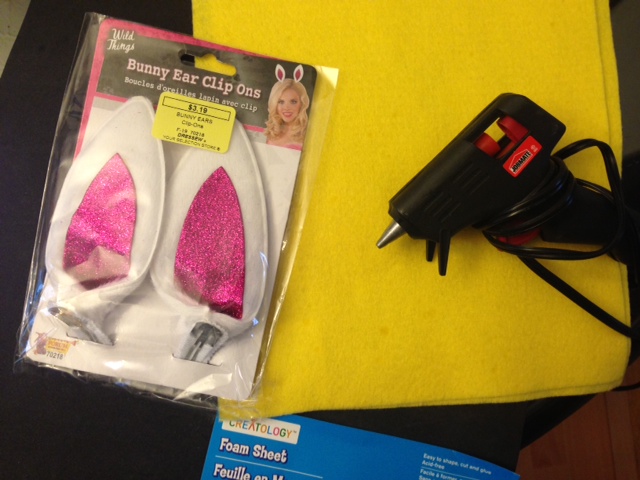
Materials:

  • Hot glue gun
  • Coloured felt fabric: White, black, light blue, purple
  • 2 Hard hats
  • Monsters Inc logo- Either print one or it’s easy to draw
  • Bright green tshirt
  • Dark turquoise tshirt
  • Blue acrylic paint
  • Paint brush
  • Packing tape (optional for logo on the hard hat)

sully mike diy costume monsters inc couples costume

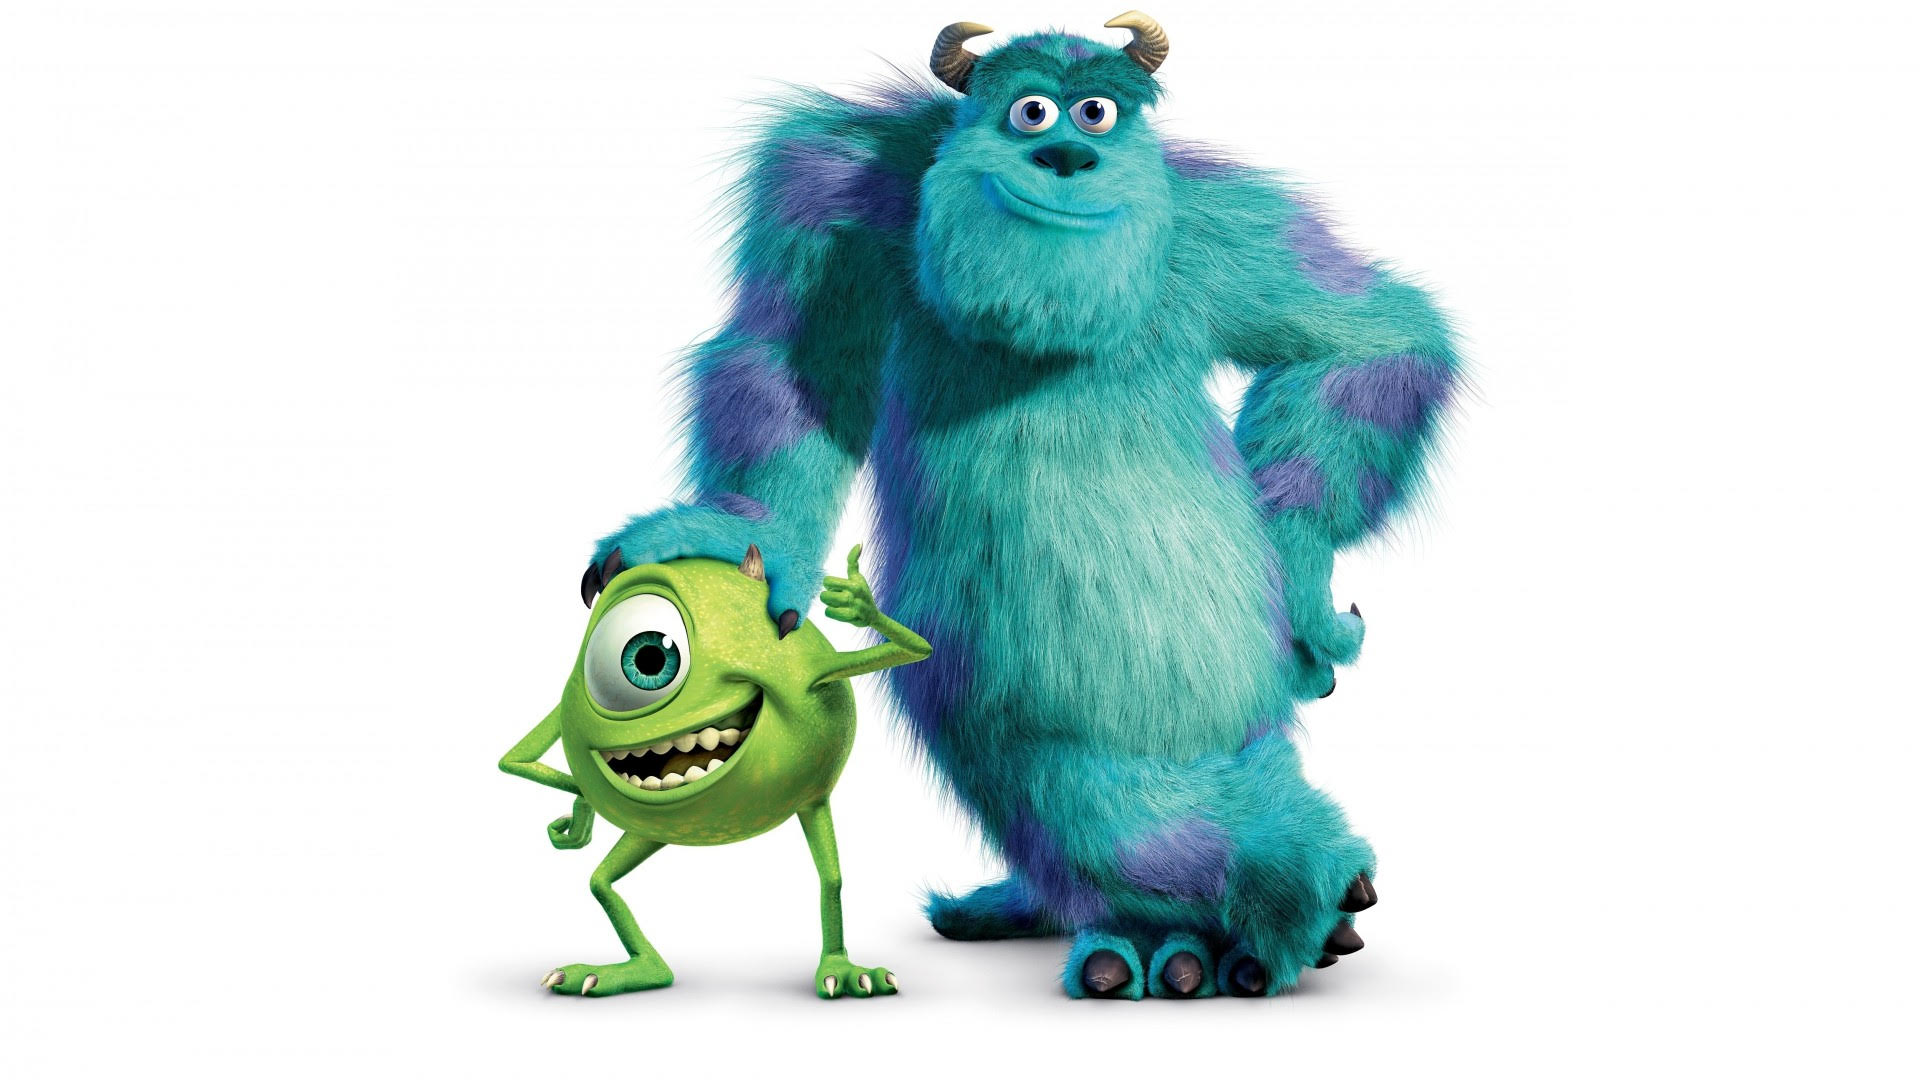
Mike: You will need the white, black, and light blue fabric. Simply cut out the appropriate shapes for his big eye, surprised looking mouth and teeth. Then, position them on your green shirt before hot gluing the pieces on!

Sully: You will need the white, black, light blue, and purple fabric. Again, cut out the shapes for Sully’s face and horns as shown in my picture. For the purple spots, cut out irregularly shaped ovals and hot glue gun them on the back of the tshirt.

Hats: Can’t forget their safety hats! We were firefighters the year before, so we had leftover hard hats. These are really easy to find at any costume or toy store! Just paint liberally, we painted 3-4 layers before the paint was a nice solid light blue.
diy costume monsters inc logo couples

Then, I found a Monsters Inc logo online and printed two copies out. I then stuck them on the hard hats using tape.

If you’re going to be outdoors, I recommend laminating the logos incase it starts to rain. You can either go to Staples or simply use packing tape to laminate.

There you go! Super simple, no sewing required. This costume is also great with a friend!
sully-mike-diy-costume-monsters-inc-couples-3Happy DIY costuming!


Filed Under: costumes, misc

Jord Wooden Watch Review

January 30, 2016

I am excited to share this company with you all today! Jord is a company specializing in luxury, all natural wooden watches.

I was given the chance to try out one of their beautiful wooden watches in the fall, and here is what I thought.
Jord Wooden Watch Review
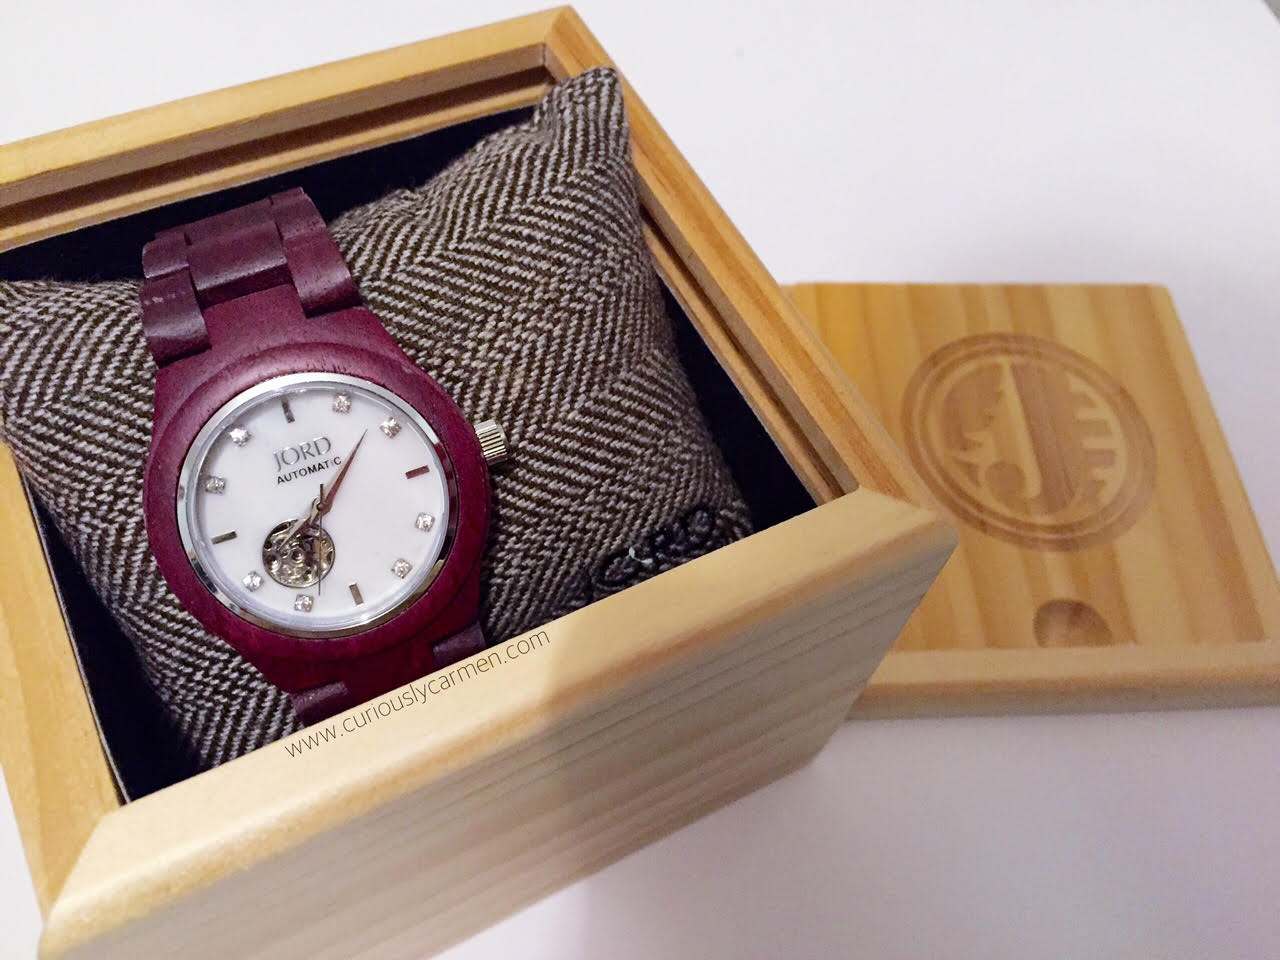
Out of the designs that I was allowed to chose from, I decided to go with the Cora series, with the beautiful purpleheart & mother of pearl watch.

Did you know that purpleheart is a type of wood that is all natural in colour? When freshly cut, purpleheart is a  dull grayish/purplish brown. Upon exposure, the wood becomes a deeper eggplant purple. So pretty and cool!

The watch arrives in a sturdy wooden box. It also comes with a slip on wooden lid, with their logo engraved on the box. The box is really good quality and you could use the box to store small items.

Jord Wooden Watch Review

This watch is splash-proof, but not entirely water-proof so don’t submerge yours in water! Since this watch is made from 100% wood, it is recommended to clean the watch with lemon or orange oil extract so that you don’t damage the material.

Jord also recommends to avoid storing the watch in extreme hot/cold or humid environments.
Jord Wooden Watch Review
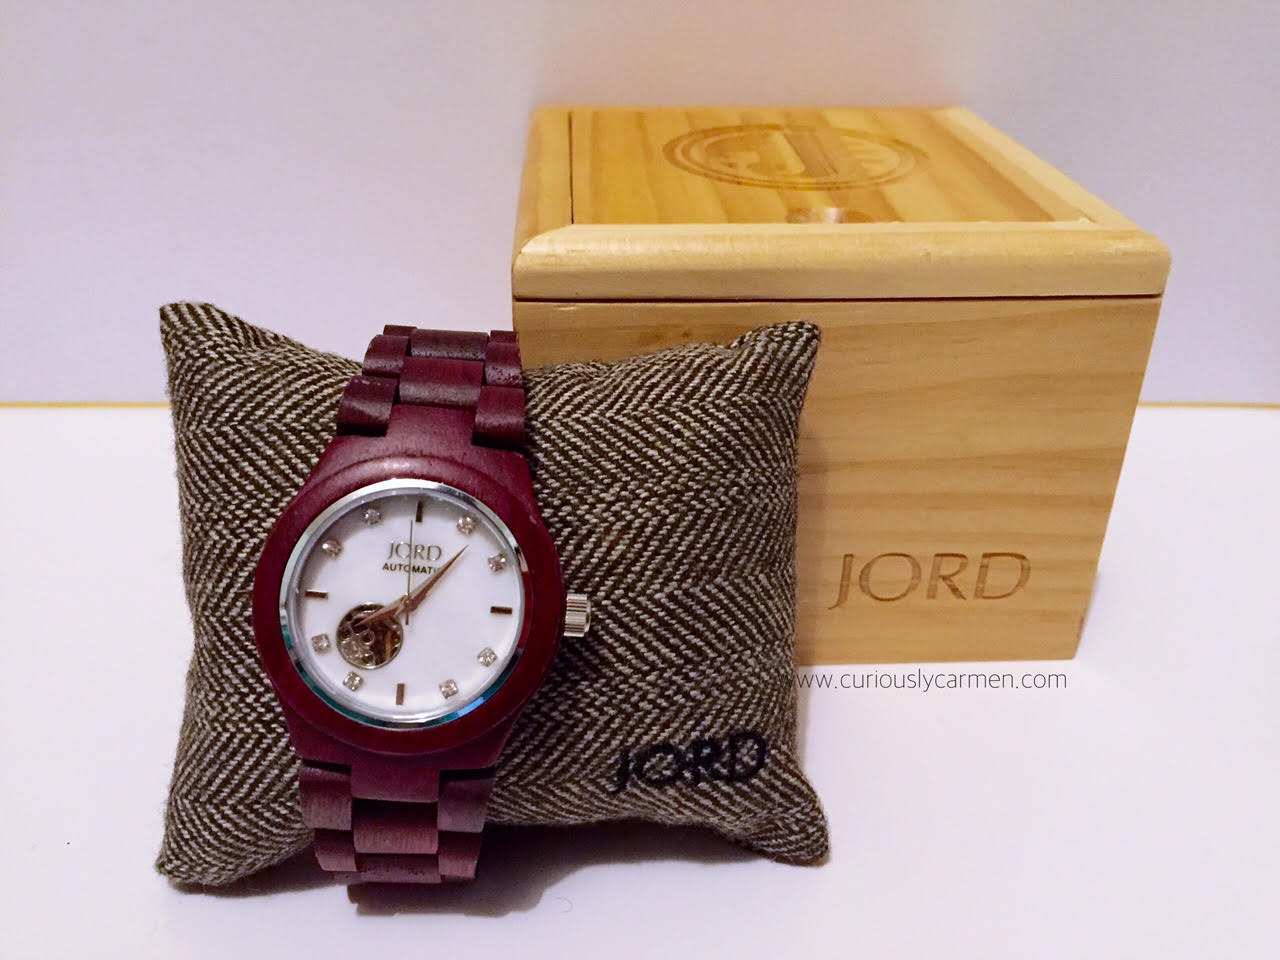
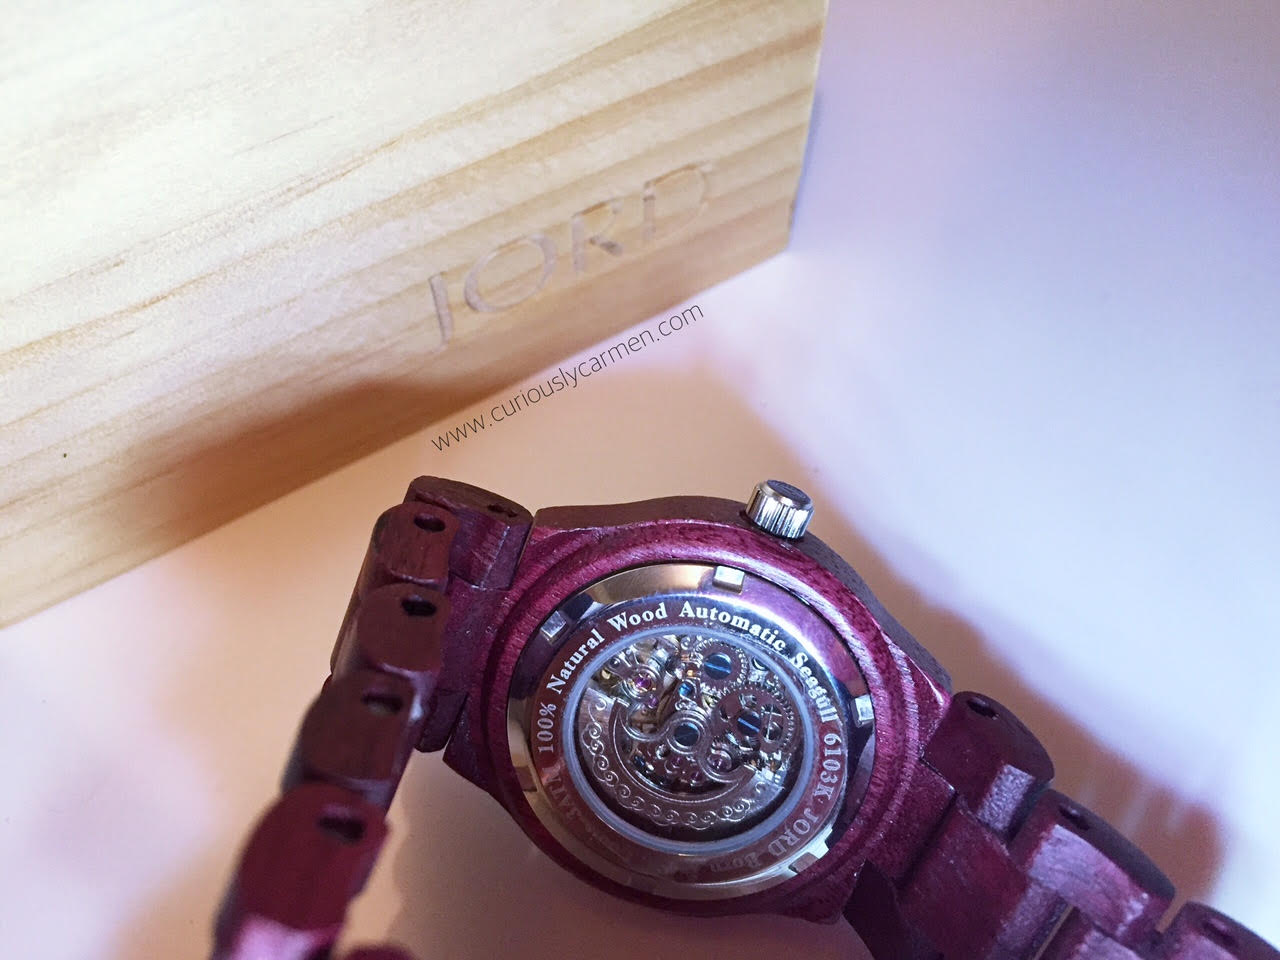
One thing that is really great about Jord watches is that most of them do not require the use of batteries. This watch is a self winding watch, meaning that the movement of the watch depends on the wearer’s wrist movement.

To start the watch, you use the winder on the side and set the time. It is important to wear the watch in order to keep the time moving. After enough movement and wearing, the watch will start to move automatically and won’t stop unless you take it off for long periods of time.

Check out that intricate craftmanship- it looks even more beautiful when you see it in action. It reminded me of those classic grandfather clocks!
Jord Wooden Watch Review
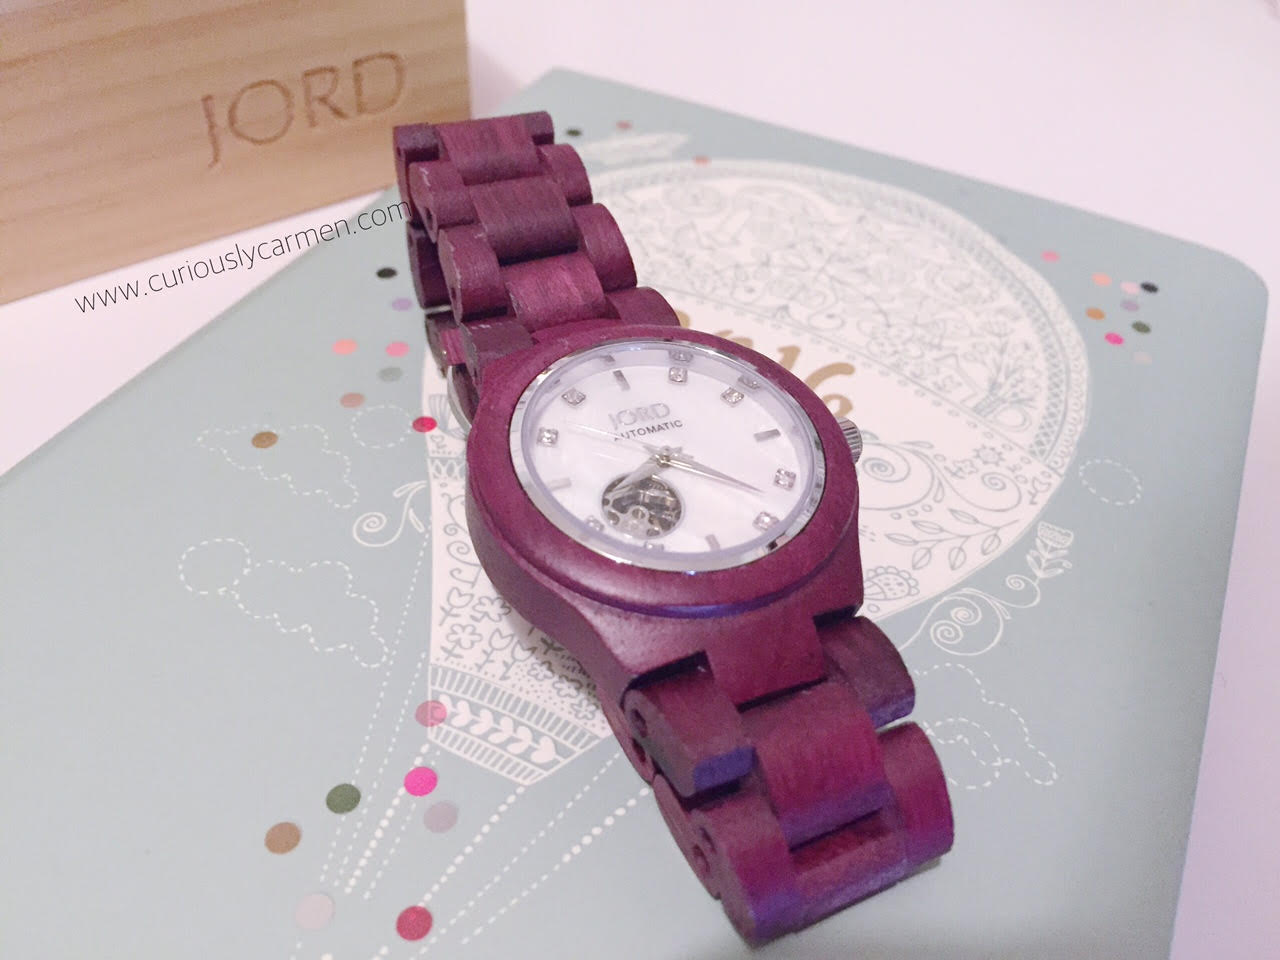
Overall, I enjoyed the Jord watch, but it was my first time having an automatic watch. Since I would only wear it for a few hours at a time, it became tedious to have to reset the time each time I wanted to wear it. Clearly, I am not #fancy enough but at least I learned something new from this watch!

However, I’m aware that this is the case for ALL self winding watches, so it is something that I will have to get used to! Other than that, I have no complaints about the watch itself. The watch is of great quality and I love the unique all-wood design.

As previously mentioned, I would consider these watches to be a luxury item. The price ranges from $129-$395 USD, depending on the series and style. Automatic watches cost more than battery-powered watches, but you don’t have to worry about your watch running out of batteries.

yay-nay-or-meh

Meh…

Thanks for reading!

Carmen

Sample provided for review. Opinions are own.


Filed Under: costumes Tagged: beauty, beauty blogger, jord, jord watch

GUEST POST: Sasa.com Makeup & Skincare Haul! 

April 16, 2015

Hi everyone!

Special blog post today- everyone, virtually meet one of my good friends, Pauline (She’s super awesome)! She has agreed to write a guest post for me and I’m excited to share it with you all today. See what type of Asian cosmetics Pauline bought from Sasa.com and how she wore them to the Japanese cherry blossom festival. 

Happy reading everyone!

Carmen 

~~~~~

Hello everybody! I am doing this for my friend, Carmen, as a guest post, and will be the very first time doing this! So, hopefully this goes well… haha!

I recently bought some makeup and face products from this super famous Hong Kong make up store: Sasa. I usually purchase my makeup and face products from here because it’s cheap and my skin seems like to like Asian brands of makeup/skin products. They also often do free shipping once in a while!

The first product I’m going to introduce is an eyeliner by Majorlica Majorca: the cream pencil liner.

Sasa.com Makeup & Skincare HaulI must say, this cream liner is super smooth to line your eyes with, and it’s super creamy. Usually with creamy eyeliner, it smudges easily, but this eyeliner didn’t smudge and actually stayed on my eyes for the whole day! Especially when I tight lined with this eyeliner, I was ready for this to smudge all over my eyes by the end of the day. I was so surprised at how it stayed on so well! 5/5 for this product! =)
Sasa.com Makeup & Skincare HaulThe second product is: Majorlica Majorca’s jeweling pencil. This product is basically a white eyeliner to put on your eye corners to brightening up your eye as well as giving an illusion of having bigger eyes!

Nothing really special about this eyeliner, as I think all white eyeliners can do the same as this one can. 😛

Sasa.com Makeup & Skincare HaulThird product: Majorlica Marjoca’s perfect automatic liner: This product was kind of weird to use at first. So, the first thing you do is twist the bottom of this eyeliner until the ink comes out from the tip. The con of this is that if you twist too much, the ink will splat out and comes into a big mess.

However, after you clean that up, you can just apply that on your eyes just like any other eyeliner would … If you do not want to clean up the mess, this might not be the best product for you, because you will have to twist the bottom every time you want to use this product.

This eyeliner also stayed on really well on my eyes, and was pretty easy to apply as well. So, other than the whole twisting thing, I would rate this 4.5/5 ☺Sasa.com Makeup & Skincare Haul
Hehe … I have combined the three eyeliners mentioned above today, for my makeup look of the day! I went to the cherry blossom Japanese festival with a couple of my friends today, so I thought “hey, why not try out these products if I am going to blog about them anyway!”

I used the cream eyeliner to tight line my upper line as well as my water line. Like I mentioned, it stayed on without smudging the entire day. I then used the perfect liner to line across my eye and winged it out just a tiny bit, facing downwards, to give an illusion of a cute round eye. (…or eyes…)

Finally, I used the white eyeliner to put on my eye corners to brighten up my eyes. ☺

Sasa.com Makeup & Skincare HaulAnd here’s me in a Yukata ☺ .. To protect my friends’ privacy, I have turned them into Rilakkuma and Korilakkuma.

Okay, on with the other products!
Sasa.com Makeup & Skincare HaulFourth product: Shu Uemura Skin purifier (in premium A/I) This product … is godly. Although this is a “cleansing oil”, this will not clog your pores nor will you have a disgusting oily feeling left on your skin after. Honestly, I can say it is like rubbing pearls on your face. There are 4 easy steps to using this purifier:

1.) Pump 4 pumps on your hand (hand and face dry)
2.) Rub the oil all over your face (and eyes if you have eye make up on)
3.) Add water to the oil until it turns into a milky foamy wash
4.) Rinse and wipe your face

Your makeup is literally all gone, and you do not have to go through a second cleanser to clean your face. The oil also leaves you with smooth skin and feeling hydrated.

The best part about this product is : THIS IS FOR SENSITIVE & DRY SKIN!!! Which is a big problem for me, because sadly, I have super sensitive skin … So now that I have found this, I rate it 10/5!
Sasa.com Makeup & Skincare HaulLast product I’m going to talk about is: Laniege Multiberry Yogurt Pack. I have mentioned above that my face is super sensitive … and this mask did not go well with my skin. I gave this mask a try because of all the good things I have heard about it.

It also says that it is for “all skin types” – and let me tell you … It’s not. If you have sensitive skin, do not go for this product. My face reacted one minute after I put this on … The burning sensation and my face was literally all red like a cherry.

I must say, though, this mask smells like as if you are in a strawberry land … So the pro I can only say about this is that it smells super yummy.

That’s it to my guest post! I hope all of you enjoyed reading about these Asian products and maybe try some out on your own as well!

-Pauline

~~~~~

Thanks for guest blogging, Pauline! You look so good in the yukata. I want to wear one too! 

What are some of your favourite Asian cosmetics?

-Carmen


Filed Under: costumes, eyes, face, makeup Tagged: asian, asian beauty, asian cosmetics, beauty, beauty blogger, beauty guru, clear skin, eyeliner, fotd, japanese, lotion, makeup, makeup blogger, makeup guru, moisturizer, motd, perfect skin, sasa, serum, shu uemura, yukata

DIY Easy Pikachu Ears/Headband (No sewing necessary)

October 25, 2014

Pikachu is one of the most lovable and adorable characters from the Japanese based show/media franchise, Pokemon!

Pikachu ears done

For an extreme rookie like me, making these ears were relatively easy. I’m pretty sure a young child is capable of making these ears too hahhaha….. that’s how easy it is 🙂

Pikachu earsMaterials:

  • Yellow and black felt (I used foam because I had some left over from my Minnie costume last year)
  • Hot glue gun, scissors, pencil
  • Random ear clip ons

Pikachu ears bunny

1) Find a random animal ear headband or clip on. The most important part is that it is sturdy, it doesn’t matter what type of animal it is. We will be gluing it over.

I found some bunny ear clip ons for mine!

Pikachu frontThe idea is to basically wrap the original animal ears with yellow felt. It took me three tries to finally get an ear shape that I liked.

Pikachu cut outs

2) After finding a shape that you like, continue to trace and cut four ears out.
Pikachu glue gun

3) Now comes the fun part- gluing! I would recommend gluing the front part of your bunny ears first, or else you risk gluing higher than you actually meant to in the back (which means a lot of the white bunny ear part would show in the front or you would have uneven ears).

Be careful to check where you are gluing before you actually do it, once you add in the hot glue gun, you won’t have much time for changes!

I also marked down which felt edge should match up with the other felt edge, to prevent myself from accidentally flipping one side and making it asymmetrical.
Pikachu ear tips4) The hardest part is now done! That wasn’t too bad right? 🙂 Next up is just the black tips on Pikachu’s ears. For this, I traced the finished yellow ears onto a piece of scrap paper and drafted up some designs on how I wanted the tips to look.

After I drew a black ear tip that I was happy with on the scrap paper, I cut it out and traced it onto the black foam and hot glue gunned them on.

You are also welcome to use black felt, construction paper, black tape, marker, etc etc. I felt that construction paper wouldn’t be as durable, and felt that marker may look a bit ugly or uneven with my art ability. Construction paper and marker tips might get damaged or smudge if it begins to rain and you’re outside…

Pikachu ears doneAnd there you have it! Super easy Pikachu ears for those who don’t want to sew.
pikachu diy ears costume

Happy early Halloween!

Minnie and Mickey Mouse DIY Costume from Halloween 2013!

-Carmen


Filed Under: costumes Tagged: arts and crafts, crafting, diy, diy ears, diy headband, easy diy, halloween, halloween costume diy, halloween costume ideas, no sewing, pikachu, pikachu costume, pikachu ears, pikachu headbands, pintrest, pokemon, pokemon costume, pokemon headband, sew free zone, yellow ears

Minnie and Mickey Mouse Costume DIY

October 21, 2014

Ha! This is probably the most ironic post I’ll ever write because I am probably the worst 20-something year old crafter, drawer, diy-er in the world. I seriously can’t be bothered by craft instructions, nor do I have the patience to sit for hours on end sewing or gluing piece by piece.

As for drawing? I have NO talent in that department whatsoever either. In Grade 9, our class was playing Pictionary and my poor classmate thought I drew a banana. Guess what it was? A SNOWMOBILE. So yes, I am extremely lacking in the arts and crafts department.
unnamed (34)

Which is WHY, as I was saying…that it is ironic that I’m writing this post. The boyfriend and I were Mickey and Minnie Mouse last year, and our costumes were made with things that you probably have lying at home.

I love dressing up for Halloween, but I’m a firm believer that your costume shouldn’t cost you a leg and arm (Halloween pun intended) and if you look around enough, you might just have parts of your costume collecting dust in your closet!

unnamed (33)

Also, please keep in mind that this is not going to be a step by step tutorial, but rather, just briefly showing you what we did, and hopefully inspire you if you’re planning on being Minnie or Mickey Mouse this Halloween. 

Materials used:

  • Foam board, dollar store
  • Cheap cotton gloves, dollar store
  • Old Minnie Mouse head piece, thrift shop
  • Scissors, home
  • Hot glue gun, general store
  • Headband, dollar store
  • Paper (for Mickey mouse only)

We didn’t have a hot glue gun so we had to purchase one (figured it was worth the investment in the future anyways), but that was where the bulk of the money went for this costume.

In total, both headbands and materials cost under $20, considering that one of these in the Disney store cost $20 minimum, not bad!

MickeyFor the Mickey Mouse ears (for the boyfriend), I found a template similar to this, which we then traced onto the black foam. The boyfriend then cut out the foam, positioned the cut outs where it looked appropriate (not too wide apart, but not too close either) and glued it together on the headband.

We got a bit of dried glue on the back of the ears, as you can see :(.  Just to warn you though, the quality up close in real life won’t look that good. But we figured that for the price we paid, it was worth the sacrifice. Plus, the pictures are going to last longer, and the ears turned out pretty decent in photos!

Minnie  I ended up finding an old children’s size Minnie Mouse set from the thrift store for $5. I simply snipped the ears and bows off, and glued it onto my headband. Perhaps you could find one lying around as well, or you can buy/make a red bow and then paint white dots!

Oh yeah, the headband set that we bought came in a set of dark blue and black, which is why mine is dark blue. But once I put it on, my dark hair blends in with it and you can’t tell that it’s blue.

For the gloves, we used the remaining pieces on the foam board and cut out the raindrop shapes and hot glue gunned it.

1403695_256304224516884_1632396849_oAs for the clothes, due to my love of polka dots, I had this dress from H&M lying around from the summer time. I also had a pair of yellow flats which worked perfectly for this costume!

I had to go out and buy a cardigan, but it’s very versatile and doubles up as office appropriate attire.

For the boyfriend, he bought a pair of cheap red pants from the men’s section at Forever 21. He ended up cutting oval pieces from paper, which he then taped onto the pants. I remember that this didn’t turn out so well. From the 5 minute car ride, the tape wasn’t holding out so we had to stop at Shoppers to buy better quality packaging tape.

It would have been better to hot glue gun or sew white fabric on.

unnamed (35)As for the makeup, I kept it relatively simple and placed a lot of emphasis on fake eyelashes and blush. Minnie has super long lashes, so I doubled up my falsies and placed them only on the outer corner of my eyes, to give it more of a cartoon effect.

I wanted to look extra girly and add more of a cartoon effect, so I put on a lot of blush. It’s hard to tell in those pictures though! Of course, I had to draw a button nose with eyeliner as the finishing touch.

1532013_281116645368975_820147862_nAs a bonus, I also got to wear my Halloween costume two months later to Disneyland!

I hope that this post was a bit helpful during the Halloween costume planning season! Half the fun is thinking of, and preparing the costume, am I right?

What are you going to dress up as for Halloween this year? Or, what have you dressed up as in the past?

Thanks for reading!

-Carmen


Filed Under: costumes, face, makeup, personal Tagged: arts and crafts, costume, costume making, costume planning, crafts, disney, Disneyland, diy, dress up, halloween, halloween 2014, halloween costume ideas, halloween diy, mickey mouse costume, mickey mouse diy, minnie mouse costume, minnie mouse diy

  • « Previous Page
  • 1
  • 2
  • 3
  • Next Page »

Hello!

Hi and welcome to Curiously Carmen! I am Carmen, the girl behind the blog. You can read more about me here!

Recent Posts

  • H&P Noodle House Burnaby
  • Travel: Harry Potter Studio Tour (Watford, UK)
  • Travel: The Resident Soho Hotel, London UK
  • North Noodle House
  • Grand Crystal Seafood Restaurant

Subscribe to Blog via Email

Enter your email address to subscribe to this blog and receive notifications of new posts by email.

Partnerships

View my food journey on Zomato!

Archives

Theme Design By Studio Mommy · Copyright © 2025

Copyright © 2025 · Young Blush Theme on Genesis Framework · WordPress · Log in