• About / Contact
  • Work With Me
  • Food & Drink
    • asian —>
      • chinese
      • indian
      • japanese
      • korean
      • malaysian
      • taiwanese
      • thai
      • vietnamese
    • brunch
    • coffee and tea
    • dessert
    • fusion
    • happy hour
    • italian
    • greek
    • mexican
    • pub
    • seafood
    • steakhouse
    • vegetarian/vegan
    • western
  • Travel
    • Canada ->
      • Kelowna
      • Sunshine Coast
      • Victoria
    • Japan ->
      • Himeji
      • Kamakura
      • Kobe
      • Kyoto
      • Osaka
      • Tokyo
    • Mexico ->
      • Cancun
      • Isla Mujeres
      • Playa Del Carmen
    • USA ->
      • Las Vegas
      • Los Angeles
      • New York City
      • Seattle
    • Europe ->
      • London
  • Beauty
    • beauty events
    • body
    • eyes
    • face
    • costumes
    • hair
    • lips
    • nails
    • skincare

Curiously Carmen

6 Eye Makeup Looks With One Liquid Eyeliner (Part 2/2)!

April 21, 2015

Hi everyone =)

I am continuing my 6 different eyeliner looks with one liquid liner today! You can read part 1 here. I decided to separate the looks into two posts, because I thought that it would be too long of a single post.

IMG_2433.JPG
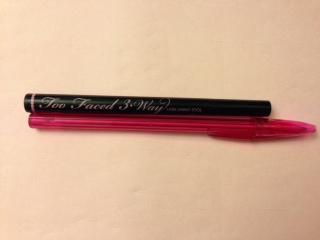
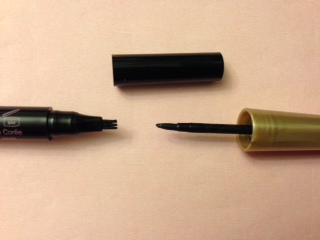
Just in case you didn’t read part 1, I decided to use my Dolly Wink liquid liner that my friends bought for me in Hong Kong. You can buy them in North America as well, but the prices are a bit higher due to importing, etc. Things are usually cheaper in Asia =)

Dolly Wink is a very popular brand among the Asian beauty industry, it is probably the equivalent to the Kat Von D tattoo liner craze, but Dolly Wink is cheaper. I like my Dolly Wink liner because the pigment is great, lasts long, and the fine tip of the brush makes it very easy to create different looks.

IMG_2272.JPG
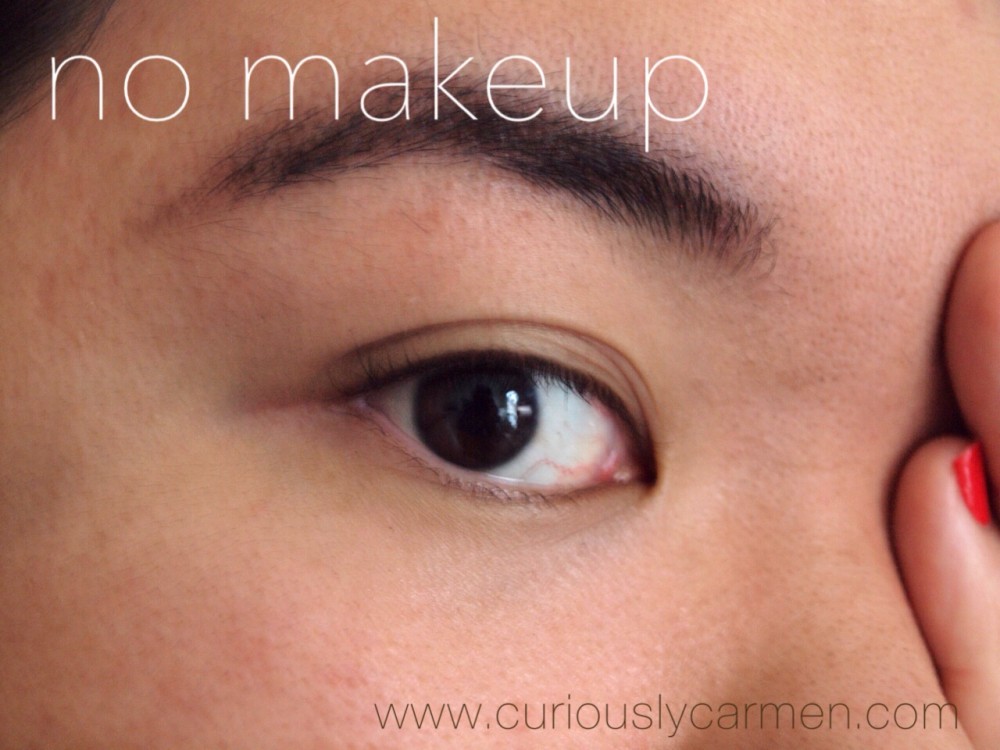
Here is my eye without any eyeliner! I took this picture to show the differences that eyeliner can do to your eye.

IMG_2273.JPG

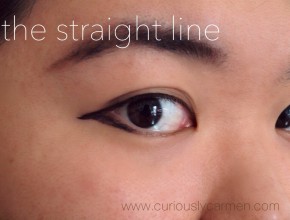
The staight line/under eye:  Oops, I forgot to include the “under eye” in the picture as well! This is a combination of two looks.

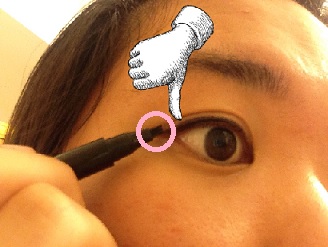
For this look, I tight lined my eye (more information on how to do that here), and then instead of winging my liner upwards, I followed the downward slope of my eye to create a straight, parellel line that extends further.

One of my favourite beauty gurus talked about it in her videos once so I decided to try it out for myself. The straight line look is very popular in Asian beauty culture, as it gives the appearance of a rounded eye. The straight line also your eyes look rounder and bigger, while the classic winged liner makes your eyes look more sultry.

I also used the Dolly Wink liner as a bottom liner as well! I normally never line my lower lash line, but I decided to try it this time. Lining your bottom lash line is pretty self explanatory. I used lighter strokes so that the colour was not as dark as the top.

My friend, Pauline did a guest post for me and she is a big fan of doing the “straight line” liner look too! Read how she did hers here!

IMG_2274.JPG
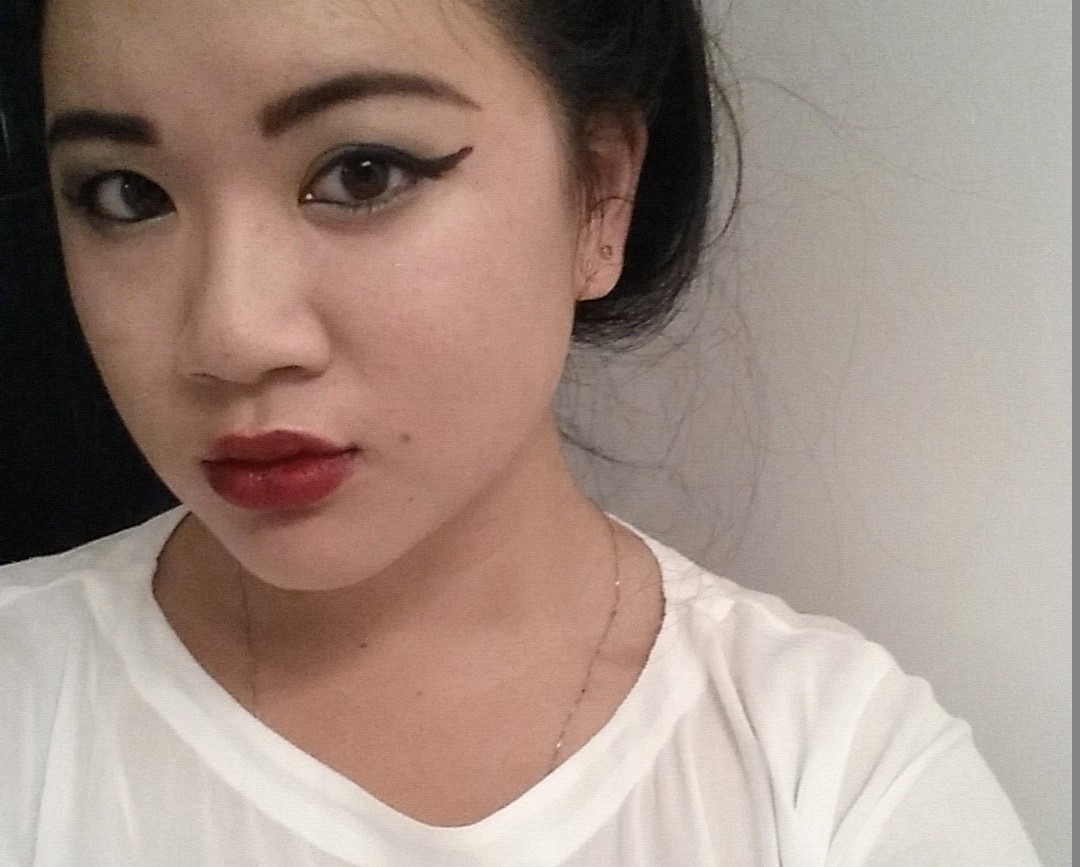
The Egyptian cat eye/under eye: 

This is another take on the classic wing, but with more drama and intensity 😉 Start by tight lining your eye, and then extend the wing out. The further you extend, the better! Egyptian makeup was all about a long, beautiful, and thick winged liner. After you have extended, go back and apply your liner over, so that the wing gets thicker.

Tips:
-Go back and ensure that the line you created is even
-Since this look is requires such thick eyeliner, it would look a bit odd if the thick liner suddenly started in the middle of your eye. Line your whole upper eyelid, including the corner =)
-If you’re a beginner, this may take a while to perfect but I believe in you! Practice makes perfect =)

As I was creating this look, I extended my wing so much and it felt so weird! I wasn’t sure if I would like the end result or not, but I really do! I probably would save this look for special occasions, because it’s too intense for me to wear on a daily basis.

I ended this look by lining my lower lash line as well! This time, I lined my lower lash starting from the inner corner, and used a bit more at the outer corner so that it would connect with the top line.

rach5

Speaking of Egyptian cat eye, my other friend Rachel, also wrote a guest post on a Cleopatra inspired makeup look! I love how intense her wing is!

Which one of these would you rather try? Or maybe both?!

Thanks for reading!

-Carmen


Filed Under: eyes, makeup Tagged: asian cosmetics, beauty, beauty guru, cosmetics, dolly wink, eye, eye liner, eye tricks, eyeliner, eyes, makeup, makeup guru, motd, potd

Marc Jacobs Highliner Gel Eye Crayon

January 6, 2015

Hi everyone!

After buying Sephora’s Draw the Line 2014 set and using most of the products for two months now, I decided it was finally time to talk about them! One of the products included in this year’s set was the Marc Jacob’s Highliner gel eye crayon, which retails for $30 Canadian (full sized product) at Sephora. The set only included the sample size, which was half the size of the full but I still thought it was a good deal with the set!

Marc Jacobs eyeliner

Funny story, I wasn’t actually planning on using this until I had finished one of the other pencil liners in the set. Of course, I accidentally misplaced that one somewhere and the rest of the pencil liners I had weren’t that great, so I decided on opening this one.

It seems like gel liners are all the rage right now, and for great reason too! I remember the first time I tried gel liner, it was one of the gel pots from MAC back in high school. Ever since then, I’ve loved gel liners for how smooth it glides on your eyelid and the intensity of the colour. Gel liners are  more pigmented due to the way that it is formulated.
marc-jacobs-sephora-makeup-collection-2013-07

Combining the gel and crayon eyeliner into one, the Marc Jacobs highliner was born!

I can’t think of a single negative thing about this product except for the cost, maybe. At first use, I loved how smooth and easy it was to apply, and how pigmented and intense the colour was. It also does not smudge the whole day and night, and is waterproof.

In fact, this eyeliner is all that I’ve been using lately since it seems I’m always in a rush in the mornings now. It takes me 15 seconds to quickly tight line my eyes, and what results is an intense and striking black that lasts all day! Any makeup product that is easy and fast to apply, and long lasting, is good to me.

Marc Jacobs

One thing I don’t like about pencil products is having to look for my sharpener. This product comes with a built in sharpener so you don’t have to worry about it becoming dull. It also comes with a twist up bottom!

I’ve also been looking for a replacement gold liner since my favourite gold shade of the Sephora + Pantone has been discontinued (how sad), I might give the champagne shade a try next time I’m in Sephora. But at $30 a pop, it does not come cheap =( However, I’ve come to realize that I much prefer high quality eyeliners that are worth the investment, than a cheap one which smudges or does not last the whole day- the annoyance and retouching up is not worth it. Which means I need to carefully manage my money (aka no more useless sugary drinks or random snacks)!

What are your thoughts on gel liner? Have you tried the Marc Jacobs highliner before and what did you think of it?

Thanks for reading!
-Carmen


Filed Under: eyes, face, makeup Tagged: beauty, beauty blogger, beauty guru, beauty review, eyeliner, eyeliner looks, eyes, gel liner, liner, liquid liner, makeup, makeup blogger, makeup guru, marc jacobs, motd, sephora

Urban Decay Naked 2 Palette

June 14, 2014

I love my Urban Decay products.  I was introduced to the UD Primer Potion in Grade 9, and have been loving their products ever since, from their 24 hour liquid liner, to the Naked Skin foundation (review here), and finally, their Naked palettes.

So far, UD has launched 3 Naked palettes which have all seen insane reception from the beauty community. Whenever they announce a release, Youtube blows up with beauty gurus reviewing the product. For good reasons too, this is one of my beloved eye palettes! I have Naked 2 and Naked 3, but like the Naked 2 more because of the shades!

photo 3 (3)Simple packaging of the product. The physical palette is pretty sturdy, you can throw this into your bag without damaging the product. I brought the Naked 3 for my trip to Disneyland back in January, and it lasted fine all throughout moving around from my luggage to the hotel room and what not. I’ve noticed that some cheaper eyeshadow will fall out if moved around or dropped, but not the “case” for this.
photo 4 (3)Ahhhh…the beautiful shades. You can tell which shades I love using more than others. When it comes to eye shadow, I only wear champagne or golden tones. I used to wear purple a lot, but bright colours haven’t really been in style anymore and I love how champagne colours make my eyes look brighter and whiter.
Application: The brush that the palette comes with is really good as well. It is called the Good Karma shadow brush and is double ended, with both a shadow and crease brush. The shadow brush is used for general application, while the crease brush is used to add dimension (to your outer or inner corners of your eye, for example).
Long lasting?: I always use my UD Primer Potion with my eye shadow. If I don’t, my eye shadow will crease within an hour and it will fade away. With the primer, my eyeshadow will last at least 6 hours with no touch up, which is good considering I have oily skin. I’ve worn this to work, and even if I sweat or run around cause it’s a busy shift, my eye shadow looks untouched or unsmudged with the primer. For the sake of the review, I did not wear the primer tonight. I noticed that after four hours, the eye shadow was pretty much gone. I would highly recommend using a primer, or have the kit with you to touch up.

Value: Naked 2 at Sephora is $62 Canadian. Naked and Naked 3 are the same price as well. It just depends on which shades you like. Considering the quality and colour of the palette, I would say that it’s a good investment as the palette is very versatile and durable!

Pros:

  • Beautiful range of shades!!! (ranging from neutral to dramatic looks)
  • Can experiment with many different colours to create a look that you love
  • Comes with a their Good Karma shadow and crease brush & mirror
  • Easy to carry on-the-go
  • Comes with 4 samples of their different primers
  • No fall out!! (major pet peeve of mine, urgh)

Cons:

  • It is $62, so it is definitely an investment
  • Lasts longer with primer potion (I suggest the UD Primer Potion, as you can sweat a lot but it’ll still hold up)
  • Would not recommend if you do not like sparkly eye shadows or shades (Naked and Naked 3 have different shades than the 2)

Up next: Maybe the Urban Decay Primer Potion or Naked 3? Which one would you like? Thanks for reading!

-Carmen


Filed Under: eyes, makeup Tagged: beauty, beauty guru, beauty review, bloglovin, dove, eyes, eyeshadow, girly, glam, glamour, gold, LUSH, makeup, makeup review, naked2, naked3, OPI, pintrest, tumblr, urban decay, wordpress, wordpress blog

Too Faced 3 Way Lash Lining Tool

June 6, 2014

I haven’t done a makeup review for awhile now, eh? Currently, most of my days have been spent at school or studying at home, where I don’t even bother wearing makeup anymore. But I have missed writing about makeup so I decided to quickly put some on and write this post as a study break.

The Too Faced 3 way lash lining tool is not like your typical liquid eyeliner, as you’ll find out below. This eyeliner came in the Sephora “glitz and glam bag” set that my cousin gave me during Christmas. It sells for around $28 CA by itself. I’m not sure if the one I have is the full size, since the gift basket did come with a few sample products.
image (7)I used my pen just to show the size comparison. I really like the branding and packaging of Too Faced products, especially the type of writing style they gave.

Anyways, the first few times I used this product, I was very confused because I’ve never seen anything like it before. In contrast to a normal liquid eyeliner brush with one tip, this brush has a triple tip. 
image (5)The triple tip brush serves a couple of purposes. Firstly, it allows you to “dot” your eyeliner across the root of your lash line, making your lashes look fuller. I suppose you can do this with a normal tip eyeliner brush (my L’oreal one seen on the right), but it would take longer, and the normal brush tip might be looser/softer or thicker, which will give away the illusion of your “natural” thick eye lashes.

Secondly, the triple tip allows you to tight line better. I find that since the tip brush is flatter, as opposed to the rounder ones, you have an easier time when tight lining your eyes. Thirdly, it claims to give you an easier cat eye and winged look, but I don’t really see much difference in that arena.


Here, since I suck at explaining, I took a picture.
UntitledAs I mentioned above, notice how the brush tip is parallel to my eye lid. To achieve a nice, smooth, and even line, make sure that your brush is parallel to your lid. For normal eyeliners, it doesn’t really matter which way you angle your brush, but for this one, it matters! 🙂
UntitledjThe brush tip in this picture is not parallel to my eyelid. So, when I draw the line, you will see the three dots of the eyeliner vertically which is what you do not want! It will also be harder for you to wing your eyeliner if you hold the pen this way. Also, if you’re wondering, I am wearing this Too Faced eyeliner in the two pictures.

Pros:
-Easy to create a natural looking and full lash line without the appearance of eyeliner
-Easy to tight line due to the flatness and width of the brush
-Goes on smooth and longlasting

Cons:
-Will take a bit of time to adjust, and find the right angle
-The angle of the brush matters when applying, unlike other eyeliners
-If you are not a fan of tight lining your eyeliner, stick with other products
-Expensive

Would I recommend this product? For $28, I would not suggest buying this product if you do not like the natural “no makeup, makeup” look. It’s a good eyeliner if you want it to look natural.  If you like your eyeliner dramatic and noticeable, you’re better off buying other liners with a better value.

I would not use this eyeliner for a fancy, dress up event because it’s very subtle. Yes, I can create dramatic eye looks with this as well, but since the purpose is to create a natural looking full lash, what is the point of spending $28 when I can do the same thing with a brush that costs less and is thicker? I hope you enjoyed the review and found it helpful!

-Carmen


Filed Under: eyes, makeup Tagged: beauty, beauty review, benefit cosmetics, ELF, eye lashes, eye liner, eyes, face, first impressions, fuller eyelashes, lashes, MAC, make up review, makeup, makeup products, sephora, too faced, too faced cosmetics

Hello!

Hi and welcome to Curiously Carmen! I am Carmen, the girl behind the blog. You can read more about me here!

Recent Posts

  • H&P Noodle House Burnaby
  • Travel: Harry Potter Studio Tour (Watford, UK)
  • Travel: The Resident Soho Hotel, London UK
  • North Noodle House
  • Grand Crystal Seafood Restaurant

Subscribe to Blog via Email

Enter your email address to subscribe to this blog and receive notifications of new posts by email.

Partnerships

View my food journey on Zomato!

Archives

Theme Design By Studio Mommy · Copyright © 2025

Copyright © 2025 · Young Blush Theme on Genesis Framework · WordPress · Log in