• About / Contact
  • Work With Me
  • Food & Drink
    • asian —>
      • chinese
      • indian
      • japanese
      • korean
      • malaysian
      • taiwanese
      • thai
      • vietnamese
    • brunch
    • coffee and tea
    • dessert
    • fusion
    • happy hour
    • italian
    • greek
    • mexican
    • pub
    • seafood
    • steakhouse
    • vegetarian/vegan
    • western
  • Travel
    • Canada ->
      • Kelowna
      • Sunshine Coast
      • Victoria
    • Japan ->
      • Himeji
      • Kamakura
      • Kobe
      • Kyoto
      • Osaka
      • Tokyo
    • Mexico ->
      • Cancun
      • Isla Mujeres
      • Playa Del Carmen
    • USA ->
      • Las Vegas
      • Los Angeles
      • New York City
      • Seattle
    • Europe ->
      • London
  • Beauty
    • beauty events
    • body
    • eyes
    • face
    • costumes
    • hair
    • lips
    • nails
    • skincare

Curiously Carmen

Too Faced Melted Liquified Long Wear Lipstick

October 5, 2014

The beauty world has been abuzz with Too Faced’s Melted Liquified Long Wear Lipstick, which triples as a lipstick, lipgloss, and lipstain all in one. After reading and watching many reviews, I really wanted to find more info and try it out! Plus, I’ve been searching for a fall lipstick colour and I really loved the shades that Too Faced had on this line.

Unfortunately, this lipstick didn’t work out for me but I will give it a second chance. Really disappointing since I was almost in love with it- there was just a tiny problem that was driving me crazy!
unnamed (8)
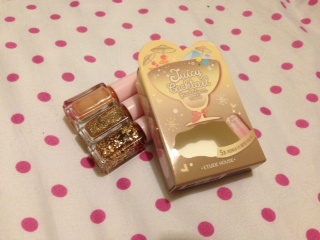
With tax, this tube came to $27 (Canadian) at Sephora when I bought it last week. Probably the most I have paid for a lip product, but I had really high hopes for this one and did not mind the investment! The packaging itself was pretty sturdy, it wasn’t flimsy at all.

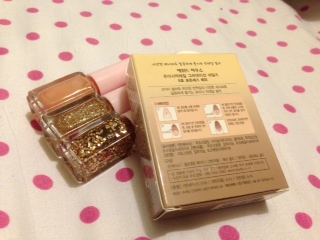
I also loved how the packaging of each shade matched the box and tube, there are products out there where you are unable to tell unless you open it up. Since I was looking for a deep and rich shade for fall, I chose melted berry.
unnamed (9)Almost all the reviews I watched and read noted the different application tip, and I really do think it’s worth mentioning! This product features a soft velvet precision tip applicator, which felt very nice on my lip. Since the applicator has a fabric, velvety material on it, the lip product comes out slower as it absorbs through the material first.

There is a small hole in the center of the velvet applicator where the product comes out of, and then spreads out as you apply it on your lip. It reminded me of those mini sponge-y eyeshadow brushesย ย that are seen at the Sephora makeup testing stations, but thicker.

unnamed (12)

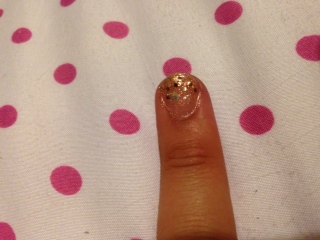
Funny story, when I first applied the product, I completely under estimated how much I would need. Seriously, a little goes a longggg way with this product, which is good considering it cost $27 ๐Ÿ™‚ I ended up accidentally smudging it all over my chin as I tried to get the excess off, except that it wouldn’t come off and ended up spreading even more!

That was a sign at how long lasting this product is, but it was definitely embarrassing as my boyfriend just stared confusingly at me and said “you have lipstick all over your chin….” Sigh… I finally ended up using makeup remover to get rid of it on my chin.

Anyways, I was in love with the shade at first glance and Too Faced lived up to its words, describing this lip product as “intensely saturated colour”. It was extremely vibrant, noticeable, and will definitely make your lips PoP! It glided really easy too, and the precision tip was very helpful for lining my lips.
I originally wasn’t planning on doing a before and after, but I remembered that I took pictures on my phone on the way to Sephora (I was not the one driving and we were stuck in traffic, also this was the second time I wore my coloured contacts so I wanted to see how they turned out in pictures okay, don’t judge me).

Side note, I did a review on these coloured contacts if you would like to read it! ๐Ÿ™‚
Too-Faced-Melted-SwatcheslBUT THIS LIPSTICK IS PERFECT – SHADE, INTENSITY, LONG LASTING. WHAT COULD BE WRONG WITH IT? (Warning- mini angry rant ahead)

I applied this right after I purchased it. When I got back in the car, I noticed that I got some of it on my phone. I thought it was weird since I used makeup remover at Sephora on my chin and hands, but shrugged it off. I’ve read reviews that this has stayed on through drinking and eating, so I decided to eat dinner with this on and test it out.

Then, I noticed that it got on my utensils, which is fair. As I was happily munching on my noodles, I noticed a glop of the product in my noodle soup and on the noodles. It was pretty gross as I’ve never seen product fall off into a glop onto my noodles, and lost a bit of my appetite. I understand if it’s on your utensils and straws, but I’ve never experienced it in my actual food.

In addition,ย I had also bought some new novels, and was reading one of them as I ate. I noticed that there was lip stain smudge on my page… How did it get there?! My hands were definitely clean and wiped. (You can see it on the top right hand corner, and also on the first line, on “of my”)
unnamed (13)After eating, I went to the washroom, and noticed again that the product was on the toliet lid (Sorry for TMI). ?!?!?!How did it get there too?! I didn’t even touch the lid… At this point, I was getting a tiny bit annoyed as the lipstick had transferred to my phone, noodle soup, my book, and the toliet seat in less than 40 minutes.

THEN, after wiping off the seat, I went to the sink AND THE COLOUR WAS IN THE SINK TOO. I didn’t use the washroom sink prior to this, I’m not even remotely sure how the colour got there! At this point, I gave up and didn’t want this product on my face anymore (Well, not like it was staying on my face to begin with…). ย I used a cotton pad to wipe it off, but it would not come off.

Frustrated, I ended up using makeup remover on my lip (well, that’s a first!) and of course, it smudged to my face and took a long time to scrub off. I decided that this product was not worth the hassle. I wouldn’t be as frustrated as I was, but I was 105% certain that my hands were free from any leftover product residue so I’m not sure what kind of lipstick-magic-wizard-sorcery was going on here. Also, why was it so easy to get everywhere but so hard to remove?! =(ย 
0777

Phew! So, in conclusion, the beautiful shades, precision, and vibrancy of this product is unarguable. So is the long lasting part, as I was having trouble wiping it off without makeup remover. I’m just not sure how it managed to get into my noodle soup in glops, on my novel, the toilet seat, and sink when my hands were 100% wiped and free of any residue. I’m also still technically a student (although I have an internship right now, that money is going straight to my student loans), and can’t justify paying $27 right now for such a confusingly messy product. I guess there’s always that one person who doesn’t have a great experience with it, unfortunately, that was moi ๐Ÿ™ I’ll probably give this product a second chance before exchanging since everyone loves it.

Am I the only one with this problem? Have you tried this product out as well?ย 

Thanks for reading! Would love to hear back from you, leave me a comment! ๐Ÿ™‚

-Carmen


Filed Under: lips, makeup Tagged: beauty, beauty advice, beauty blog, beauty community, beauty favourites, beauty guru, beauty product, disappointing, face, fotd, lipgloss, lips, lipstain, lipstick, makeup, makeup review, makeup routine, product, regret, sephora, too faced

Etude House- gradient nail trio

July 17, 2014

The full name of this nail polish is actually Etude House Juicy Cocktail Graduation Nails, but that seemed like too long of a name to

include in my title. The name also doesn’t really make sense, but oh well ๐Ÿ™‚ I was over at my friend’s house, and loved the gradient and golden shimmer on her nails. She told me that her aunt got the set for her in Hong Kong, and let me use it as well. The nail polish set comes with three shades, which you are supposed to use in a specific order for the desired gradient effect.
photo 1The nail polish themselves are smaller in size than your typical drugstore nail polishes. After browsing on Amazon, I found that the average price of one set is around $3-10 dollars. The relatively large price window was very surprising to me!

I also came across a review from Youtube beauty guru FromHeadToToe, who had the same set but in different shades. I have attached her picture here because it explains a lot better.
EtudeHouseGradationPeachCrush4Straightforward enough, you start with the translucent polish all over your nail. You can choose to use more than one coat, I used two coats for mine and I will attach a picture of my own nails down below.

After it dries, you apply the second polish, which has glitter to half of your nail – from the tip to the middle, not the base. From there, the third polish is applied which has bigger glitter particles, giving it a beautiful gradient!
photo 2There are also instructions on the back as well (written in Korean but with straightforward pictures).
photo 4Unfortunately, I was only able to wear my nails for one day as I had to work the next day. I work part-time at a coffee shop, where we are not allowed to wear nail polish due to health reasons. This is both good and bad. The good is that I have saved a lot of my money by not buying copious amounts of nail polish.

The bad part, of course, is that I love painted nails and that I miss being able to paint them whenever I want! I apologize for the blurry picture, I was in a hurry to work and quickly snapped this picture. I was having a hard time removing the glitter off my nails. I have yet to find an easy way to remove glitter, if anyone has a solution PLEASE let me know! I know you can wrap your fingers in foil and let it soak but I don’t have the patience to cut up the foil, soak my nails, etc etc etc.
photo 3A better, less blurry picture of my nail. I showed this picture to my best friend and she thought my finger was swollen. No, my nail naturally looks like that,I don’t have “lady-like” ย long, slender, and beautiful fingers :(.

Anyways, since I didn’t get to wear this for as long as I hoped (3+ days at least!), I wasn’t able to test how long lasting it was. One thing that I really liked about the nail polish was that it gave my nails a good healthy and natural shine. My nails also looked thicker and healthier with this on, kinda like gel nails but that might have been the top coat I used from my friend. I am hoping to try this polish out again in the upcoming months so I will post an updated review to this current post when I do!
55119

I also found this awesome compilation online of all their various sets! I used the one in the middle, first one on the left. I really like peachy and pink sets in the first row! What about you?

Pros:

  • Love the shade and idea of this!
  • Don’t have to waste time finding three separate nail polishes that will blend well together
  • Gives your nail a healthy shine
  • Many beautiful colours to choose from

Cons:

  • Small nail polish set
  • Glitter was hard to remove (But then again, all glitter polish is difficult to remove)
  • Can’t buy this in Western drug stores or Sephora, best bet is online or in Asia

Update: I wore this nail polish for four days again the week after writing this draft. Most of the polish had chipped off, except for the glittery tips. I noticed that my nails began to chip the second day. After going swimming on the third day, more than half the polish had chipped ๐Ÿ™ But overall, not too bad! I also didn’t wear a top coat, which probably would have helped!

That’s it to this review! Happy painting everyone!
-Carmen


Filed Under: body, makeup, nails Tagged: asian, asian beauty, asian makeup, beauty, beauty blogger, beauty review, beauty routine, etude house, korean, korean makeup, makeup, makeup blogger, makeup review, makeup routine, manicure, nail design, nail polish, nail routine

June 2014 Favourites!

July 9, 2014

Hello everyone! This is my first time doing a round-up with the Canadian Beauty Blogger network. I am very excited to join this community, everyone is so talented and passionate about beauty products and I hope to bring something to the table as well. I look forward to reading everyone’s posts! Leave me a comment and say hi, I won’t bite ๐Ÿ™‚

june favBurt’s Bees lip gloss: I bought this lip gloss due to my search for a lip gloss with natural ingredients. I have been more conscious about what lip products I use, because we directly consume lip product ingredients into our bodies and I would like to minimize the amount of harmful products I consume. I picked this up at London Drugs, and it was around $8. I like how the shade looks on my skin tone, and how non-sticky it is. I haven’t really bought many Burt’s Bees products in the past, but after trying this, I will be looking into more! If you know any lip products that are made with natural ingredients, please let me know!

The Face Shop “Face it” ย Oil Cut Pore Balm: I did a separate post on my mini haul from The Face Shop. I use this as a primer in my daily makeup routine, replacing my Benefit Porefessional. I won’t go into too much detail here since I raved about it in a previous post, but I do love this product very much and I’m glad that I found it!

Seahorse crop top: I have never worn crop tops until the past month. I was not comfortable with exposing my navel area, even though my friends have told me that I have a nice belly button which I should take advantage of (?? LOL weird I know). Anyways, on a recent shopping trip, I finally found the perfect summer maxi skirt. I am only 5″2 (5″3 would be pushing it haha), so I either have to cut my maxi skirt to avoid tripping everywhere, or pull it a bit higher. I chose the latter, which finally gave me the opportunity to buy crop tops without feeling super exposed! I absolutely love the seahorse pattern of this crop top, and how loose-fitting and comfortable it is. My maxi skirt and this top will definitely be a Summer staple this year!

London fogs: I am addicted to the Starbuck’s earl grey tea latte, which is the same as a London Fog. The thing that stands out for me with Tazo’s earl grey is the lavender taste. The lavender creates a more rounded and fragrant taste. Last month, I decided to try making my own lattes so that I didn’t have to spend money or waste time going to Starbucks every morning. I bought their vanilla syrup and a milk frother, and haven’t looked back since! The lattes I make at home taste identical to the earl grey tea lattes I buy at Starbucks ๐Ÿ™‚ In fact, I am drinking one right now as I type this!

Lush herbalism cleanser: I got a sample of the herbalism cleanser from Lush back in May, and at first, I did not like it because it came in a clay form. You have to break off a bit and wet it with water before cleaning, which was a bit annoying to apply on my skin afterwards. But after two weeks of use (and patience), I noticed that my skin improved and I wasn’t breaking out as much anymore. My skin also became super soft and felt really smooth. I will probably do a separate post on this product because I love it now! I’m glad I gave it a few chances ๐Ÿ™‚

Well, that’s it for my June favourites! I hope you enjoyed this post and would love to hear your opinion about these products!

Check out Canadian Beauty Bloggers here!

-Carmen


Filed Under: eyes, face, lips, makeup Tagged: beauty favorites, beauty favourites, beauty guru, beauty routine, crop top, earl grey tea, face wash, lip gloss, makeup, makeup favorites, makeup favourites, makeup routine, soy milk, summer, summer favorites, summer favourites

E.L.F. Studio Eyebrow Kit

July 3, 2014

Since my last beauty post, I have promised a drugstore product because I realize I haven’t done much of those. The elf studio eyebrow kit is my favourite eyebrow tool and brow makeup to use. I love how it is super easy to apply, how long lasting it is, and how natural the colour looks on me. I’ve been using this kit for the past eight months everyday, and just recently ran out.

Unfortunately, I live in Canada where we do not sell elf products in drugstores, so I usually stock up when I visit the US (US Targets or Wal-Marts sell them for cheap!) or ask my friend to kindly order them online for me!
photo 1 (8)

Simple packaging of the product. The packaging is very sturdy, I’ve dropped it a few times on tile floor but it did not shatter. The left side is the pigmented wax, which kind of gives off a gel-like texture. The lighter shade on the right is the powder, which sets the eyebrow colour. For me personally, I never used the right side since it was too light on my skin. I only used the pigmented wax.
photo 2 (8)It comes with a small angle and eyeshadow brush, along with a mirror. For $5, this is a really good deal and you get a lot more than what you pay for. The angle brush helps you to colour in your eyebrows with more precision. I normally just use the angle brush from this kit. I know that some people are a bit nervous to use a brush and stick with eyebrow pencils, but to be honest, the application process is tremendously easy.
photo 3 (6)Yep… as I mentioned earlier, I just recently finished my first kit. Looks a bit gross, eh? Oh well. I am pretty surprised that it lasted me this long since I use this every single day.

Anyways, since I use this eyebrow kit daily, I’ll just attach a few random photos from the past few months when wearing this. I think that the shade is suitable for my skin and like that it’s not too harsh of a colour, what do you think?
image (34)Random picture #1:ย This picture taken from my Face Shop mini haul post!
photo (5)Another random picture from last month…Yes I know my hair is a mess, it was very windy that day in my city and we were by the water ๐Ÿ™‚ Also, say hi to Polka the cat again!
photo (4)Taken in Disneyland back in January ๐Ÿ™‚

I hope you enjoyed the post, thanks for reading! Comments make my day, and I would really appreciate your support! ๐Ÿ™‚
-Carmen


Filed Under: eyes, face, makeup Tagged: beauty, beauty blogger, beauty review, daily makeup, ELF, eyebrow, eyebrow routine, lifestyle blog, makeup, makeup review, makeup routine

Hello!

Hi and welcome to Curiously Carmen! I am Carmen, the girl behind the blog. You can read more about me here!

Recent Posts

  • H&P Noodle House Burnaby
  • Travel: Harry Potter Studio Tour (Watford, UK)
  • Travel: The Resident Soho Hotel, London UK
  • North Noodle House
  • Grand Crystal Seafood Restaurant

Subscribe to Blog via Email

Enter your email address to subscribe to this blog and receive notifications of new posts by email.

Partnerships

View my food journey on Zomato!

Archives

Theme Design By Studio Mommy · Copyright © 2025

Copyright © 2025 ยท Young Blush Theme on Genesis Framework ยท WordPress ยท Log in