• About / Contact
  • Work With Me
  • Food & Drink
    • asian —>
      • chinese
      • indian
      • japanese
      • korean
      • malaysian
      • taiwanese
      • thai
      • vietnamese
    • brunch
    • coffee and tea
    • dessert
    • fusion
    • happy hour
    • italian
    • greek
    • mexican
    • pub
    • seafood
    • steakhouse
    • vegetarian/vegan
    • western
  • Travel
    • Canada ->
      • Kelowna
      • Sunshine Coast
      • Victoria
    • Japan ->
      • Himeji
      • Kamakura
      • Kobe
      • Kyoto
      • Osaka
      • Tokyo
    • Mexico ->
      • Cancun
      • Isla Mujeres
      • Playa Del Carmen
    • USA ->
      • Las Vegas
      • Los Angeles
      • New York City
      • Seattle
    • Europe ->
      • London
  • Beauty
    • beauty events
    • body
    • eyes
    • face
    • costumes
    • hair
    • lips
    • nails
    • skincare

Curiously Carmen

Estee Lauder Perfectionist Foundation Review

September 10, 2014

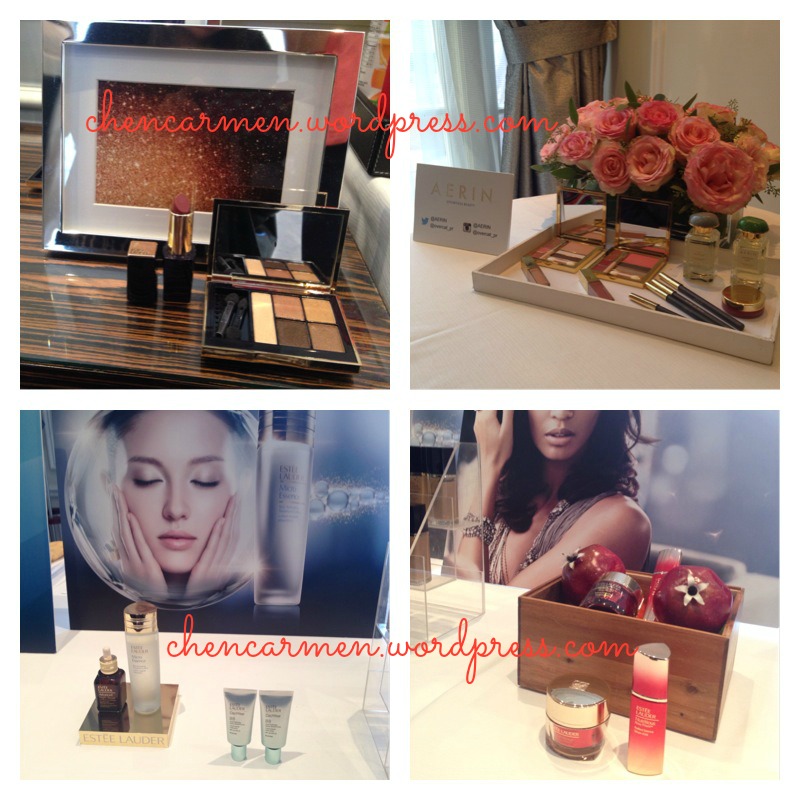
One of the products I received from the Estee Lauder Fall/Winter 2014 Media Preview was their perfectionist, youth infusing foundation. I mentioned this briefly in my media preview post, but I finally had the opportunity to try it out.

Honestly, the name “youth infusing” sounds a bit strange to me. In my opinion, I don’t think maturing skin is anything to be ashamed about. There is nothing wrong with aging- it is a natural process, and I think it’s beautiful, as it is a part of human life. Just because someone is sixty years old, I don’t think that it makes them less beautiful than a 20 year old.  I do know that they are referring to the skin’s physical appearance, but there is a  beauty and art in wisdom too.
photo 1Wow sorry, I definitely did not mean to go off on a tangent about maturing skin! Do you agree though?

What it claims:

  • This foundation contains Estee Lauder’s best selling perfectionist [cp+r] serume, which helps to repair the looks of lines and wrinkles, makes skin looking more radiant, glowing, and noticeably younger
  • The advanced optical ingredients softly highlights and defines to enhance facial features which will brighten skin
  • Contains priming beads which instantly fill lines and blurs imperfections to create flawless looking skin
  • Is lightweight, ultra comfortable with a satin-finish, so skin feels luxuriously soft to the touch

photo 3 (1)
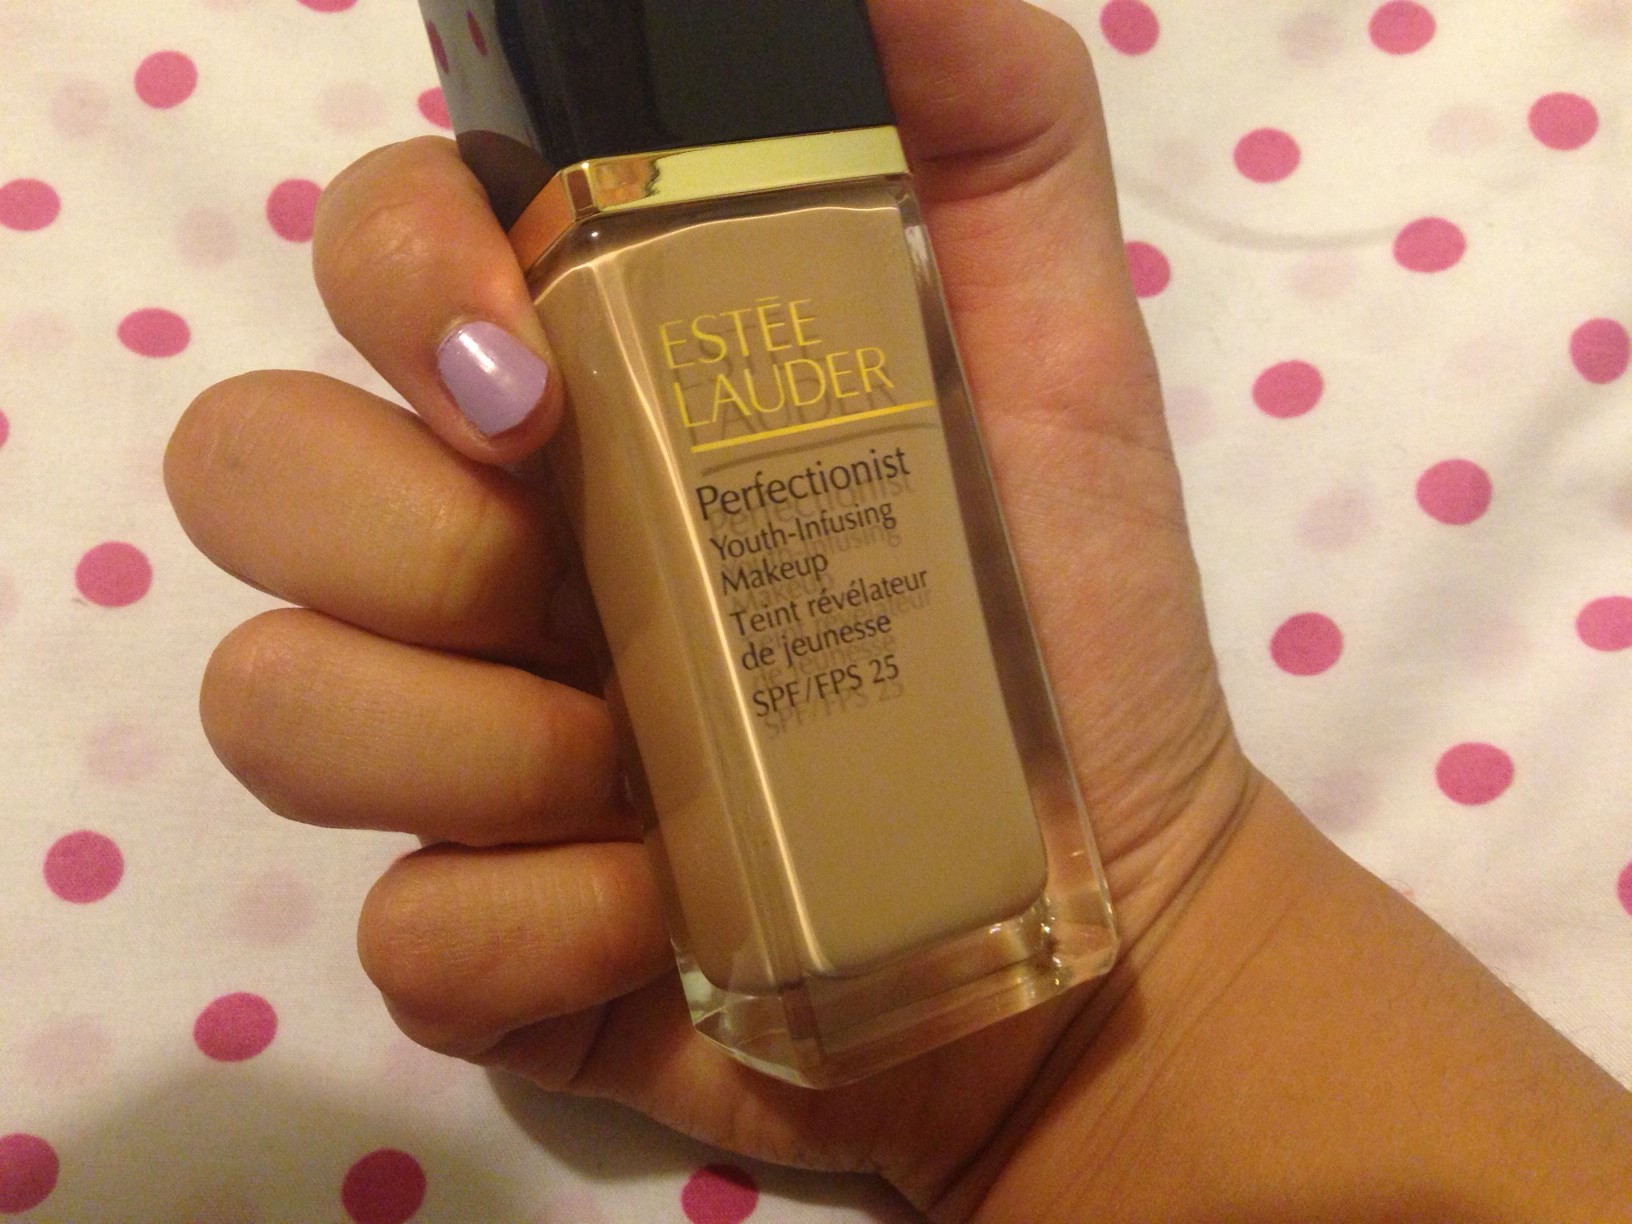
Since I received this as a gift, I was unable to select my shade. I received the shade “fresco”, number 2C3. Fortunately, this shade was suitable for me and did not make me look unnaturally dark or too pale! The foundation also contains their IntuiTone pigment technology, which guarantees true-to-life shade matching by working with skin’s natural undertones, so that might be part of why the shade matched so well right away. This retails for $50 CA.

Application: I used two pumps of this foundation on my face, and blended it with my brush. Immediately, I noticed that the foundation felt very lightweight, as it claimed to do. Since it does have a lightweight feel, I found that the coverage was lighter than I liked. Normally, I wear medium-heavy coverage but I would say this is a light coverage.

I considered applying a different foundation on top to see how well it blended, but I decided that I rather see how much lasting power this has throughout the night.  My face felt pretty smooth and non sticky after this foundation. Another thing that I liked about this foundation was that it had no chemical or harsh scent. I’ve bought a few foundations that have a weird chemical scent, which is a bit off putting.
photoHere is the finished product! I have on the foundation, with light bronzer and blush. What do you think? I thought that for a lightweight, light coverage foundation, this foundation did the job pretty well. I really liked the feel of it on my skin.

Lasting: I wore this foundation for around four hours. I was planning on going to an event that night, but a couple of things happened and I didn’t end up going. For the time I did wear this foundation, I found that my appearance did not become dull. It was also very easy to wash off, which I appreciated.
photo 2

Pros:

  • Lightweight formula makes it very comfortable to wear!
  • Makes skin appear radiant and softer, would recommend using this foundation if you know you’ll be taking many pictures cause your skin will look very smooth and healthy 🙂
  • For a light coverage foundation, it covered my imperfections/scars/etc amazingly well 
  • Very easy to blend and remove
  • Includes a IntuiTone pigment technology that guarantees true to life shade matching by working with skin’s natural undertones
  • Includes SPF 25

Cons:

  • Very sturdy packaging, but the glass bottle means that you will have to be careful not to drop this
  • Directed more towards a more mature consumer, as this foundation focuses a lot on blurring fine lines and wrinkles

Bottom line, I do really enjoy this foundation mainly due to how lightweight it feels, but covers my imperfections very well. It also made my skin appear more radiant, smooth, and soft!

What are your thoughts on this foundation? Do you prefer light/medium/or full coverage foundation? I would love to hear your comments!

Yay!

Sample provided for review. Opinions are own.

Thanks for reading!
-Carmen


Filed Under: face, makeup Tagged: aging, beauty guru, beauty review, beauty talk, estee lauder, fine lines, foundation, makeup, makeup review, prevent aging, sephora, skin serum, SPF, UK beauty, wrinkles

Estee Lauder Fall/Winter 2014 Media Preview Event (Part 1/2!)

September 1, 2014

Hi readers!

Two weeks ago, I was invited to Estee Lauder’s Fall/Winter 2014 Media Preview Event. It was a lovely afternoon spent learning many new facts about the Estee Lauder brand and meeting other people with the same passion for beauty!

This two-part post is going to be more focused on the event itself rather than a review of all the products. I will try to write reviews of the complementary products that I received in the coming months!

There were staff from Estee Lauder, as well as the PR company that invited me to attend this event. Staff from both parties were really welcoming and made us feel comfortable. In particular, I had a great conversation with the makeup artist on-site, Fiona! Props to great and kind service from both ends, I was very impressed.
photogrid_1409528231420We were first greeted by breakfast platters, and a variety of different drinks!
photo 1 (3)Some of the products Estee Lauder has lined up for the upcoming season! Our host told us that each one of those eyeshadow palettes were inspired by the pictures behind them. I really enjoyed all the shades and palettes that were there, as well as the packaging of the eyeshadows.

The palettes had either a lipstick or nail polish shade that complimented the colours in the palette. Furthermore, the lipstick packaging is actually magnetic, so no need to worry about not putting on the cap all the way by accident and ruining the whole tube.
photo 2 (2)
Moving on, the picture at the top left is a closeup of one of the new eyeshadow palettes. It was my favourite, since I loooove golden and champagne tones. At the top right, is a preview of a new line released by Estee Lauder called AERIN.

I believe it might be launched already by the time my post comes out, but the line is created by Estee Lauder’s granddaughter, Aerin Lauder. The AERIN line is more youthful, simple and neutral, as Aerin herself prefers simplistic makeup.

The bottom left picture shows the night repair lotion, day lotion, and BB cream. Last but not least, the one at the bottom right is their new cream, made with the natural antioxidant benefits of the lovely pomegrante fruit. Like the AERIN perfumes, it smelled absolutely lovely and was my guest’s favourite product that day.

Anyways, that’s it to the first part! The second part will include a revolutionary foundation brush, gold infused foundation, and a makeover! Keep posted and thanks for reading!

-Carmen


Filed Under: Uncategorized Tagged: beauty, beauty blogger, beauty guru, estee lauder, eye makeup, eyeshadow, face makeup, face routine, fashion, fashion blogger, foundation, makeup, makeup addict, makeup blogger, makeup lover, media preview, perfume

Lush Herbalism cleanser review

July 29, 2014

I talked about this briefly in my June 2014 favourites post , but I have been loving this cleanser so much lately that I just decided to write a completely separate post! Back in May, I picked up this sample while I was at my local Lush store with a friend. Initially, I didn’t like this product at all but it grew on me.

I hated the texture of it, how I had to add water to the mixture before applying it on my face, and how messy it was to use! But after a week of putting up with the messiness, I noticed that my skin tone improved and I wasn’t as oily if I used this product the day before. After carefully rationing my sample so that I could maximize the use (LOL we’re all guilty of that, don’t even lie! haha) and careful consideration (sadly I don’t make much money at my part time job and I’m on a student budget), I decided to purchase the full size a month later.
photo 2 (9)I believe I bought the 100 g pot, which was $14. I’m used to buying drug store cleansers, so this was pricier than I was used to. But since I tried it before, I knew that it would be worth the price!
**Read more: Lush Cosmetic Warrior fresh face mask **
photo (1)The texture of the cleanser was something I have not seen before. I took a closeup, because I’m not too sure how to describe it. It is a bit moist and flaky, and a tad bit grainy. I read on another review that you aren’t supposed to get this cleanser wet, or it can start to go bad since it contains natural ingredients.

However, I got my sample size pot wet by accident and I haven’t seen it go bad yet (had it for a bit over 2 months now).
photo 1 (9)Ingredients (as listed on site): Ground Almonds, Kaolin , Glycerine ,Chlorophyllin Water (Aqua) , Nettle, Rosemary, Rice Vinegar Extract, Rice Bran, Gardenia Extract, Rose Absolute,Chamomile Oil, Sage Oil, Fragrance | After reading the ingredients, it makes sense why there is a grainy texture to the cleanser- probably the ground almonds and/or rice bran. I love being able to read the ingredients list and know exactly what most of the ingredients are /how it is derived. 


Steps: As mentioned above, I initially hated the cleansing process with this cleanser. It comes in a moist-ish type of packed clay tub.
photo 3 (7)Step 1: Take a pea sized amount with your fingers, and put it in your palm.
photo 4 (6)Step 2: Take a dab of water and gently drop it into the cleanser, so that it resembles a traditional cleanser. This part can be a bit messy, so be sure to do it over the sink. Then, you transfer the mixture onto your skin and wash. Applying this onto your face can be messy too, as the watery liquid can possibly run down your arm or neck/ aka everywhere it was not meant to be.

Pros:
-Keeps skin oil free, does not over dry
-Controls breakouts really well; I use this more often when I feel my skin breaking out and it usually does a great job in combatting the breakouts or making them not as bad
-Leaves skin feeling very soft and smooth (it is a gentle exfoliant as well)
-I would recommend this if you have oily, acne-prone skin

Cons:
-Messy!!!
-May be hard to adjust to at first
-Pricier than drugstore cleansers
-Since it is made with natural ingredients, they suggest finishing the tub within three months of purchase incase they go bad
-Unpleasant, herbal, earthy smell

Thanks for reading! Leave me a comment and tell me what you think about this product!
-Carmen


Filed Under: body, face Tagged: american beauty, beauty, beauty blog, beauty blogger, beauty routine, canadian beauty, cosmetics, cosmetics review, face mask, LUSH, lush cosmetics, makeup, makeup blog, natural face mask, natural makeup, skincare, skincare routine, UK beauty

Backstreets Makeup Company Review (Handmade, vegan cosmetics)

July 28, 2014

Backstreets Makeup Company is founded by one woman, with a passion for makeup and creating her own vegan makeup products. Yep, you heard that right! April, the owner, actually hand makes each one of her products, where she then posts them on her website to sell at affordable prices.  I have never tried handmade, vegan eyeshadow products so I was quite excited to give these a try!

I wore the colours out once right after I received the products, but unfortunately, did not have time to take any pictures. I finally found the time again to play with these products last week, where my artist friend came up with two looks for me! My opinion will be based on the first time I wore the eyeshadows out, instead of the mini makeup session I had with my friend!
imageApril, the owner, was very nice and friendly. She even sent me a handwritten card when I received this in the mail. The packaging was very thoughtful as well, the makeup products came in two separate layers of recyclable bag. I can not comment on the turnaround time as we found out through our emails that we were actually neighbours! What a small world. But on the website, the TAT is 3-5 days.

Originally, I tried to use the makeup as is in the baggie, but it was very difficult and messy for me. I wasn’t able to get the amount of product I desired, and my table was becoming a powdered mess. I found those small, plastic medicine holders and unused contact lenses cases, and ended up transferring the products in the baggie. The beginning was quite messy as I moved from attempting to dip my brush into the baggie, to moving them into small compartments.
image (2)Yay! After moving them into these pods, they were WAYYY easier to work with! Please excuse the erm… visual appeal factor to the new compartments. But trust me, it really helped! The three pots are the full sized products which you can order. Each pot costs between $4-$5.

One of April’s goals when starting her own makeup creations was to make her products affordable, and I definitely think they are! You get a lot of quality product, and each pot comes with a sifter as well (you can request to not have one if you want). Here are the colours that I received, my first ever swatch!
swatch 2I noticed that some colours weren’t as glittery on my skin as in the eyeshadow packages. Which one is your favourite colour? 🙂

swatch 1As I said in the beginning, my friend wanted to play with makeup and we decided to create two looks with these products, since we had such a wonderful range of colours to work from! I’m glad I did, because I felt that the “love” and “golden pie” colours were too dramatic for me, but they actually turned out pretty neutral when she applied it on my eyes!

The colours are really gorgeous, but I think you would need to apply a lot of each shade to match the colour it looks like in the pot. I also found that there was a lot of fall out, we ended up using an index card under my eye to catch it. It was very powdery as well, which made it very soft to apply on my eyes.

On the day that I wore it out, it lasted all night and the colour did not fade (I used eyeshadow primer too). I was pretty impressed with the staying power of this, and liked how the shades looked on my eyes! I would recommend this product if you are looking for an alternative to your usual, everyday eye products.

Pros:

  • Very soft and powdery texture
  • Vegan and hand blended by April, the owner
  • Not tested on animals
  • Colours are neutral and suitable for everyday wear
  • Does not wear off easily; wore the products on a night out and did not smudge
  • Affordable & cheap
  • Excellent response rate from April

Cons:

  • Fallout when applying
  • Can be hard to apply when the eyeshadows are in the baggie. I talked to April about this and she mentioned that some people actually prefer baggies, so maybe it’s just my own preference?
  • Colour in the pot and on your eye may look different

Check out Backstreets Makeup Company here! You can also follow their Instagram.  I would love to hear your opinions on this product, leave me a comment and let’s chat! 🙂 Thanks for reading!

The products in this post were sent to me free of charge from Backstreets Makeup Company, and I was not paid to write this post. Everything in this post is my personal opinion and was not altered by the request of the company. 

-Carmen


Filed Under: eyes, face, makeup Tagged: beauty blog, beauty blogger, beauty review, cruelty free, eye routine, eyeshadow, makeup, makeup review, makeup tutorial, vegan makeup

Etude House- gradient nail trio

July 17, 2014

The full name of this nail polish is actually Etude House Juicy Cocktail Graduation Nails, but that seemed like too long of a name to

include in my title. The name also doesn’t really make sense, but oh well 🙂 I was over at my friend’s house, and loved the gradient and golden shimmer on her nails. She told me that her aunt got the set for her in Hong Kong, and let me use it as well. The nail polish set comes with three shades, which you are supposed to use in a specific order for the desired gradient effect.
photo 1The nail polish themselves are smaller in size than your typical drugstore nail polishes. After browsing on Amazon, I found that the average price of one set is around $3-10 dollars. The relatively large price window was very surprising to me!

I also came across a review from Youtube beauty guru FromHeadToToe, who had the same set but in different shades. I have attached her picture here because it explains a lot better.
EtudeHouseGradationPeachCrush4Straightforward enough, you start with the translucent polish all over your nail. You can choose to use more than one coat, I used two coats for mine and I will attach a picture of my own nails down below.

After it dries, you apply the second polish, which has glitter to half of your nail – from the tip to the middle, not the base. From there, the third polish is applied which has bigger glitter particles, giving it a beautiful gradient!
photo 2There are also instructions on the back as well (written in Korean but with straightforward pictures).
photo 4Unfortunately, I was only able to wear my nails for one day as I had to work the next day. I work part-time at a coffee shop, where we are not allowed to wear nail polish due to health reasons. This is both good and bad. The good is that I have saved a lot of my money by not buying copious amounts of nail polish.

The bad part, of course, is that I love painted nails and that I miss being able to paint them whenever I want! I apologize for the blurry picture, I was in a hurry to work and quickly snapped this picture. I was having a hard time removing the glitter off my nails. I have yet to find an easy way to remove glitter, if anyone has a solution PLEASE let me know! I know you can wrap your fingers in foil and let it soak but I don’t have the patience to cut up the foil, soak my nails, etc etc etc.
photo 3A better, less blurry picture of my nail. I showed this picture to my best friend and she thought my finger was swollen. No, my nail naturally looks like that,I don’t have “lady-like”  long, slender, and beautiful fingers :(.

Anyways, since I didn’t get to wear this for as long as I hoped (3+ days at least!), I wasn’t able to test how long lasting it was. One thing that I really liked about the nail polish was that it gave my nails a good healthy and natural shine. My nails also looked thicker and healthier with this on, kinda like gel nails but that might have been the top coat I used from my friend. I am hoping to try this polish out again in the upcoming months so I will post an updated review to this current post when I do!
55119

I also found this awesome compilation online of all their various sets! I used the one in the middle, first one on the left. I really like peachy and pink sets in the first row! What about you?

Pros:

  • Love the shade and idea of this!
  • Don’t have to waste time finding three separate nail polishes that will blend well together
  • Gives your nail a healthy shine
  • Many beautiful colours to choose from

Cons:

  • Small nail polish set
  • Glitter was hard to remove (But then again, all glitter polish is difficult to remove)
  • Can’t buy this in Western drug stores or Sephora, best bet is online or in Asia

Update: I wore this nail polish for four days again the week after writing this draft. Most of the polish had chipped off, except for the glittery tips. I noticed that my nails began to chip the second day. After going swimming on the third day, more than half the polish had chipped 🙁 But overall, not too bad! I also didn’t wear a top coat, which probably would have helped!

That’s it to this review! Happy painting everyone!
-Carmen


Filed Under: body, makeup, nails Tagged: asian, asian beauty, asian makeup, beauty, beauty blogger, beauty review, beauty routine, etude house, korean, korean makeup, makeup, makeup blogger, makeup review, makeup routine, manicure, nail design, nail polish, nail routine

  • « Previous Page
  • 1
  • …
  • 7
  • 8
  • 9
  • 10
  • 11
  • Next Page »

Hello!

Hi and welcome to Curiously Carmen! I am Carmen, the girl behind the blog. You can read more about me here!

Recent Posts

  • H&P Noodle House Burnaby
  • Travel: Harry Potter Studio Tour (Watford, UK)
  • Travel: The Resident Soho Hotel, London UK
  • North Noodle House
  • Grand Crystal Seafood Restaurant

Subscribe to Blog via Email

Enter your email address to subscribe to this blog and receive notifications of new posts by email.

Partnerships

View my food journey on Zomato!

Archives

Theme Design By Studio Mommy · Copyright © 2025

Copyright © 2025 · Young Blush Theme on Genesis Framework · WordPress · Log in