• About / Contact
  • Work With Me
  • Food & Drink
    • asian —>
      • chinese
      • indian
      • japanese
      • korean
      • malaysian
      • taiwanese
      • thai
      • vietnamese
    • brunch
    • coffee and tea
    • dessert
    • fusion
    • happy hour
    • italian
    • greek
    • mexican
    • pub
    • seafood
    • steakhouse
    • vegetarian/vegan
    • western
  • Travel
    • Canada ->
      • Kelowna
      • Sunshine Coast
      • Victoria
    • Japan ->
      • Himeji
      • Kamakura
      • Kobe
      • Kyoto
      • Osaka
      • Tokyo
    • Mexico ->
      • Cancun
      • Isla Mujeres
      • Playa Del Carmen
    • USA ->
      • Las Vegas
      • Los Angeles
      • New York City
      • Seattle
    • Europe ->
      • London
  • Beauty
    • beauty events
    • body
    • eyes
    • face
    • costumes
    • hair
    • lips
    • nails
    • skincare

Curiously Carmen

Montagne Jeunesse Honey Manuka Peel-Off Mask (Part 3/3)

January 17, 2015

Hi guys!

My apologies that I haven’t written a post all week…I missed writing here so much (thank goodness for draft posts, bloggers will understand haha). This week has been hectic and I didn’t have any time or energy to write a coherent post.

I also have been working on my first ever giveaway (!!! Ahhh!) coming up soon, so be sure to check back on the details 😉

During the holiday break, I first introduced two Montagne Jeunesse masks on my blog, sent to me courtesy of Obssessed Canada. Today, I am finally going to talk about the last one of those masks that I received… turns out that I coincidentally saved the best one for last =P Well, in my opinion at least.. I liked this one the most out of all three, even though the other two were good as well.

Montagne Jeunesse

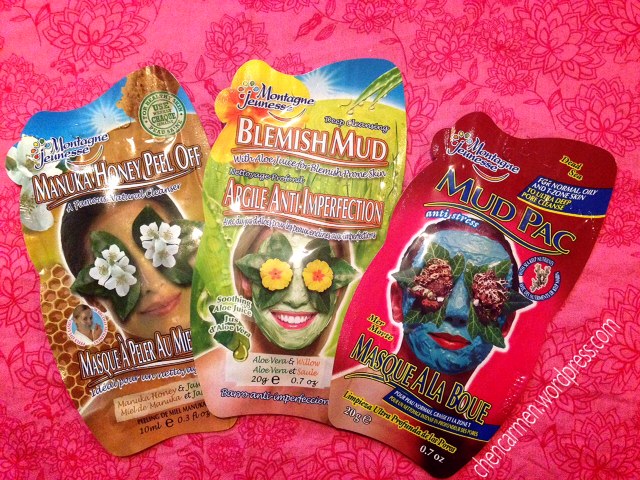
These were the three I chose from Obsessed Canada, they have around twenty different Montage Jeunesse products that you can chose from on their website. I picked the top three that sounded appealing for my oily skin type. I had already written on the Blemish Mud (click here) and Mud Pac (click here), today I will talk about the Manuka Honey peel off mask!

I love using honey in my skincare routine! I used to quickly whip up my own honey & sugar masks when I felt my skin feeling yucky, or if I was at the boyfriend’s house and did not have any masks to use. With that said and my love for honey, let’s get the review started!

Manuka honey

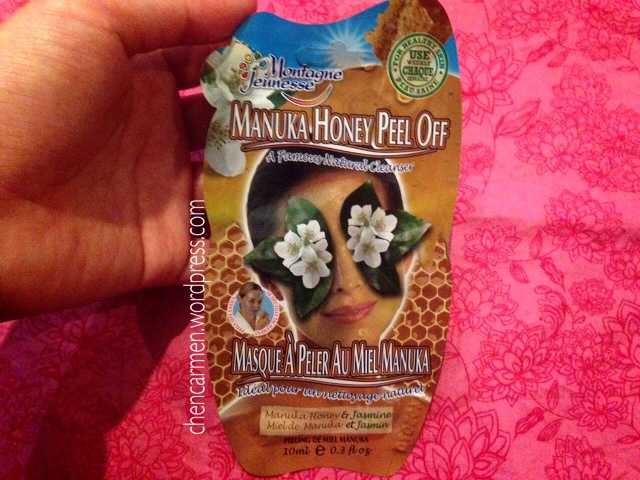
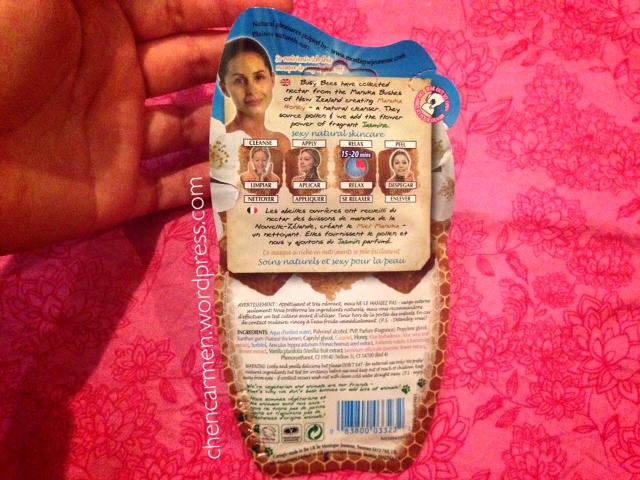
When I first opened the packet, I noticed how lovely the scent was! It was a mix of sweet honey and jasmine, very calming and soothing. The consistency and colour of this mask looked just like honey, which makes sense as it is made mainly with manuka honey.

Manuka honey is a type of honey reigning from New Zealand and Australia, and has been suggested to have antibacterial properties. It also contains aloe, chamomile, and caramel to name a few!

There were also a few non natural ingredients in this as well which isn’t worth mentioning because I don’t know how to spell lengthy chemical names by heart nor do I know what the purpose of each of those are.

Montagne Jeunesse Manuka Honey Peel Off Mask 4
Picture taken from chantalscorner.blogspot.ca

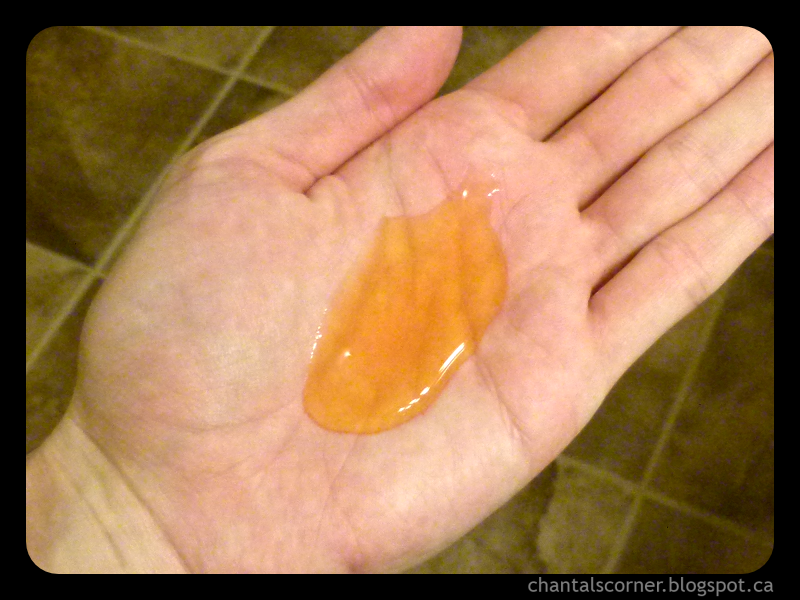
As you can see, it looks just like honey! Applying it on my face was fairly easy, it did not drip everywhere.

However, I strongly recommend making sure all your hair is tied back because it’s sticky (due to the honey). Some of it got stuck in my hair and it took me some time to wash it out.

Comparing to the other two MJ masks used, the consistency of this one was a lot thinner and lighter. The pack, just like the previous two, had more than enough for one person so I highly recommend doing the mask with a friend or having a ziploc bag handy to keep the leftover pack in (preserves freshness and less messy). I asked the boyfriend to use the rest of the mask for me as I didn’t want to store it, and he agreed to try it =) Guys can do masks too okay!!!

peel_off_face_mask
It felt like I was peeling off my own skin! (Photo from eco-lina.com)

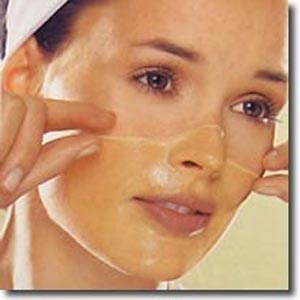
After fifteen minutes, both of our masks had completely hardened and I helped him peel his off first. Honestly, at first it was really weird because it looked like I was peeling his skin off.

I removed mine afterwards, and it was the first time I tried a peel off mask. I think it’s easier and cleaner than washing it off with water. As you’re peeling it off, it also feels good because your skin feels so tight when the mask is drying on your face!

manuka

The peel off mask was new to the both of us, but I actually really like the idea of it and will look into buying peel off masks (once I get past the idea it looks like I’m peeling off my own skin, haha!) It’s less messy, and one of my BIGGEST pet peeves are getting my sweater sleeves wet from washing my face… yes I could roll it up higher but I always forget until it’s too late.

Our skin felt really soft and smooth afterwards. Honey and aloe are known to be great for your skin, so it’s no wonder that our skin felt so great. The boyfriend even said my skin looked glowing and I’ve never heard him say that!

I’ve never been blessed with smooth, clear, and glowing skin so to hear that was very surprising… I guess it is a step forward (until my skin goes back to its usual self, but it’s all about preventative measures right =P)!

You can get this mask online at Obssessed Canada for $2, with free shipping over $25!

Stay tuned to hear about my first ever giveaway! 

-Carmen

This product was sent to me by Obsessed Canada, and I was not paid to write the review. All thoughts and opinions are my own, and not altered by the requests of Obsessed Canada. 


Filed Under: body, face Tagged: acne, aloe, beauty, beauty blogger, beauty product, clear skin, face, face mask, facial, facial routine, honey, makeup, makeup blogger, manuka honey, montagne jeunesse, motd, skin care, skin mask, skin routine, skincare

Bliss Fabulous Foaming Face Wash

January 11, 2015

Harroooo everyone! =)

About a month ago, I told you all about my Black Friday Sephora mini haul. One of the items I bought during the sale, which I briefly mentioned in that post, was the Bliss fabulous foaming face wash, a 2 in 1 cleanser and exfoliator.

Haul

It was one of those items where I wasn’t planning on buying it, but I saw that it was on sale for 50% off and had great reviews. I took too long deciding whether or not to buy it, and when I went to checkout, I found it was sold out along with all the other products I wanted =(

But when I went to Sephora in person the following day, I was happy to find that they had plenty in store, for the same sale price! I got it for $12 canadian, usually it is $24.

Because Sephora is always better at marketing a product than I am, here is what they say- “Bliss Fabulous Foaming Face Wash harnesses the power of botanical soothing technology and super soft exfoliating beads to deliver a simply sensational skincare solution. This bestselling, oil-free purifier instantly dissolves excess oil and makeup and lifts away dead cells, leaving skin clean, nourished, and fresh.”

Blissssss

Maybe because I read so many great reviews on this product, I was expecting more than it delivered. Some people claimed that this product instantly melted away their entire face makeup, so I was really excited to try it because having difficulty removing makeup when you just want to go sleep is a pain!

I tried this a few times when I had full coverage makeup on, it did not remove all my makeup easily. It also did not come off instantly, I had to scrub. It also said that it is an exfoliator, but I see this as a cleanser because it doesn’t do a great job in exfoliating.

I think this face wash would be good on a daily basis, but if you are wearing full coverage, I would recommend something else. My Lush Herbalism cleanser does an amazing job at taking off makeup, clearing breakouts, making my skin tone even, etc… it is truly a magical product. Actually, even my $3 St. Ives Apricot Scrub does a better job at exfoliating and taking off my makeup LOL!

Bliss

I really liked the light scent it had, it was very refreshing. The gel formula also had a bit of a cooling sensation. This did not dry out my face at all, and felt really moisturized after usage.

For $24 regular price, I don’t think I would buy it again because it’s not worth the price to me. There are products out there that are definitely better at removing makeup, and for a better price as well. However, I am glad that I tried it and I’ll probably finish the bottle eventually because it’s not a bad product. I just had higher hopes for it! =)

What are your favourite face washes? Let me know in the comments down below!

-Carmen


Filed Under: body, face, makeup Tagged: acne free, beautiful, beauty, beauty blogger, beauty guru, beauty review, bliss, cleanser, clear skin, facial, facial cleanser, fotd, healthy skin, makeup, makeup blogger, makeup review, motd, sale, sale finds, sephora, skin care, skincare, smooth skin, soft skin

Marc Jacobs Highliner Gel Eye Crayon

January 6, 2015

Hi everyone!

After buying Sephora’s Draw the Line 2014 set and using most of the products for two months now, I decided it was finally time to talk about them! One of the products included in this year’s set was the Marc Jacob’s Highliner gel eye crayon, which retails for $30 Canadian (full sized product) at Sephora. The set only included the sample size, which was half the size of the full but I still thought it was a good deal with the set!

Marc Jacobs eyeliner

Funny story, I wasn’t actually planning on using this until I had finished one of the other pencil liners in the set. Of course, I accidentally misplaced that one somewhere and the rest of the pencil liners I had weren’t that great, so I decided on opening this one.

It seems like gel liners are all the rage right now, and for great reason too! I remember the first time I tried gel liner, it was one of the gel pots from MAC back in high school. Ever since then, I’ve loved gel liners for how smooth it glides on your eyelid and the intensity of the colour. Gel liners are  more pigmented due to the way that it is formulated.
marc-jacobs-sephora-makeup-collection-2013-07

Combining the gel and crayon eyeliner into one, the Marc Jacobs highliner was born!

I can’t think of a single negative thing about this product except for the cost, maybe. At first use, I loved how smooth and easy it was to apply, and how pigmented and intense the colour was. It also does not smudge the whole day and night, and is waterproof.

In fact, this eyeliner is all that I’ve been using lately since it seems I’m always in a rush in the mornings now. It takes me 15 seconds to quickly tight line my eyes, and what results is an intense and striking black that lasts all day! Any makeup product that is easy and fast to apply, and long lasting, is good to me.

Marc Jacobs

One thing I don’t like about pencil products is having to look for my sharpener. This product comes with a built in sharpener so you don’t have to worry about it becoming dull. It also comes with a twist up bottom!

I’ve also been looking for a replacement gold liner since my favourite gold shade of the Sephora + Pantone has been discontinued (how sad), I might give the champagne shade a try next time I’m in Sephora. But at $30 a pop, it does not come cheap =( However, I’ve come to realize that I much prefer high quality eyeliners that are worth the investment, than a cheap one which smudges or does not last the whole day- the annoyance and retouching up is not worth it. Which means I need to carefully manage my money (aka no more useless sugary drinks or random snacks)!

What are your thoughts on gel liner? Have you tried the Marc Jacobs highliner before and what did you think of it?

Thanks for reading!
-Carmen


Filed Under: eyes, face, makeup Tagged: beauty, beauty blogger, beauty guru, beauty review, eyeliner, eyeliner looks, eyes, gel liner, liner, liquid liner, makeup, makeup blogger, makeup guru, marc jacobs, motd, sephora

Christmas Holiday Nails!

December 7, 2014

Christmas radio playlist on repeat, planning holiday parties for work,  and some Home Alone movie nights later, it is safe to say that I am getting into the holiday spirit. Last night, when I was sick at home and watching Home Alone 2 (it never gets old), I had the sudden urge to repaint my nails. Then, I realized that I should paint them in the holiday spirit!
XmasHere is what I ended up with! Pretty simple and classic, but with a holiday twist. Depending on what angle you look at them, it can look a bit more sparkly or not 🙂 Random fact about me, whenever I watch movies, I can’t just sit still and watch the movie… I always have to be doing something, which is why I painted my nails. I’ll also be working overtime tomorrow at my company’s holiday party for our members, so might as well have pretty nails at the registration table and show some holiday spirit.
Xmas nails redI applied two coats of Revlon’s Colourstay in #130-Velvet Rope. It was my first time using it, I thought it was very pigmented and had a really deep, rich, and red colour. One coat would have been sufficient, but I normally do two coats of colour. I found that the drying time of this polish was a bit longer than I was used to, but I was just watching a movie as I was painting so I didn’t really mind.
Xmas sparkleI could have stopped there, but I love glittery and sparkly things and thought that sparkle polish would really add a Christmas twist and holiday magic to it. I used the Sally Hansen Hard As Nails Xtreme Wear in #305-Shine On. I’ve always had great experiences with Sally Hansen polishes, it’s my favourite drug store nail polish as it doesn’t chip easily, easy application, has great pigment/colours, and is very affordable.

Originally, I was debating if I should just paint the tips of my nails or just one nail for accent, but I decided to paint all of them because I love the sparkly look. The sparkles reminded me of tiny snowflakes, or little stars in the night sky. I always used to paint my nails a deep, dark blue or black, and use glitter polish on top to look like the sky so this is just a Christmas version of that. Something about the starry night sky is just so pretty to me and if I could capture a bit of that on my nails, I don’t mind at all.

I’m already thinking of the next holiday themed nails! Maybe I’ll share that too. What are your favourite holiday themed designs to do?

-Carmen


Filed Under: body, makeup, nails Tagged: beauty blogger, beauty review, beauty story, Christmas, christmas nails, christmas season, december, diy, holiday, holiday nails, holiday party, make up, makeup blogger, makeup guru, makeup review, manicure, manicure ideas, motd, nail art, nail design, nail polish, nails, revlon, sally hansen, snow, snowflakes, themed party, winter

Stila Stay All Day Waterproof Liquid Eye Liner

November 13, 2014

It feels like a long time since I have written a beauty post… and it has been quite awhile. I’ve been so busy the last month that I haven’t really been able to go out and try new products, which means nothing really to write about. But I finally had time to open my new products and splurge on some new items as well so I’ll be back to more makeup posts. Yay!

To be honest, I haven’t used any Stila products before but have seen them around for quite awhile. The Stila liquid eyeliner came in an eyeliner set, and it was the first one I decided to open because I wanted to try a Stila product. This is the sample size but the full size product retails for about $26 Canadian.

StilaIt’s quite a long name- Stila Stay All Day Waterproof Liquid Eyeliner. For simplicity’s sake, I’ll just call it the Stila liquid liner. This shade is the dark brown – chocolate brown. When it comes to liner shades, I much prefer jet black because it’s more noticeable on my eyes. Brown is good if you want a neutral “no makeup makeup” look, but it’s just my preference. Anyways, I decided to try it and see how it looked.


Stila 3The packaging of this liner is pretty sturdy and standard. The eyeliner comes as a felt tip, and application was very easy. The product and colour applied instantly at first contact, and it was very easy to glide along my eyelid in one easy sweep, no corrections were necessary. The application was also very even. I was also expecting a lighter shade of brown, but I actually preferred this colour more. When it dries, I found that the colour was actually a bit darker so it does look black.

Stila 1Now, the important question is… how long did it last? I put this on in the morning, and was out and about for the whole day. Throughout lunch, shopping, and going to a very exciting Canucks game, I am happy to say that the eyeliner did not smudge at all and was in the same condition at the end of the night as it was in the morning. The removal process was also very easy too, it came off with one quick wipe of makeup remover. I am quite happy with this product and am glad that I gave it a try.

Pros:

  • Very easy to apply in one sweep, no mess at all
  • Brush is very easy to use and guide
  • Great lasting power
  • Rich colour
  • Does not smudge

Cons:

  • For this shade specifically, I found it darker after application than it was originally shown (which was a good thing for me since I prefer dark liners)

-Carmen


Filed Under: eyes, makeup Tagged: beauty, beauty blogger, beauty community, beauty guru, beauty review, cosmetics, eyeliner, eyeliner tips, fotd, how to apply eyeliner, liquid eyeliner, makeup, makeup lover, makeup review, makeup tips, motd, pretty, stila

  • « Previous Page
  • 1
  • 2

Hello!

Hi and welcome to Curiously Carmen! I am Carmen, the girl behind the blog. You can read more about me here!

Recent Posts

  • H&P Noodle House Burnaby
  • Travel: Harry Potter Studio Tour (Watford, UK)
  • Travel: The Resident Soho Hotel, London UK
  • North Noodle House
  • Grand Crystal Seafood Restaurant

Subscribe to Blog via Email

Enter your email address to subscribe to this blog and receive notifications of new posts by email.

Partnerships

View my food journey on Zomato!

Archives

Theme Design By Studio Mommy · Copyright © 2025

Copyright © 2025 · Young Blush Theme on Genesis Framework · WordPress · Log in