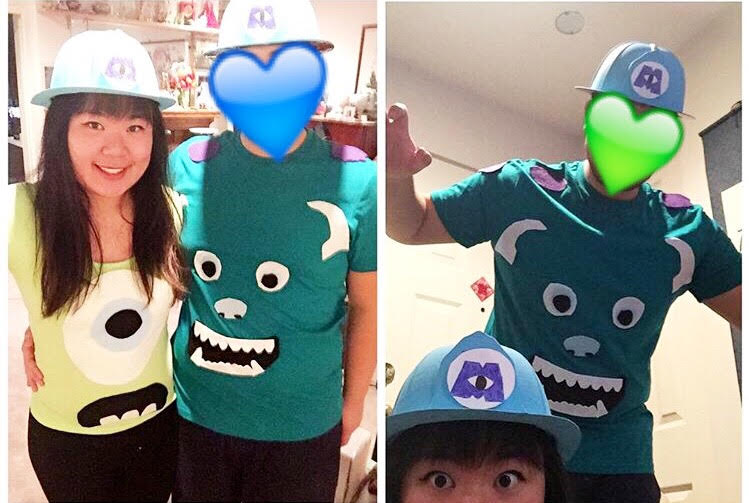
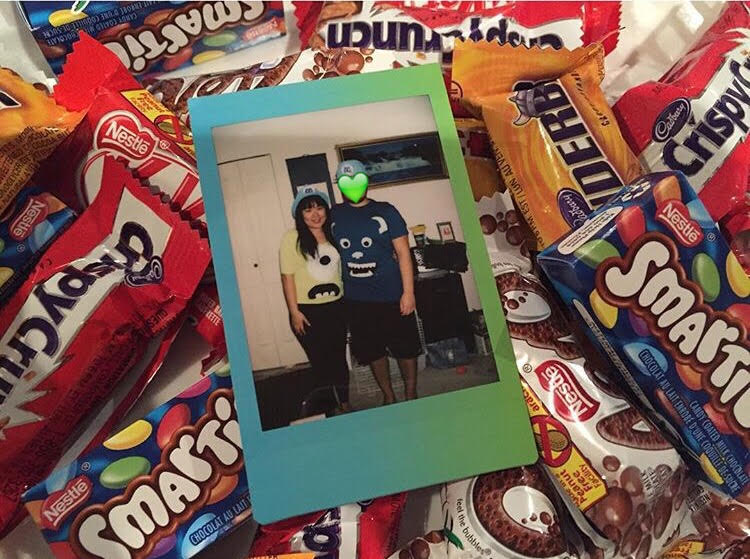
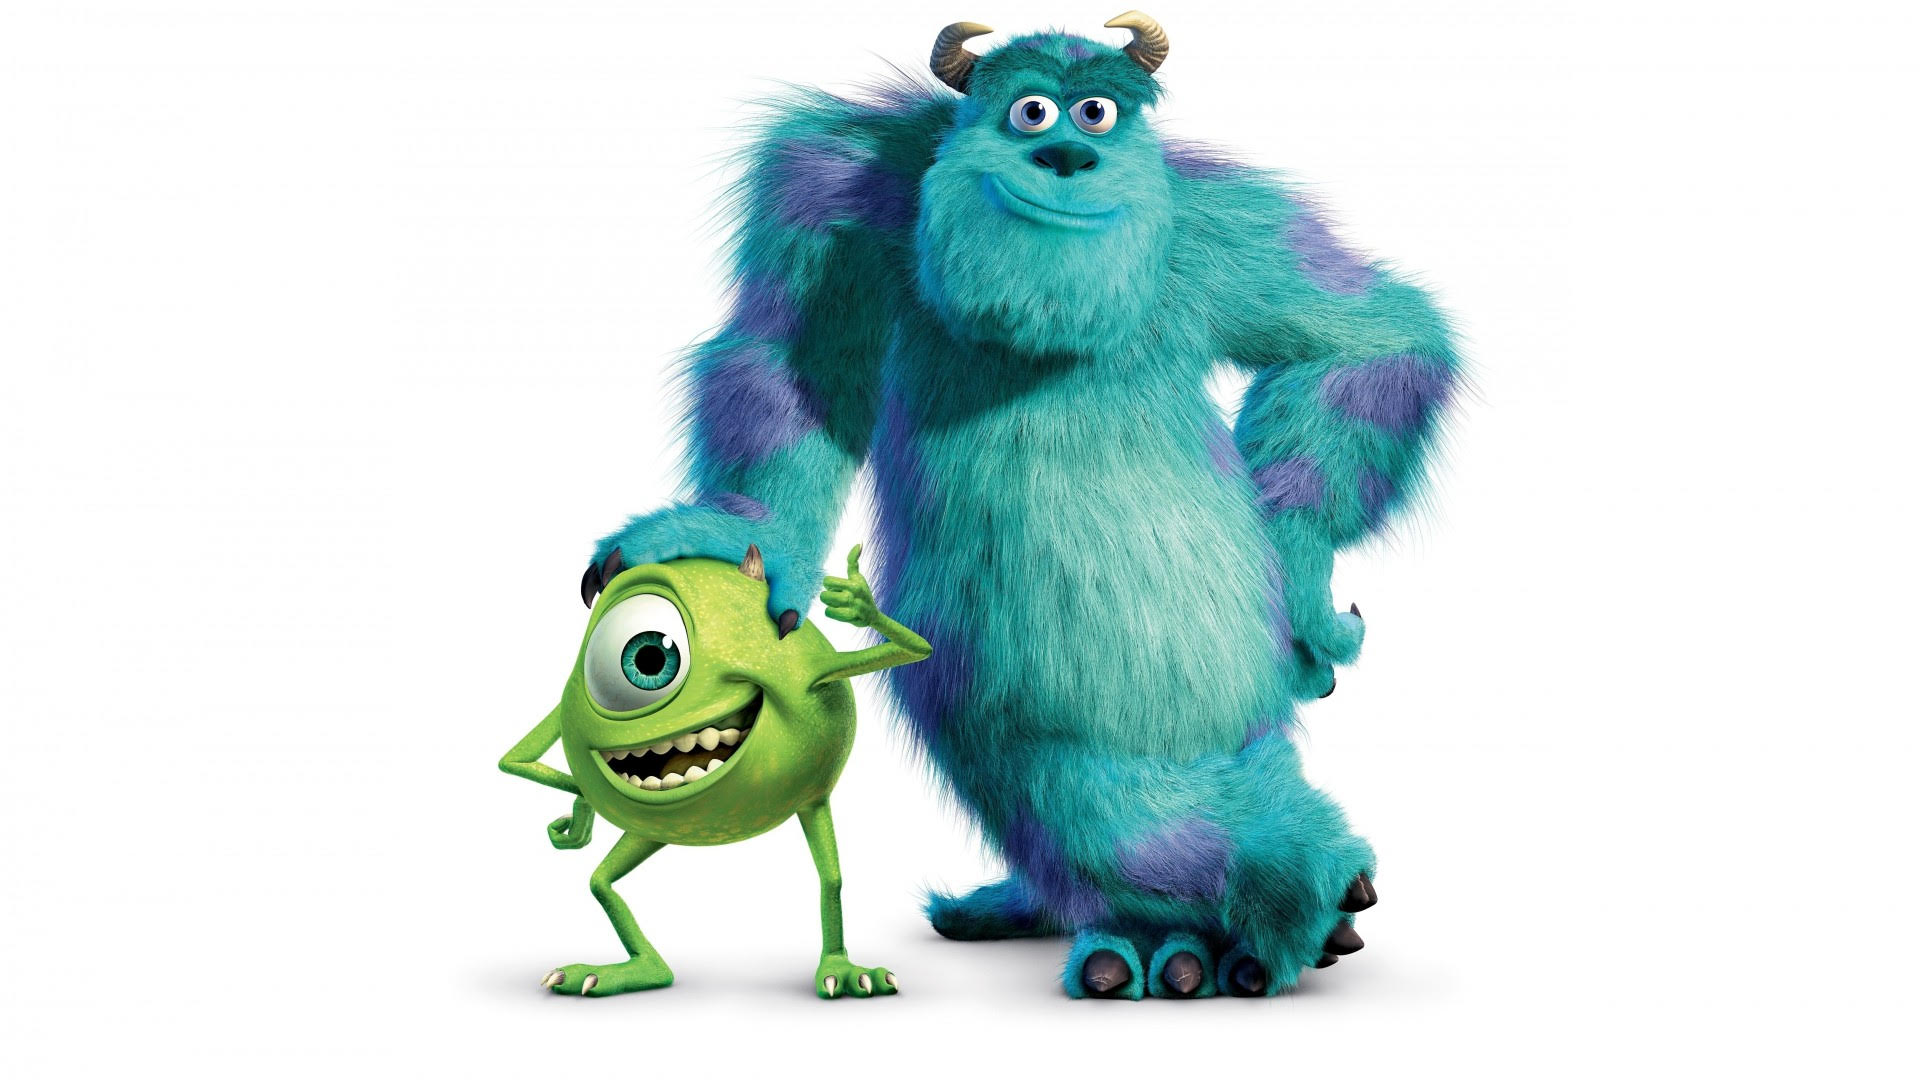
For Halloween 2015, the boyfriend and I decided to be Mike and Sully from Monsters Inc! We didn’t do anything big or special last year, just hung out at home, and gave out candy. We also decided to watch the movie while giving out candy!
 As with all my costumes, they are extremely simple to create. I can not sew, and am abysmal at arts/crafts but that doesn’t mean I can’t find ways to save money and come up with costume ideas!
Materials:
- Hot glue gun
- Coloured felt fabric: White, black, light blue, purple
- 2 Hard hats
- Monsters Inc logo- Either print one or it’s easy to draw
- Bright green tshirt
- Dark turquoise tshirt
- Blue acrylic paint
- Paint brush
- Packing tape (optional for logo on the hard hat)
Mike: You will need the white, black, and light blue fabric. Simply cut out the appropriate shapes for his big eye, surprised looking mouth and teeth. Then, position them on your green shirt before hot gluing the pieces on!
Sully: You will need the white, black, light blue, and purple fabric. Again, cut out the shapes for Sully’s face and horns as shown in my picture. For the purple spots, cut out irregularly shaped ovals and hot glue gun them on the back of the tshirt.
Hats: Can’t forget their safety hats! We were firefighters the year before, so we had leftover hard hats. These are really easy to find at any costume or toy store! Just paint liberally, we painted 3-4 layers before the paint was a nice solid light blue.
![]()
Then, I found a Monsters Inc logo online and printed two copies out. I then stuck them on the hard hats using tape.
If you’re going to be outdoors, I recommend laminating the logos incase it starts to rain. You can either go to Staples or simply use packing tape to laminate.
There you go! Super simple, no sewing required. This costume is also great with a friend!
 Happy DIY costuming!
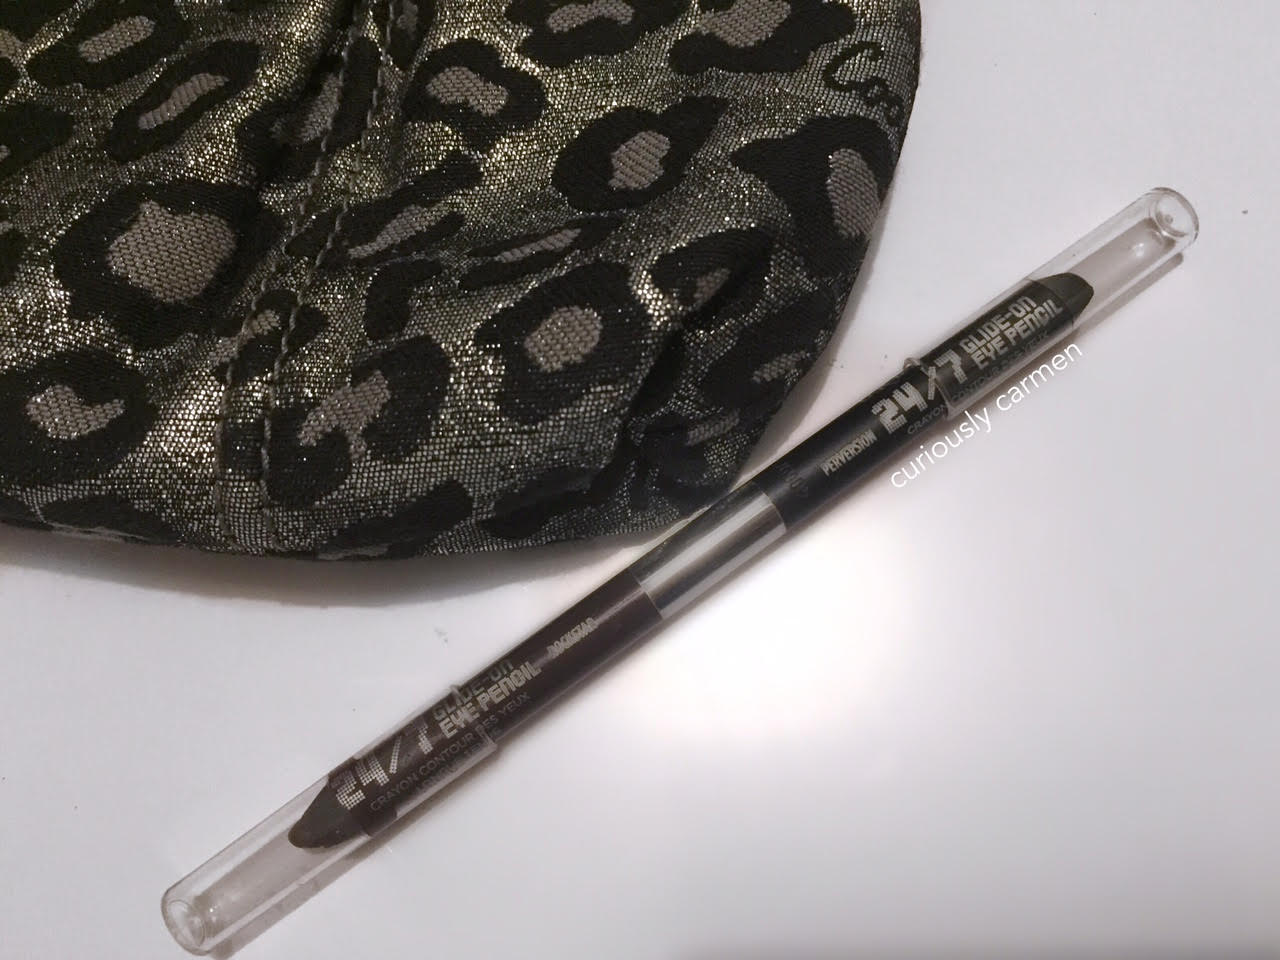 This Urban Decay 24/7 glide on pencil came in one of the Sephora favourites sets two years ago. I was a bit sad to see that an eyeliner kit wasn’t offered in the Sephora favourites sets this year, but it is understandable as eyeliners aren’t as popular as other products at the moment. But, I am thinking of purchasing the highlighting kit instead!
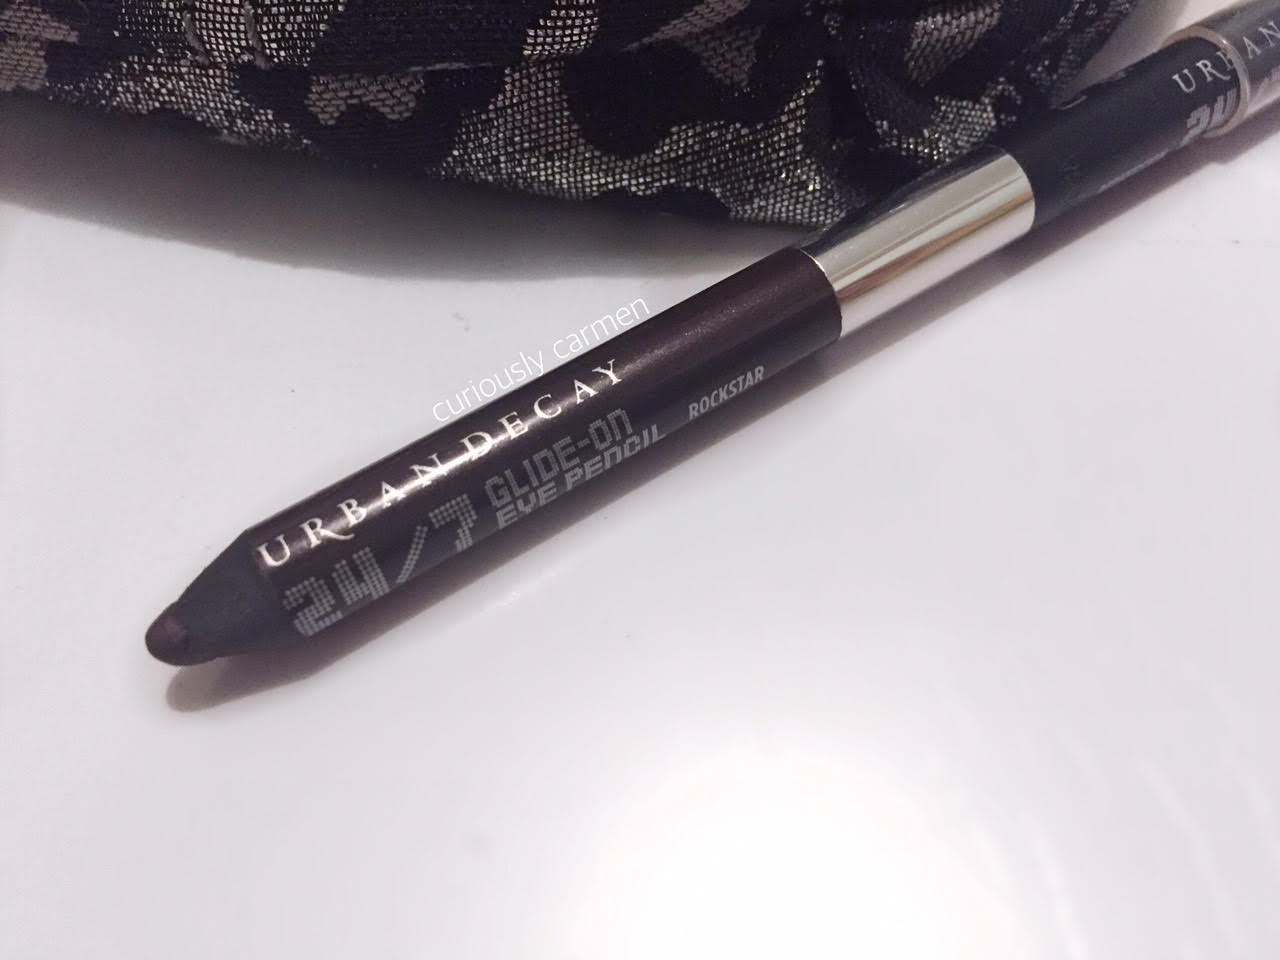 On one end of the pencil, is the shade ‘rockstar’. Rockstar is a really unique shade because I still have yet to figure out exactly what colour or shade this is. When I first used this, I thought it was a brown. But, it also has a slight metallic purple tint to it. I guess it depends on the angle, and which type of light you are seeing it from. I think this shade is really, really pretty.
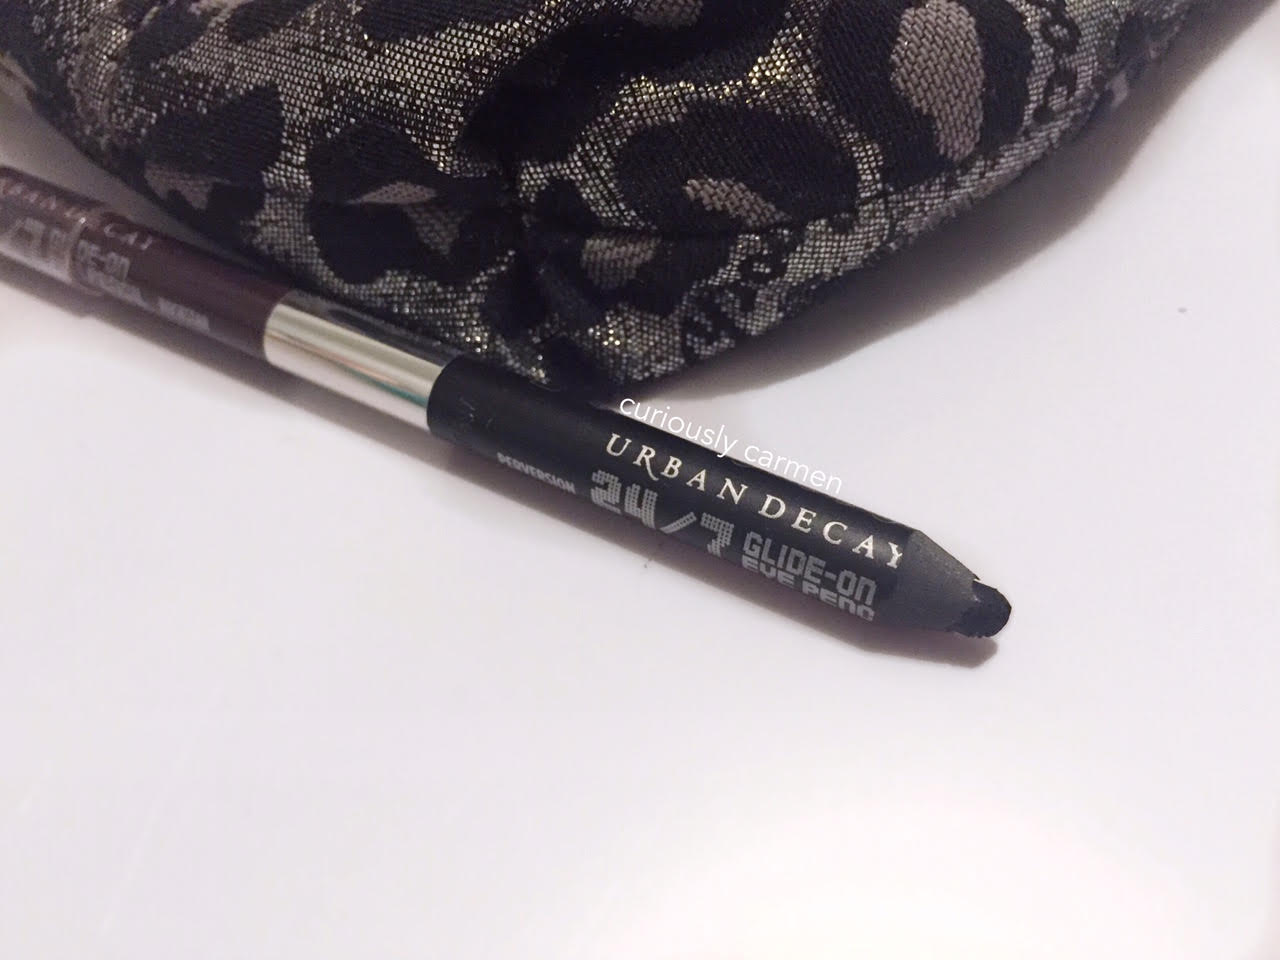 The other side is your classic, jet black liner in the shade ‘perversion’. Urban Decay also has a line with the same name, you may remember their perversion mascara. I love using this to tightline and line the middle part of my eye, to give it a consistent and thicker look (if that makes any sense, I’m bad at explaining).
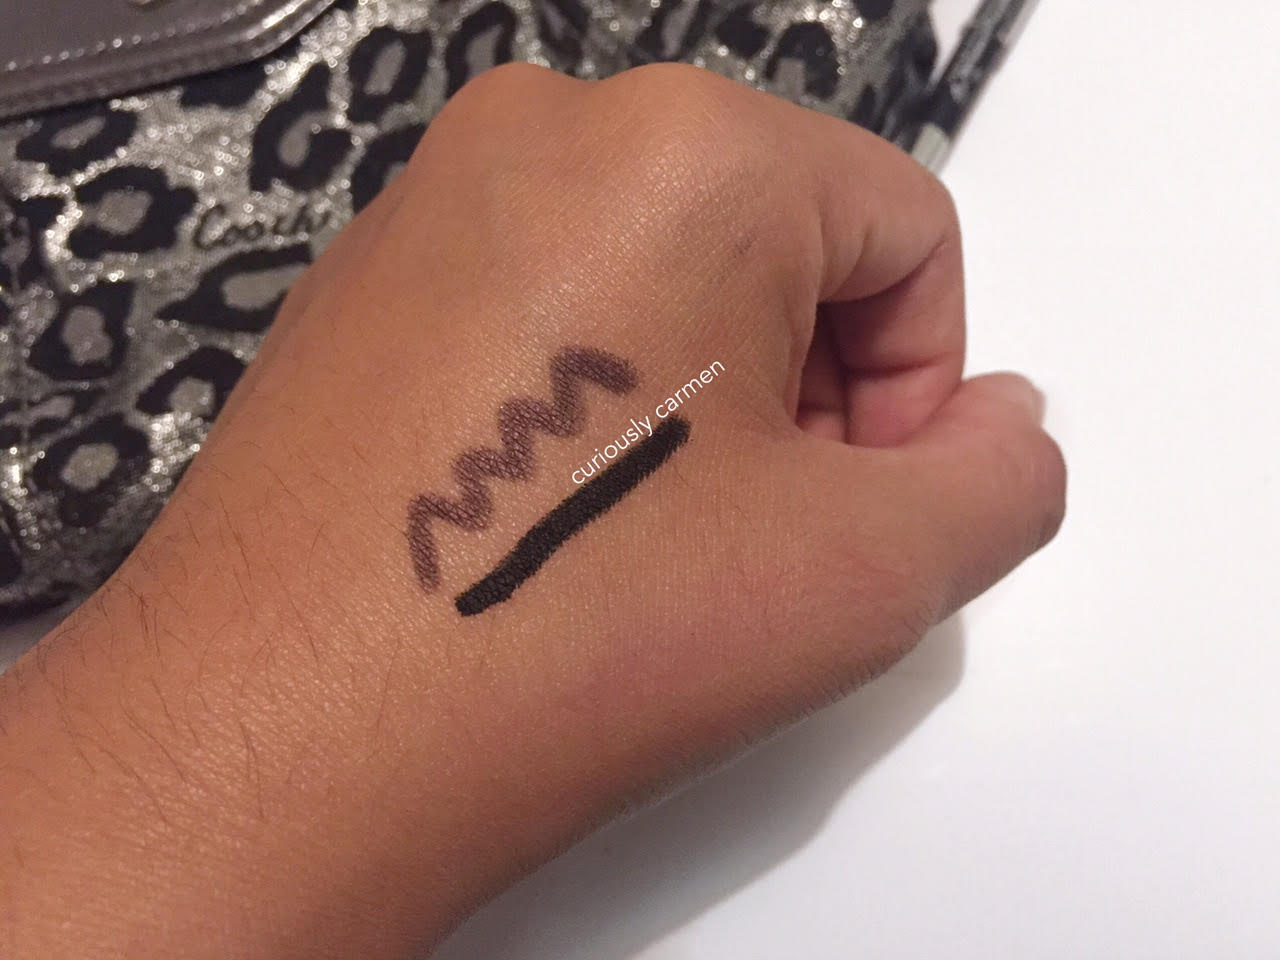 Here is a swatch on both colours. Rockstar looks more like a brown here, but you can kind of see the metallic finish towards the left?
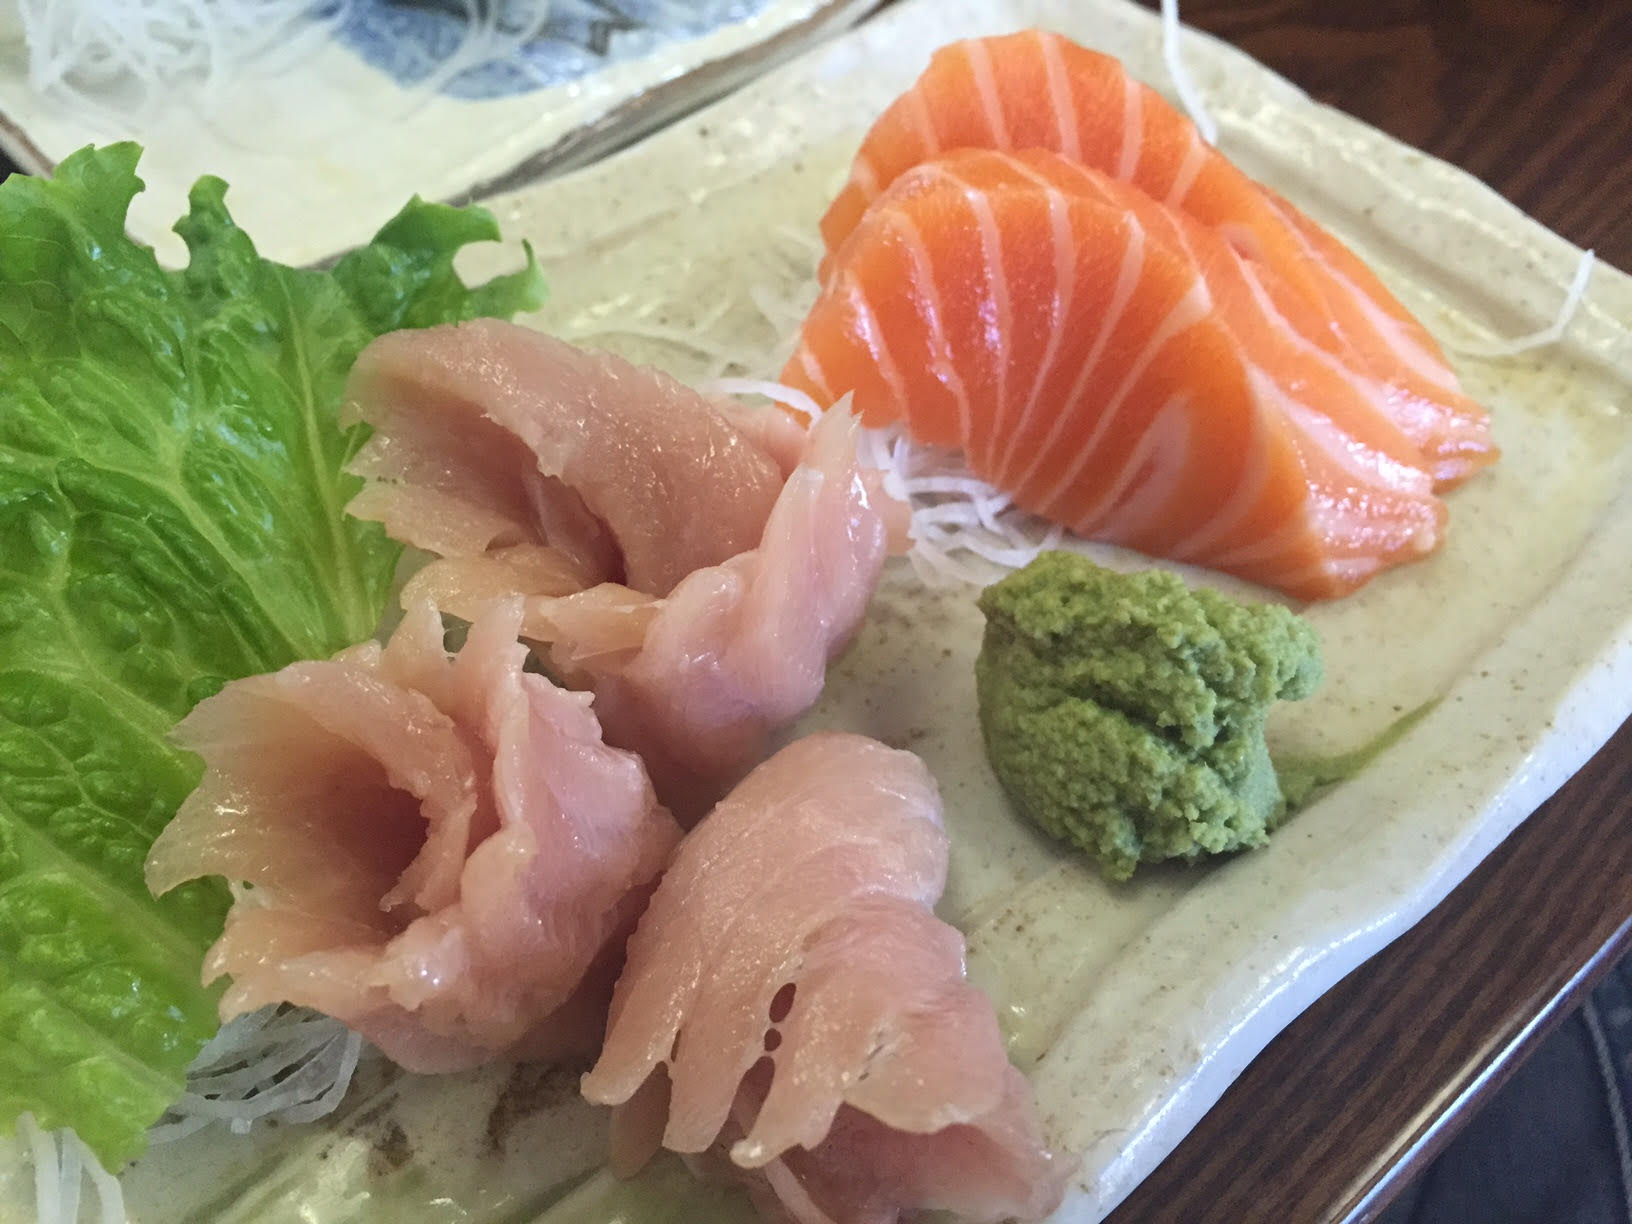 Appetizer sashimi, $5.95: The appetizer sashimi comes with three pieces of tuna, and two pieces of salmon. The salmon was average, but the tuna was really good. It was very soft and buttery, and melted in your mouth.
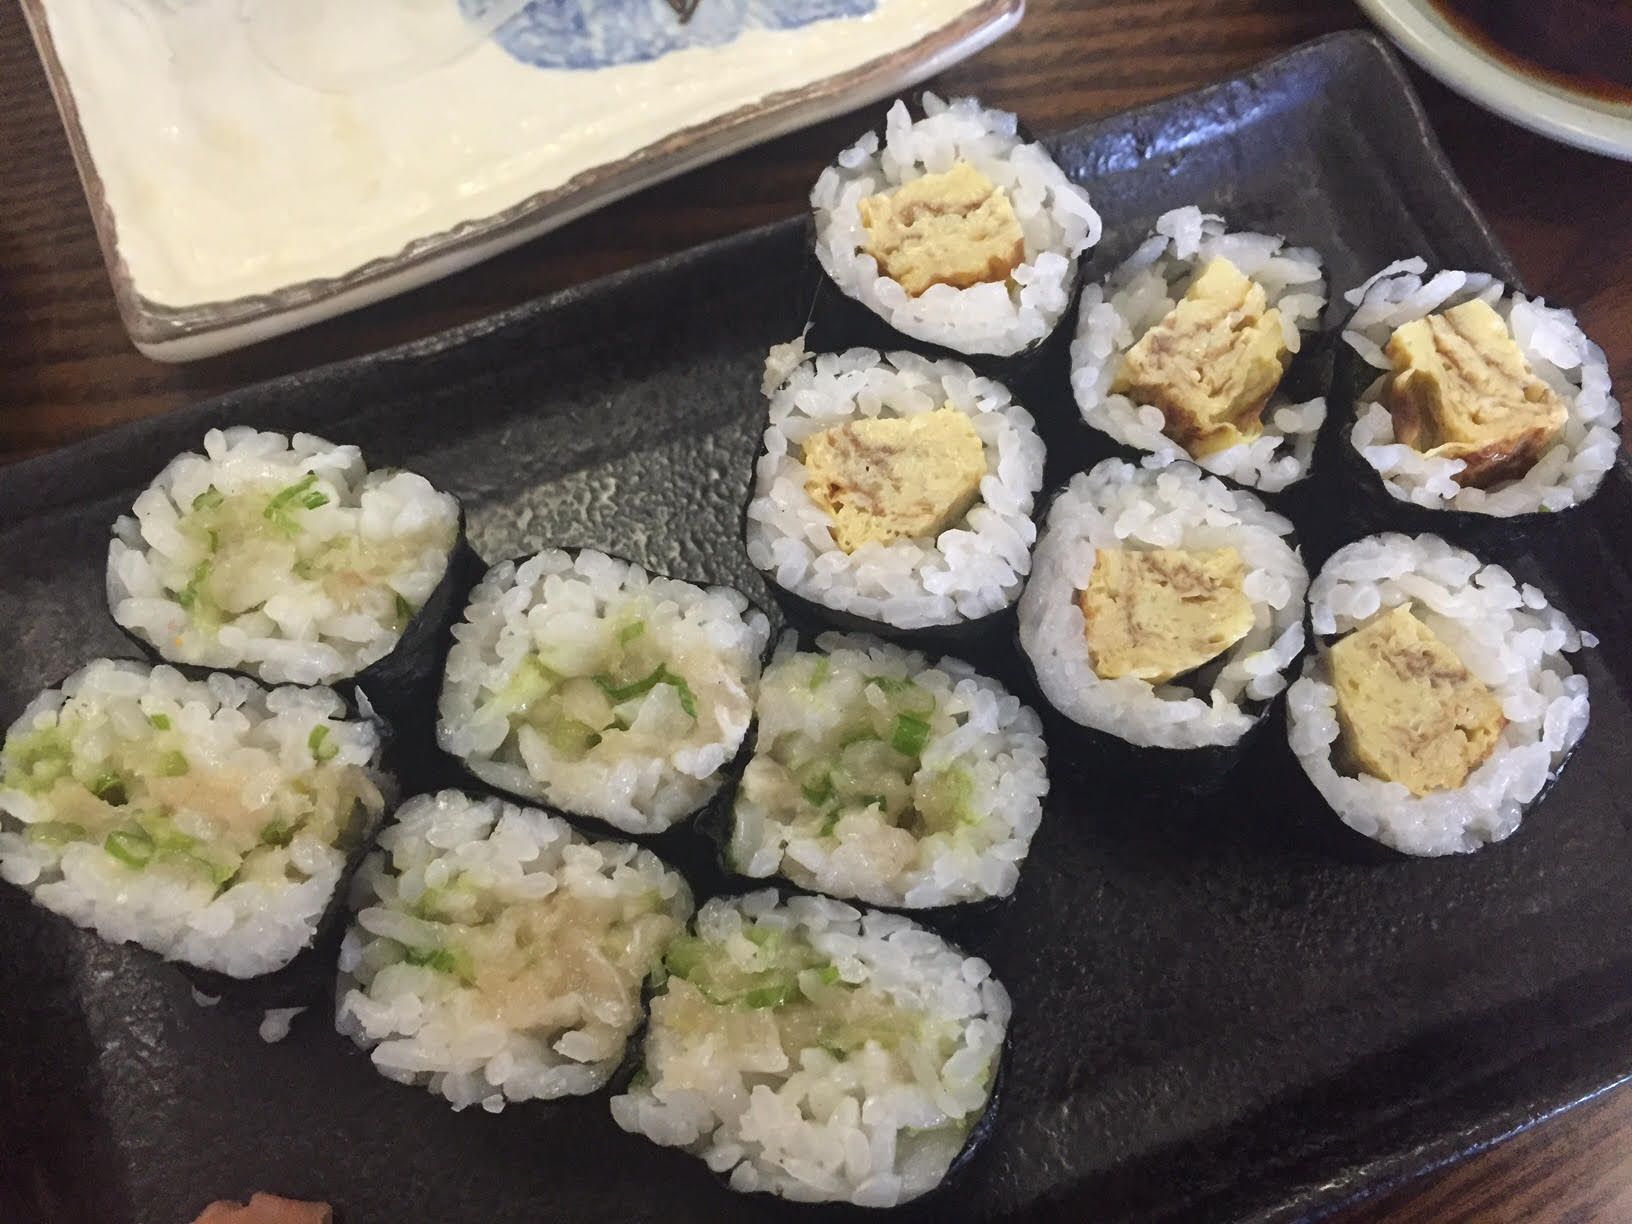 Tamago roll, $2.25: As I mentioned above, they specialize in tamago, so it was only natural to try it! The tamago was sweet, fluffy, and tasted fresh. I really liked how it had a fluffy texture, as a lot of places I’ve been to have a harder texture with dried edges (which means it’s not fresh and has fried out).
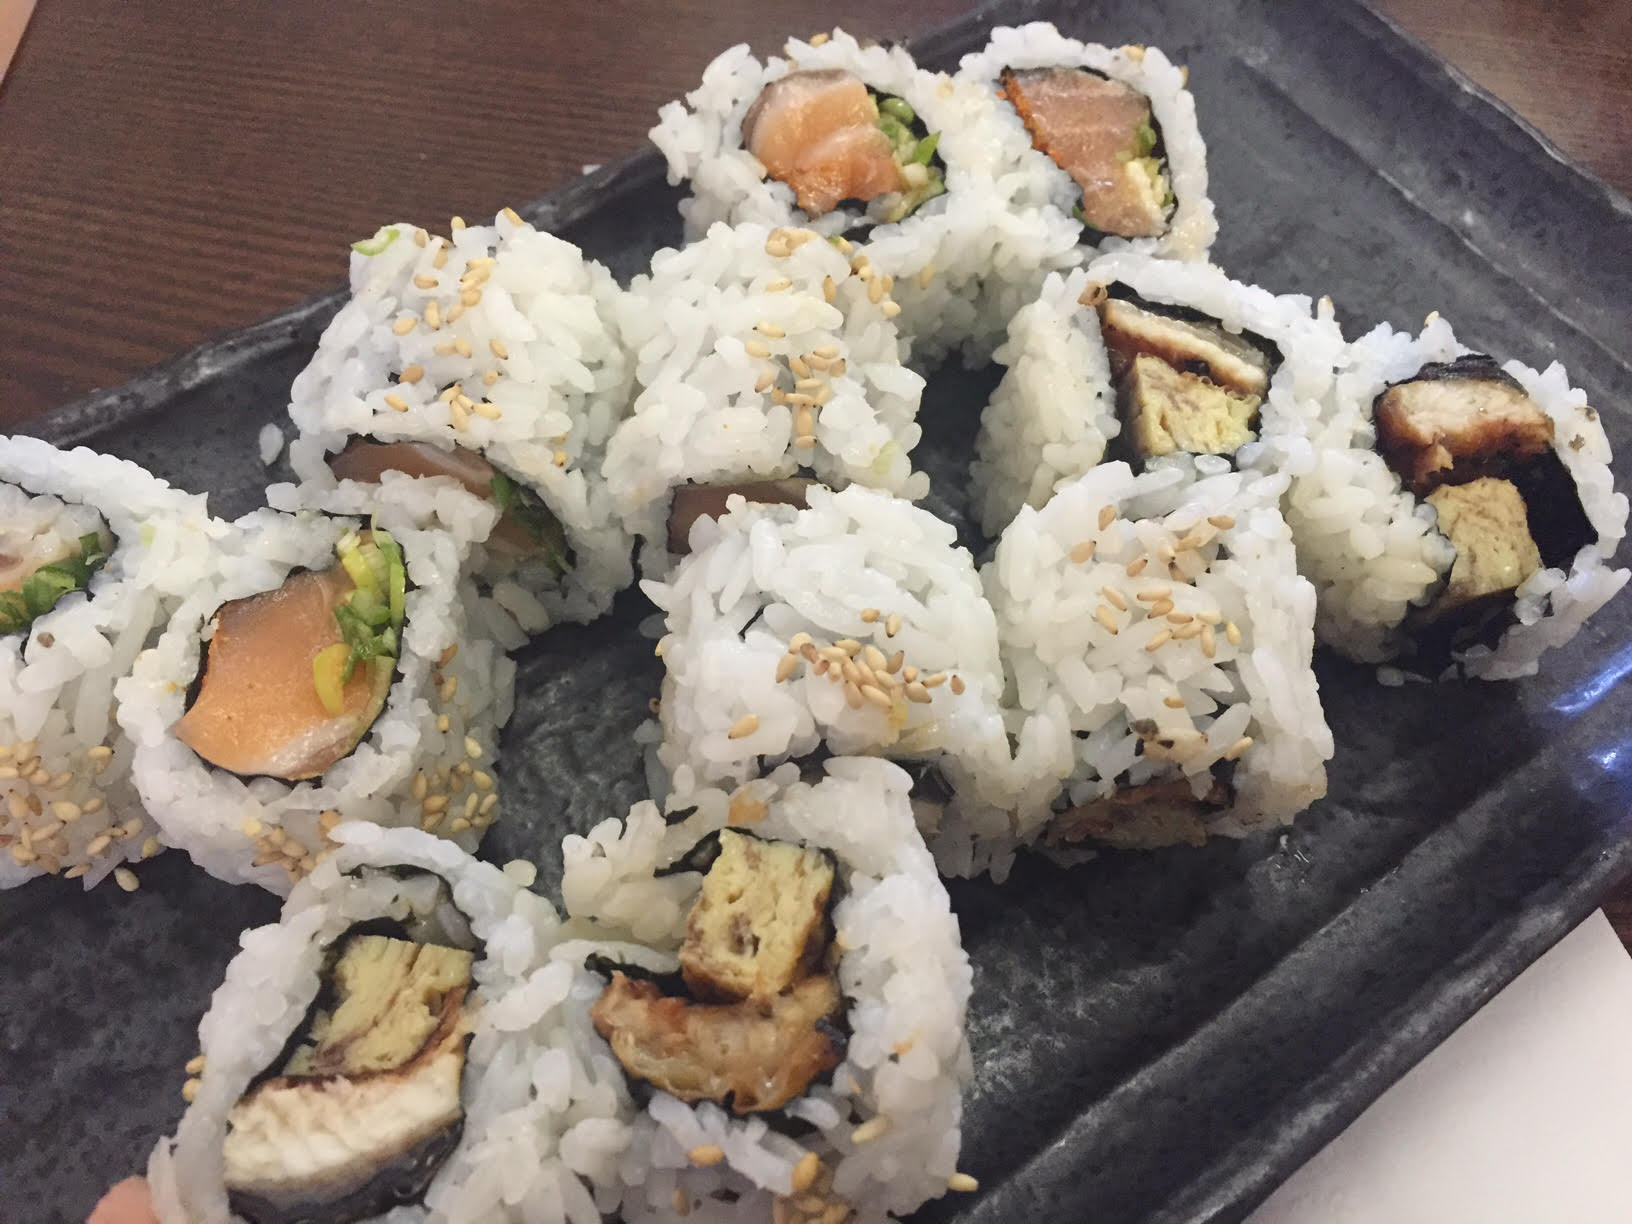 Hmmm, I don’t recall what these two rolls were called and I can’t find anything similar on the online menu! Sorry.
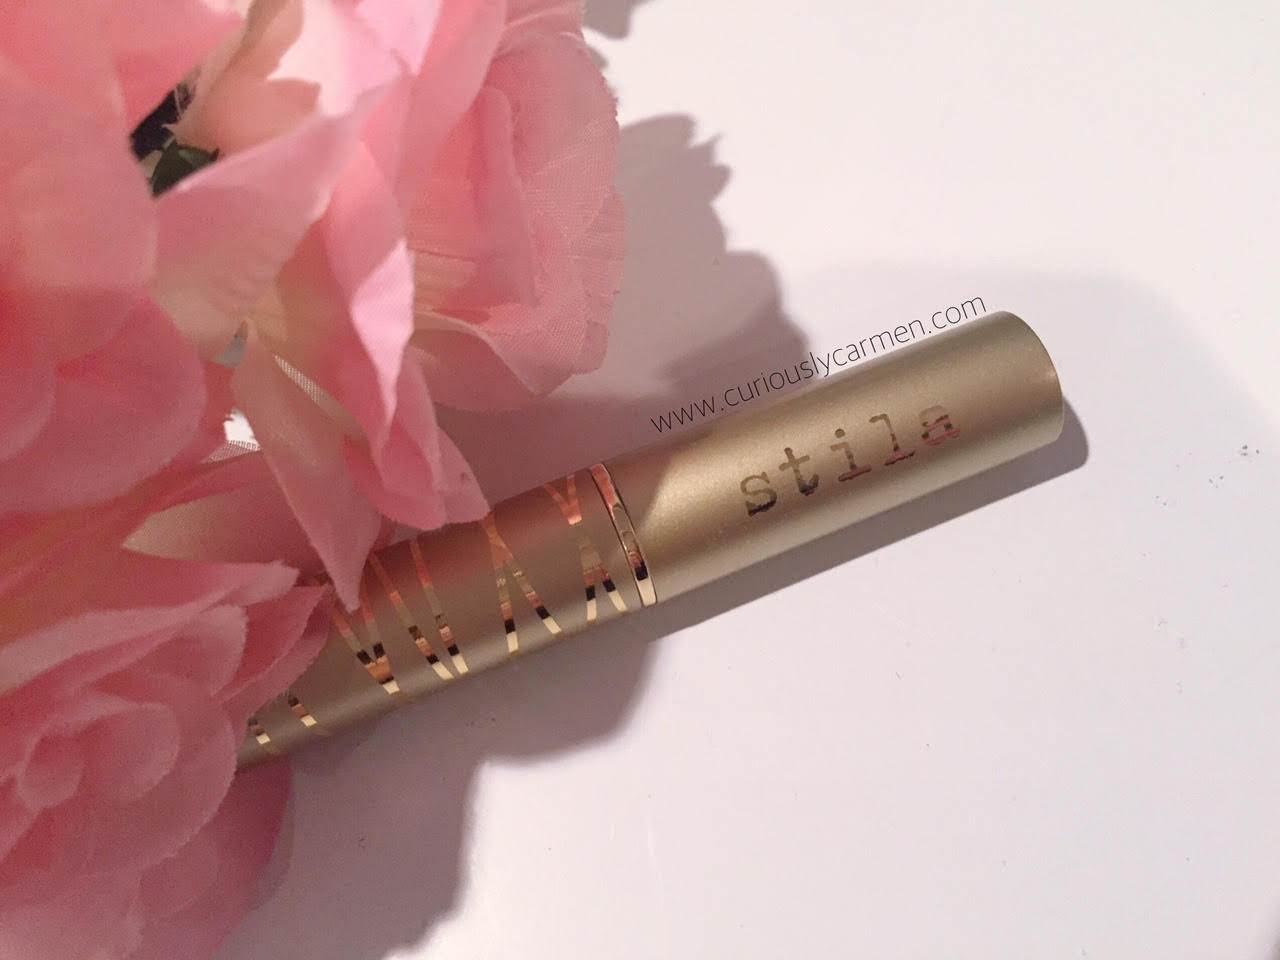 Now, onto the actual makeup review! Today, I will be reviewing the Stila Stay All Day Matte’ificent lipstick. I am a big fan of Stila’s Stay All Day foundation and eyeliner. This is my first time trying their lipsticks for the Stay All Day line.
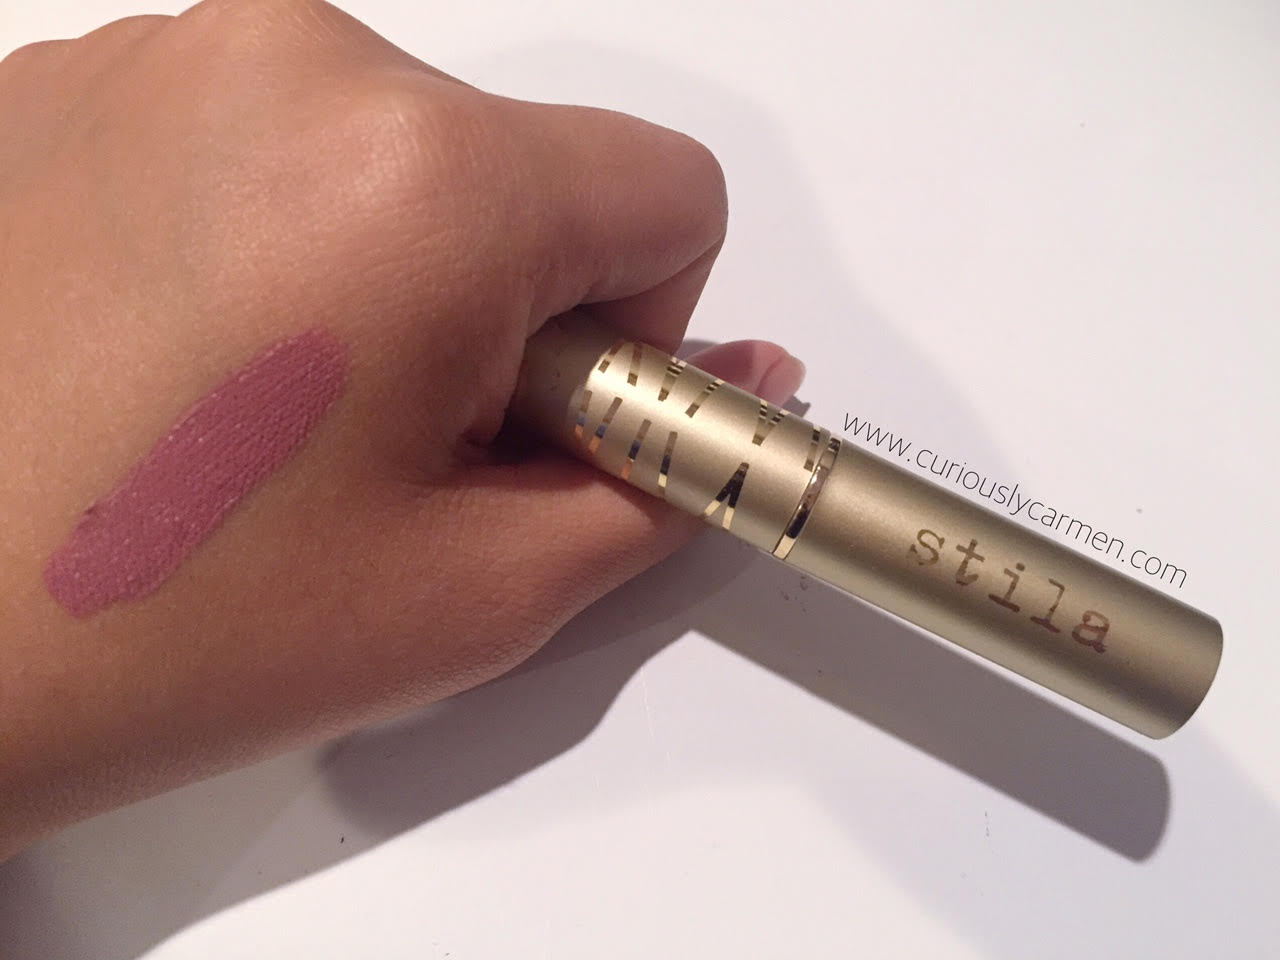 I received the shade mon ami. It is described on Sephora’s website as a “rose nude”. I personally think this shade is more of a muted pink! I normally don’t wear this colour, but I thought I would give it a try.
 The lipstick lasted around six hours, with snacking and a meal in between. After about seven hours, half the pigment was gone, particularly in the middle of my lips. I mean, you could definitely still wear it past six hours because it was still there, but it looked pretty dull and not vibrant anymore.
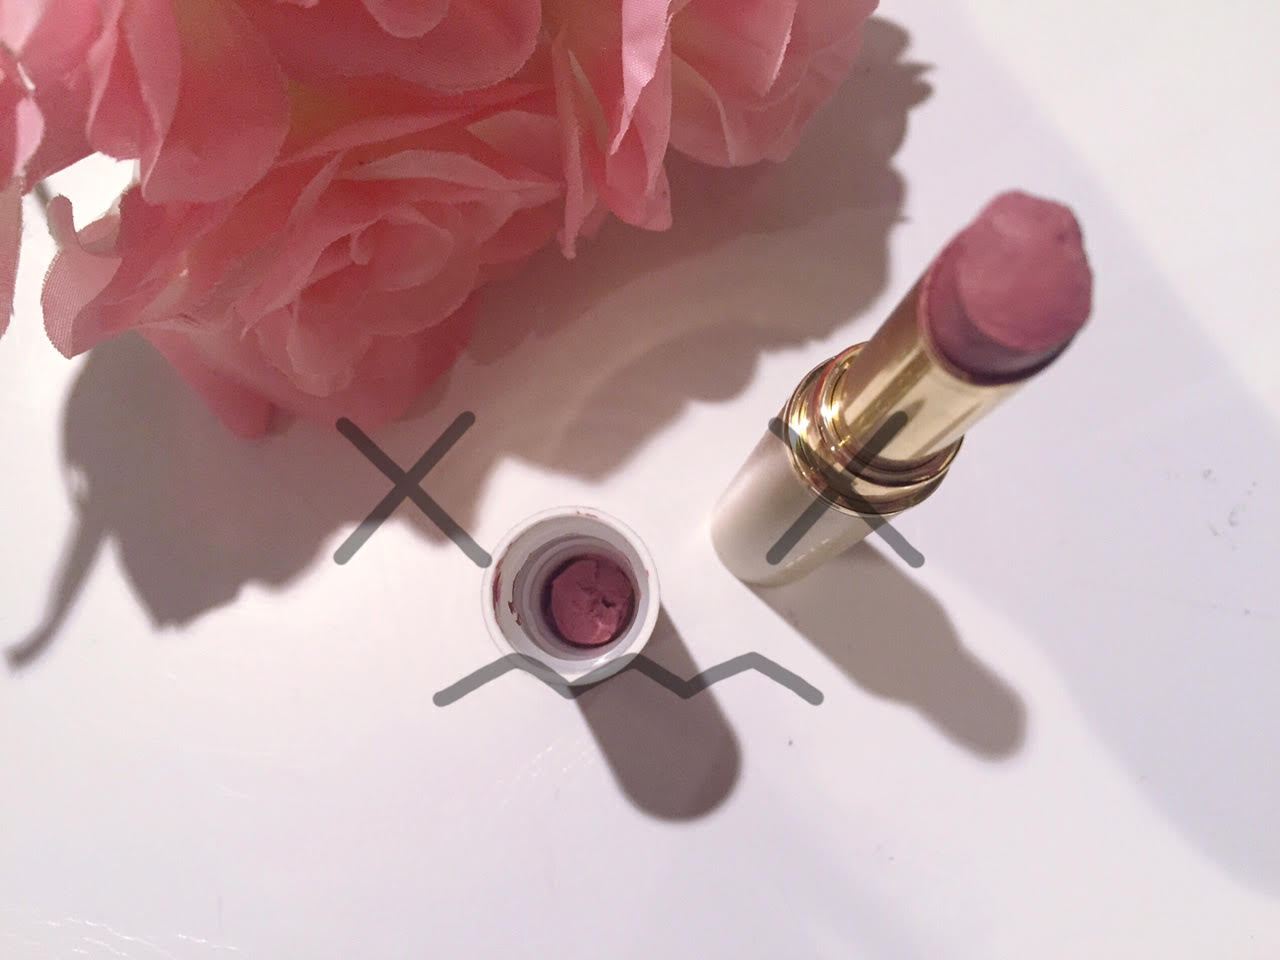 On a side note, here is a beauty blogger fail that I’d like to share with you. The struggle of a broken lipstick, SIGH. Yes, there are hacks that you can use to fix this, but the lipstick is inconveniently stuck in the lid and I can’t scoop it out without ruining it and getting it all messy =(
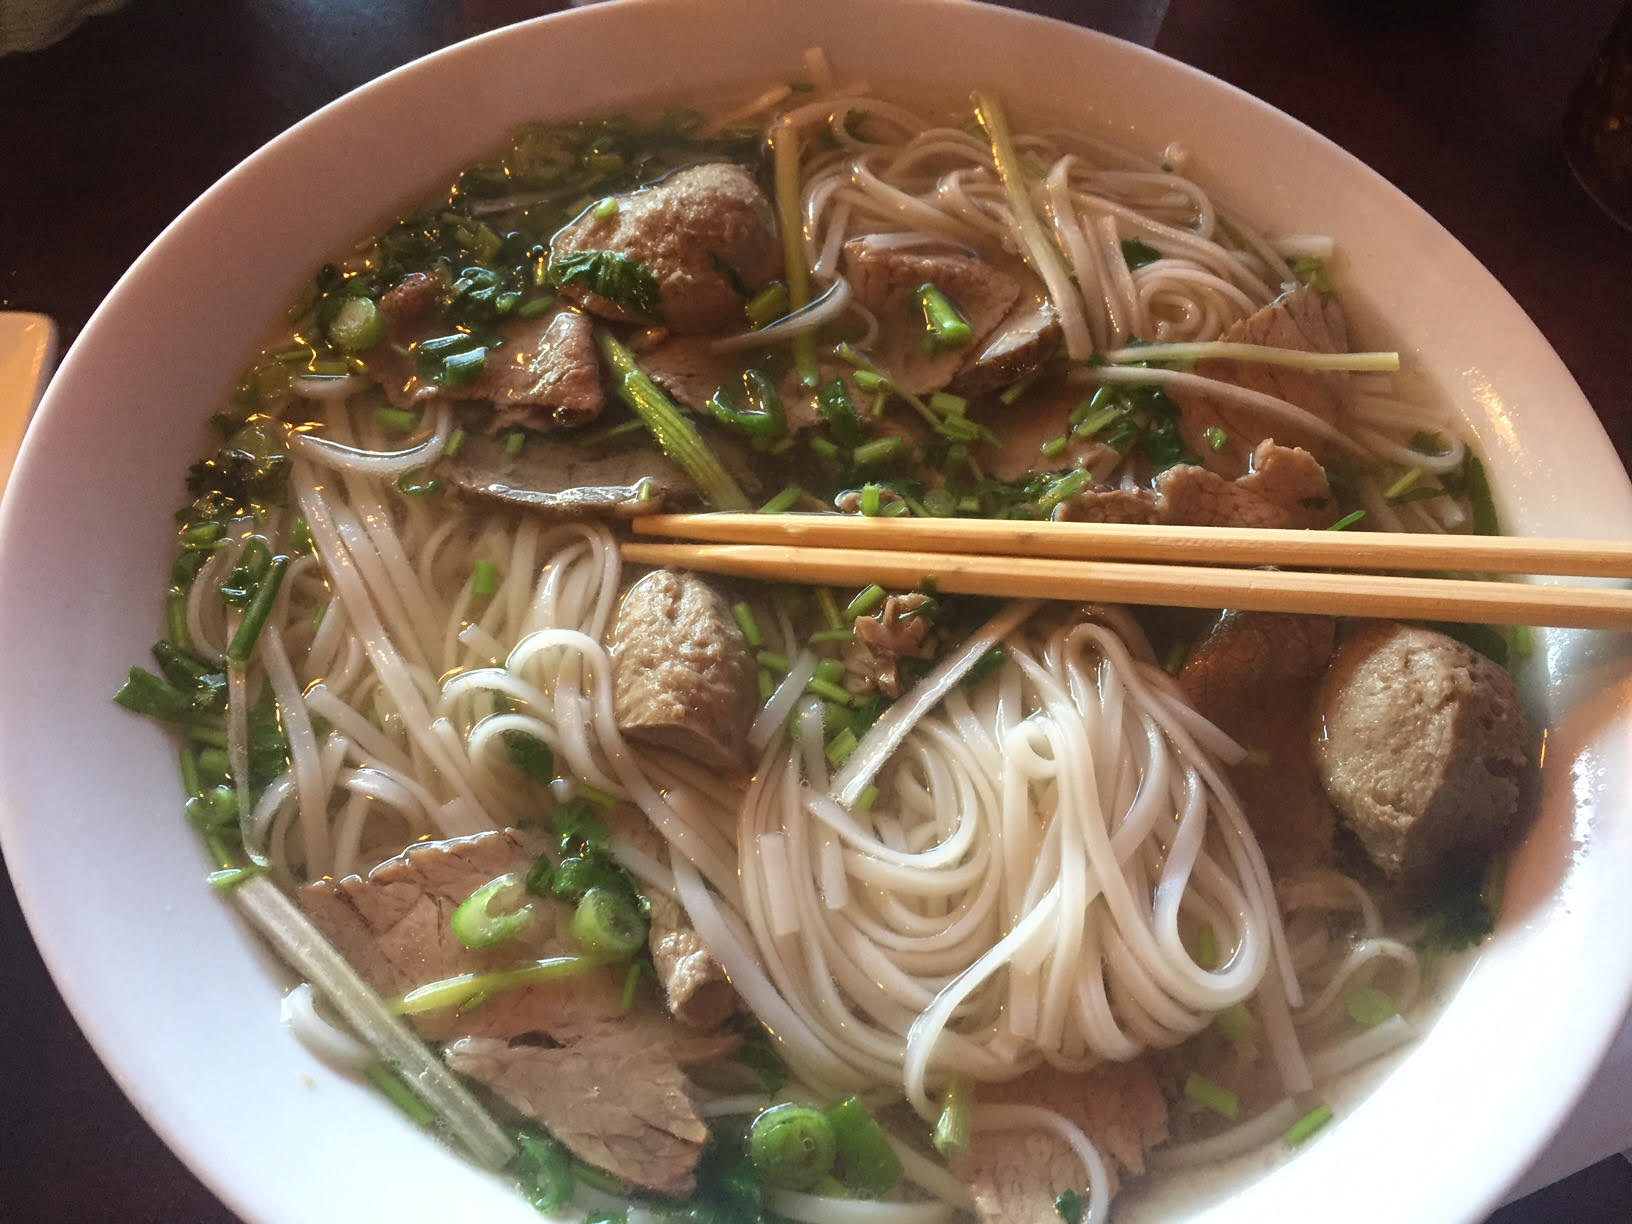 Rare beef & beef ball pho: A $9 bowl of pho is more than I’m used to paying, but it was pretty good. I liked how it was not oily.
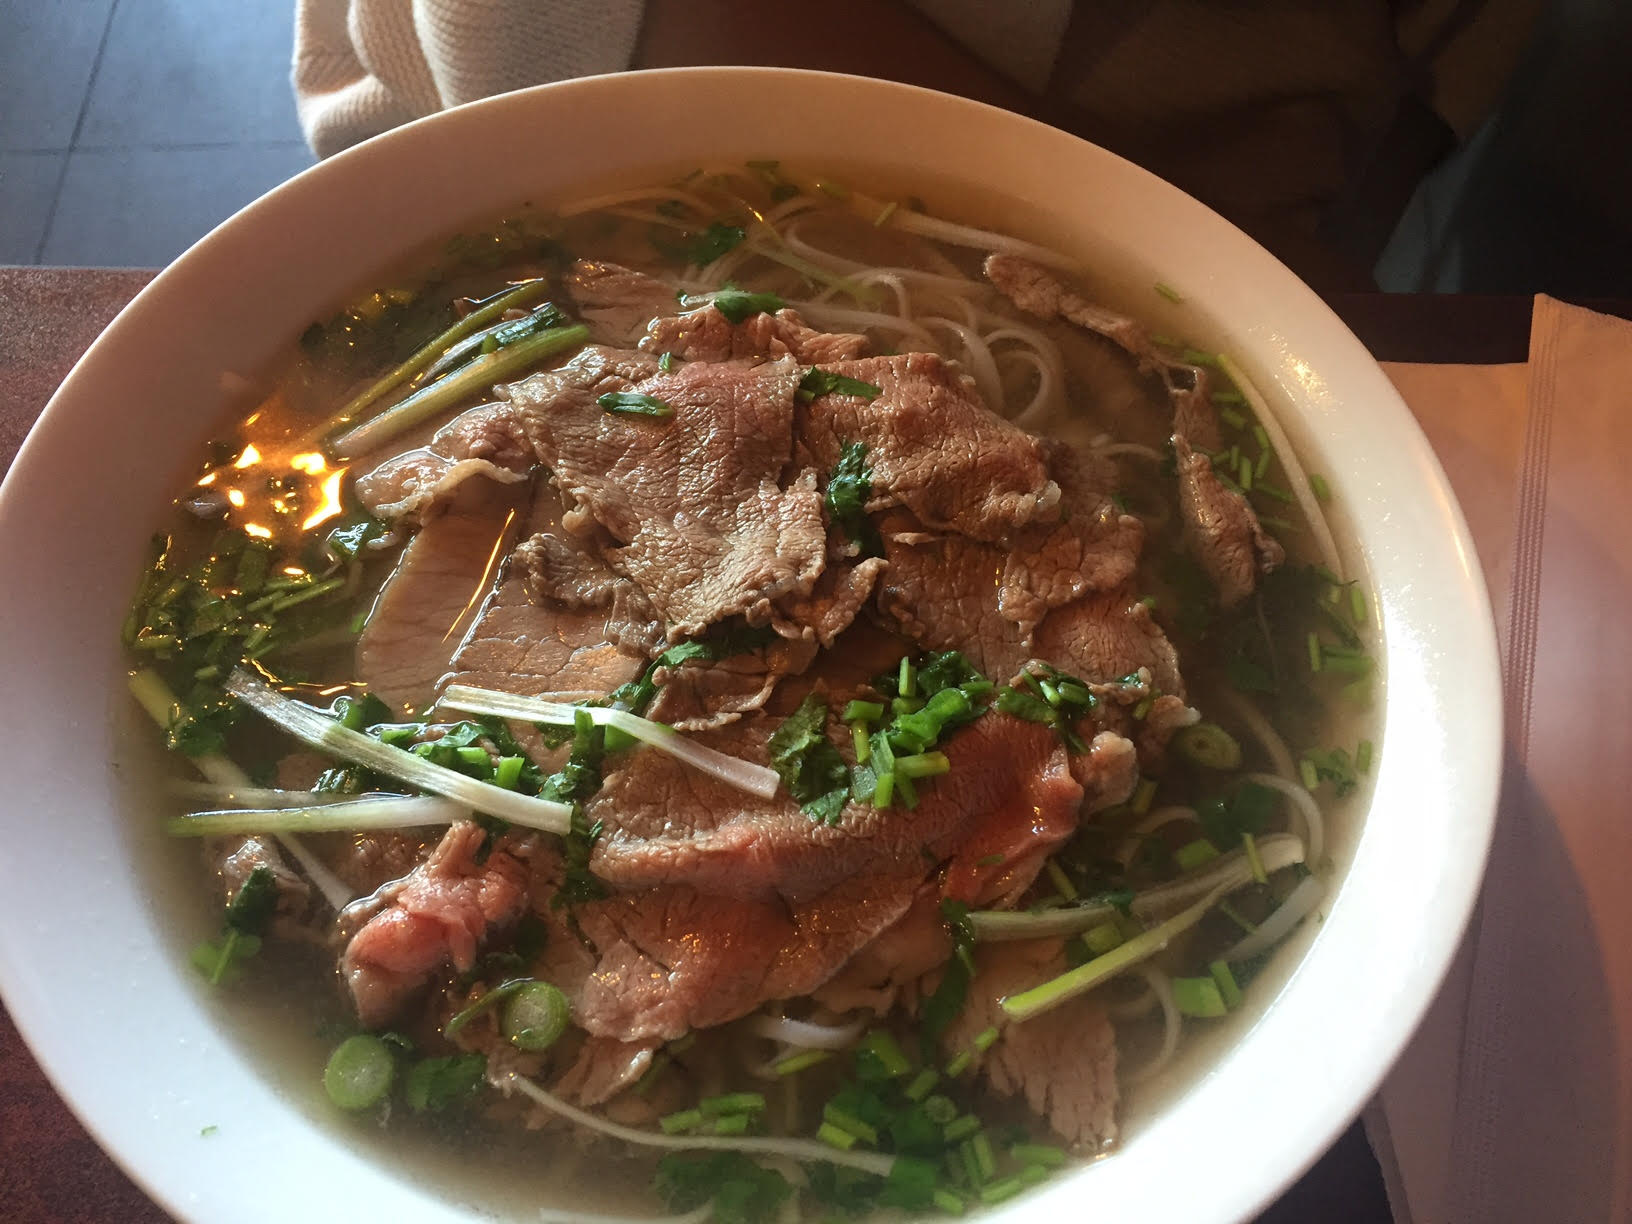 Special beef noodle pho: Macaroni has been here a few times already, and this is her go-to pho each time. The broth is the same, but the ‘special’ part just means there is an assorted selection of meat. You can see the generous portion of meat that they serve, and how clear the broth is! We both really enjoyed our pho.
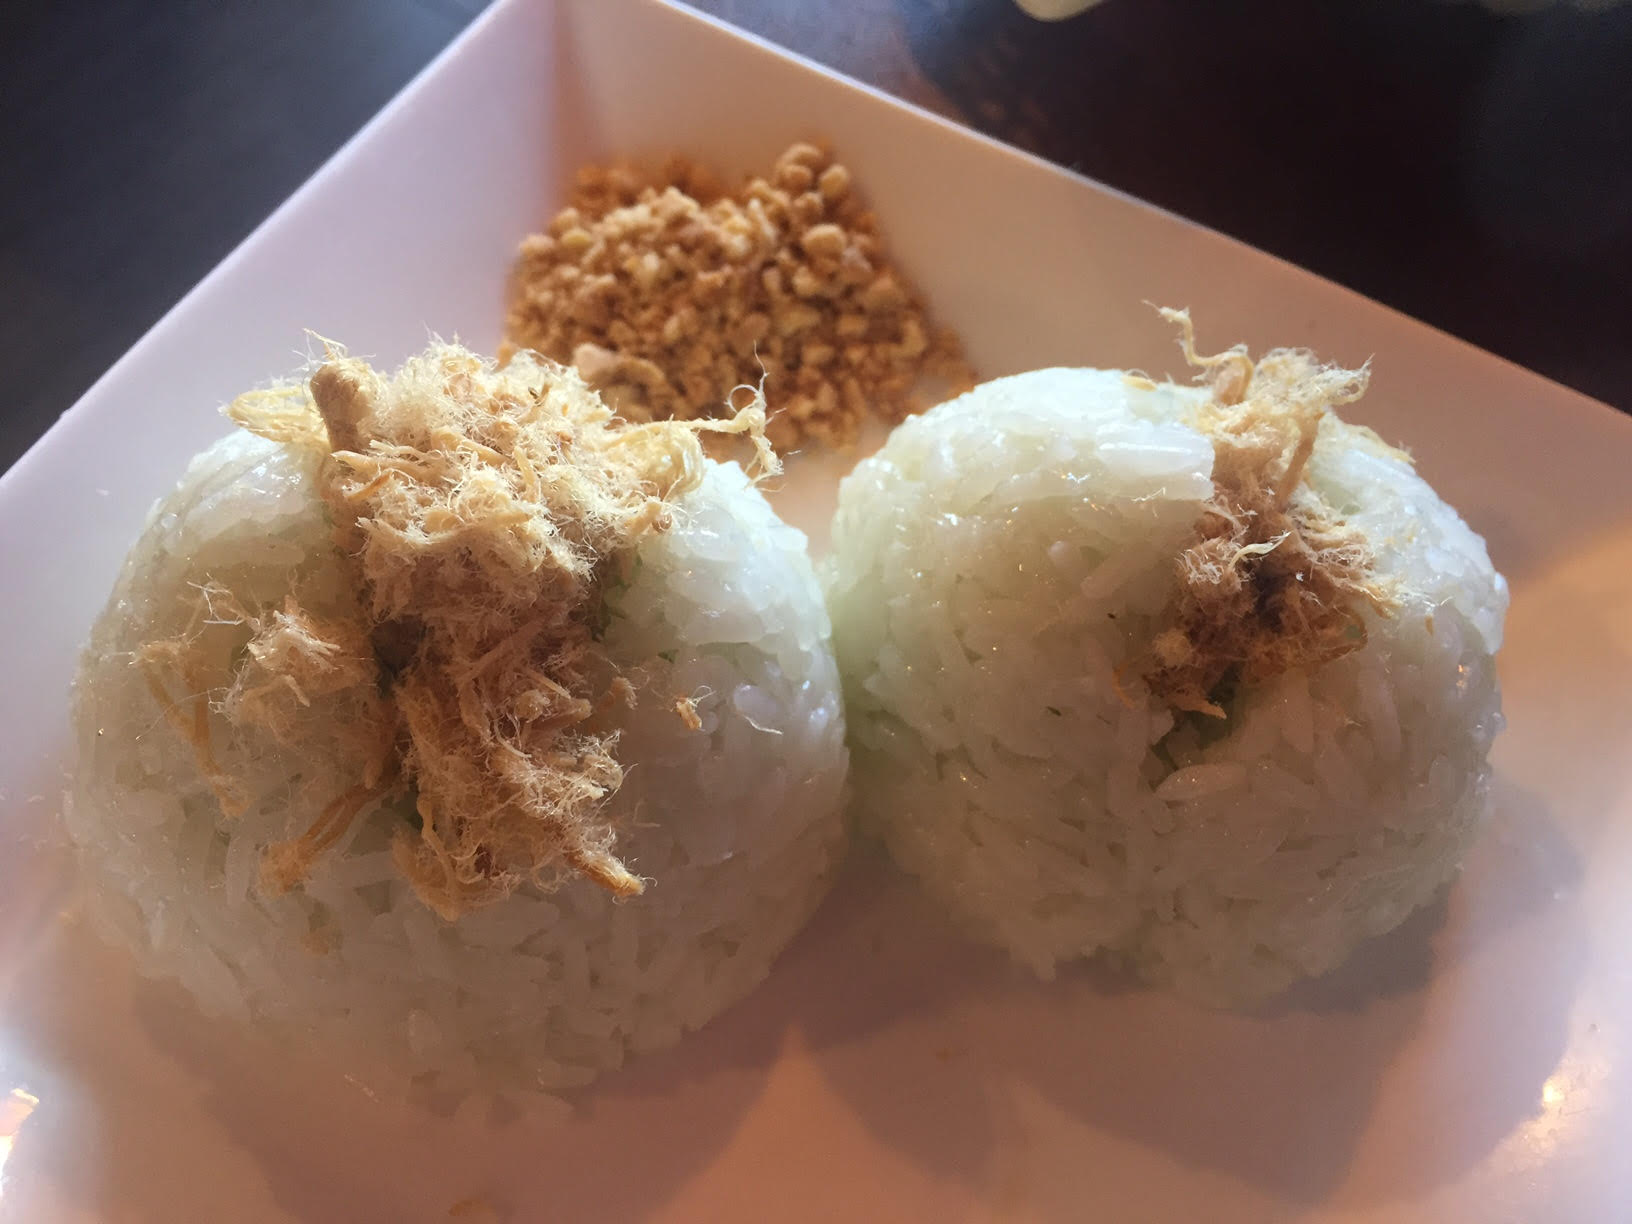 Sticky rice & mung bean dumpling: Most of the reason why I really wanted to try Mr. Red Cafe is because my friend, and fellow food blogger,
 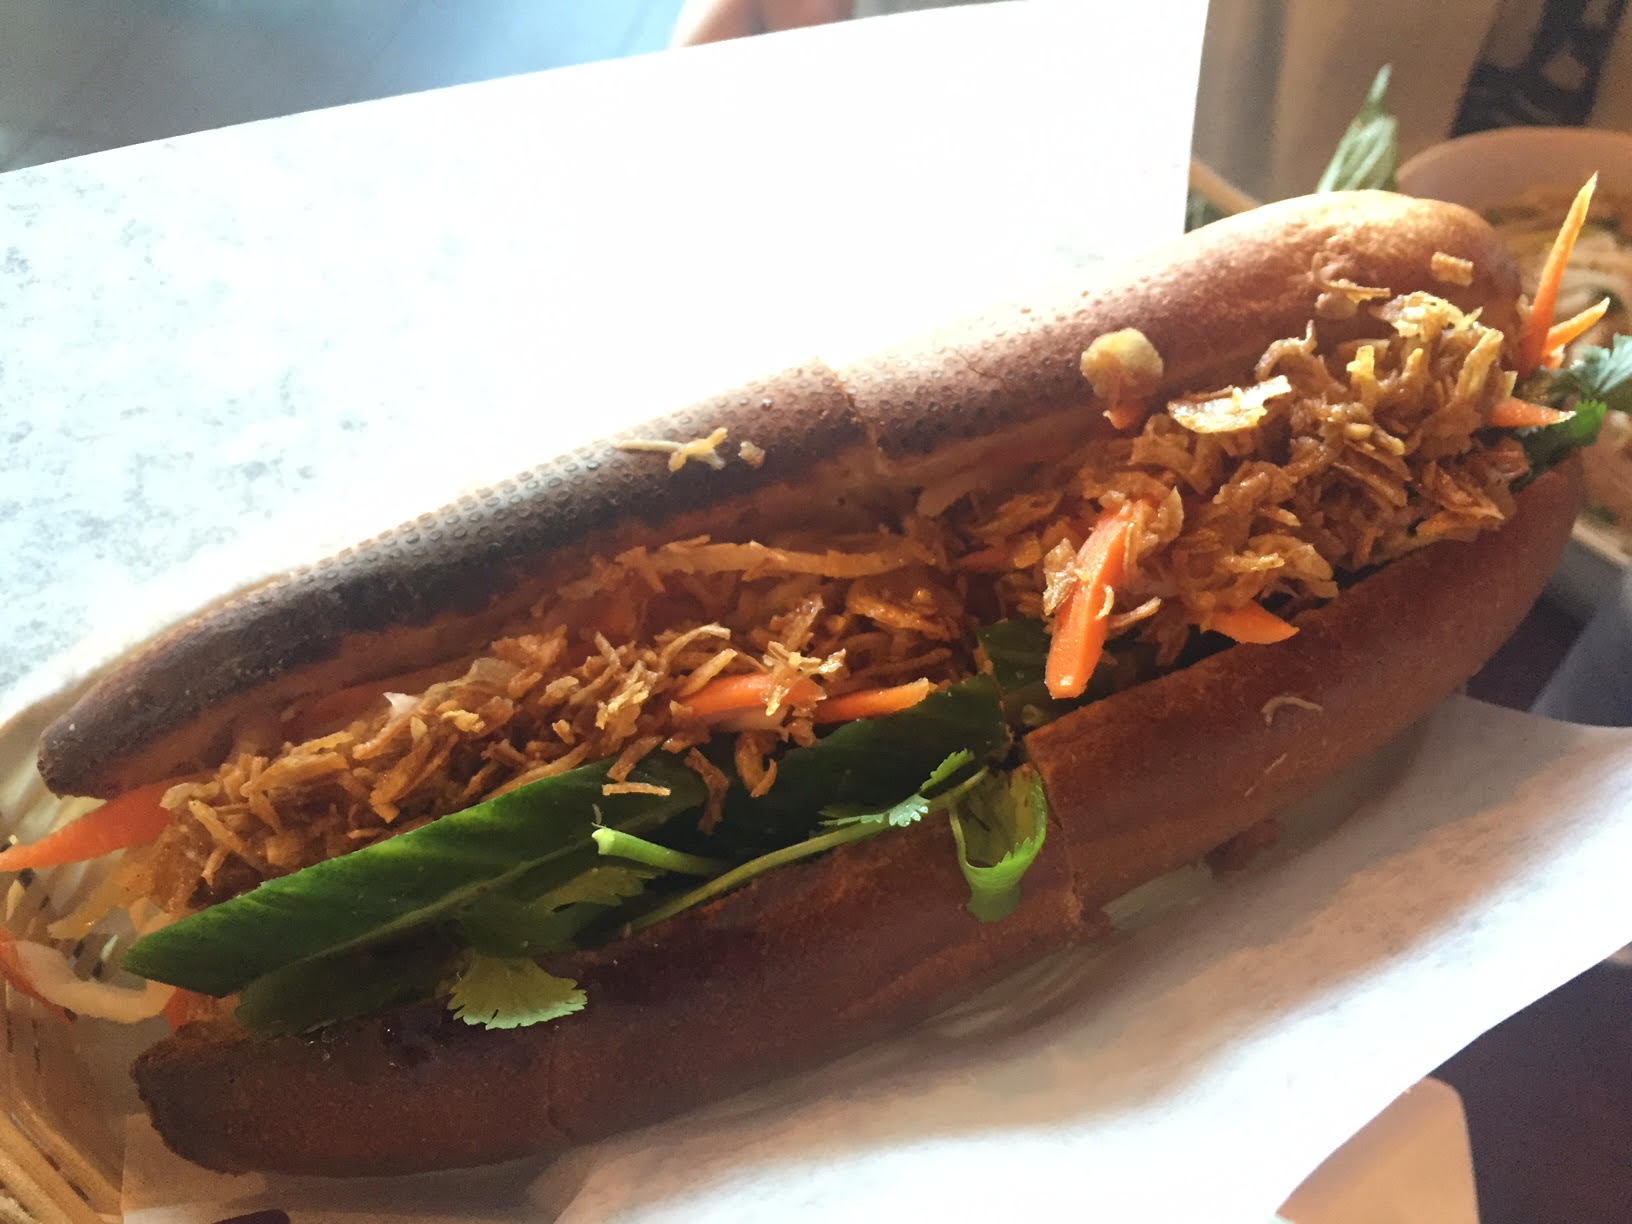 Banh mi: Macaroni already knew she would not be able to finish both the giant bowl of pho AND this sandwich, but she said it was really good so she had to order it anyways. She ended up taking half of it back home as well!